
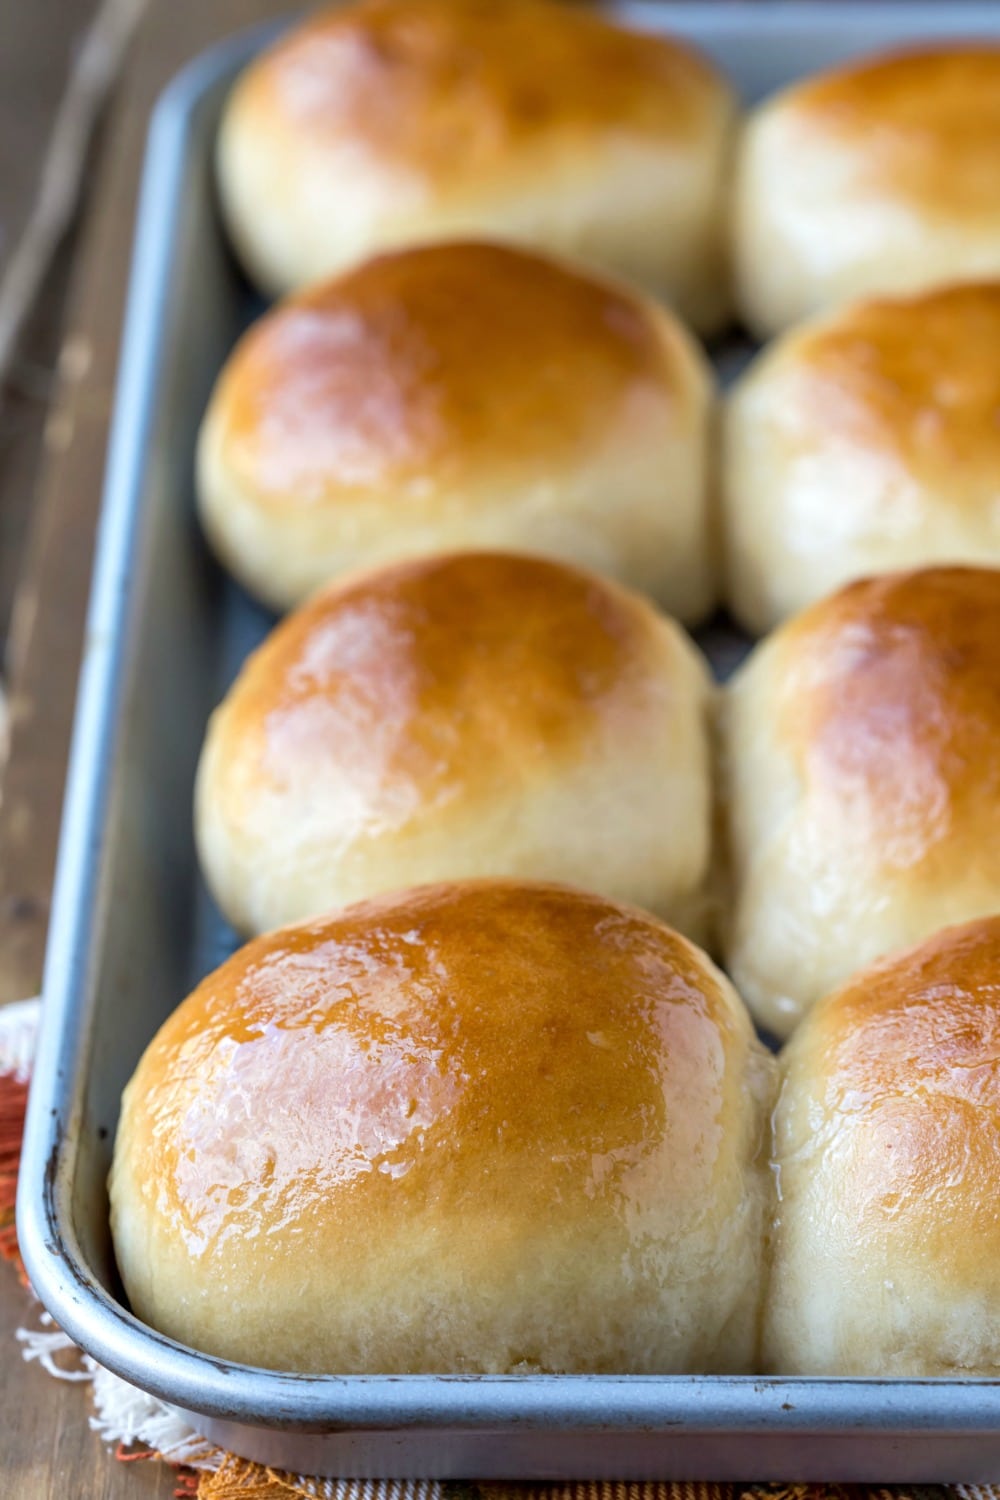
Soft 30 Minute Honey Butter Rolls are made from scratch – start to finish – in just half an hour!
My kids have gotten so used to having fresh rolls with dinner that they’re disappointed if we have a dinner without any. So, I keep working on new recipes to make quick rolls that don’t take all night to make, and I adapted this recipe from my 30 Minute Honey Wheat Roll recipe.
These 30 Minute Honey Butter Rolls are good. And fast.
Which makes them perfect for weeknight and weekends alike. Plus, they take less time to make than frozen rolls take to thaw.
So, if you’re in a hurry and want some fresh bread, give these rolls a try! And please check out the tips below to help you make perfect rolls.

Ingredient notes
These honey butter rolls are made from just a few simple ingredients. I’ve listed instant yeast in the ingredients, but there are also directions for using active dry yeast in place of the instant yeast.
- Butter: I like to use salted butter in these rolls. If using unsalted butter, increase the salt in the rolls to 1 teaspoon.
- Milk: You can use anything from skim to whole milk. Using whole milk will give you a richer, softer roll.
- Milk temperature: It’s important that the milk/butter mixture isn’t too hot. If you don’t have a thermometer, then the mixture should feel like warm bath water. If it’s too hot for you, it’s too hot for the yeast and can kill the yeast.
- Yeast: There are 2 1/4 teaspoons of yeast in a packet. If you are using packets, you will need 3 packets to give you enough for 6 teaspoons (which is the equivalent of 2 tablespoons) of yeast.
- If you would prefer to use active dry yeast, substitute an equal amount for the instant yeast. After step 5, let the mixture sit for 5-10 minutes, or until foamy. Then, continue with the recipe as written. If the yeast doesn’t foam, start over. Otherwise, your rolls won’t rise.
- Flour: Be sure to only use as much flour as is necessary to give you a sticky dough. Using too much flour will give you heavy, dry, or doughy rolls.
How to make honey butter rolls
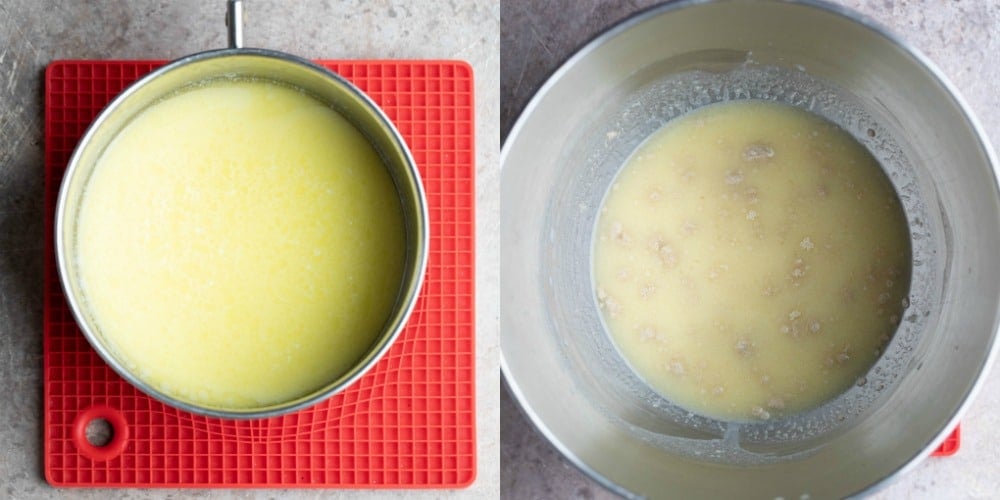
Melt butter in a saucepan. When the butter is mostly melted, stir in the milk. Heat to 100-110F.
When milk/butter mixture is at temperature, add to yeast and honey.
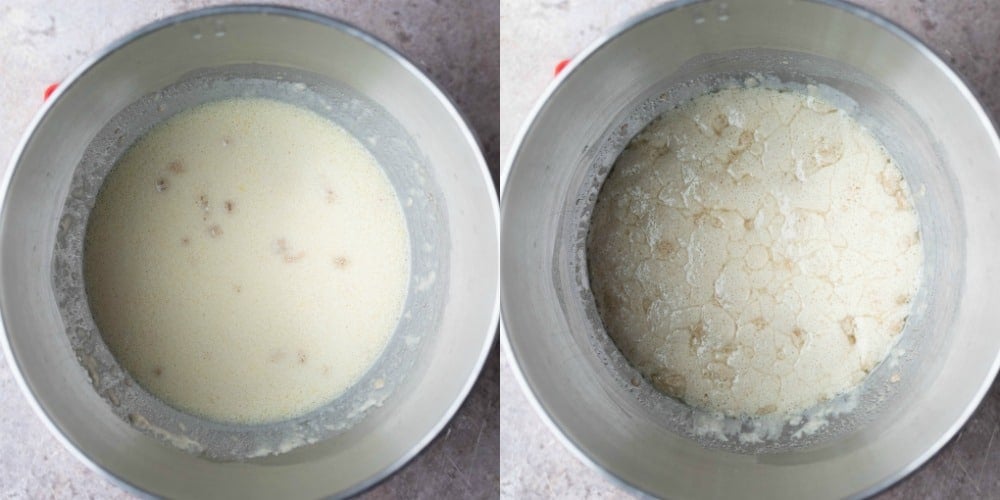
Stir to combine. If using active dry yeast, let the mixture sit for 5-10 minutes, or until foamy (picture on the right).
Stir in egg and salt.
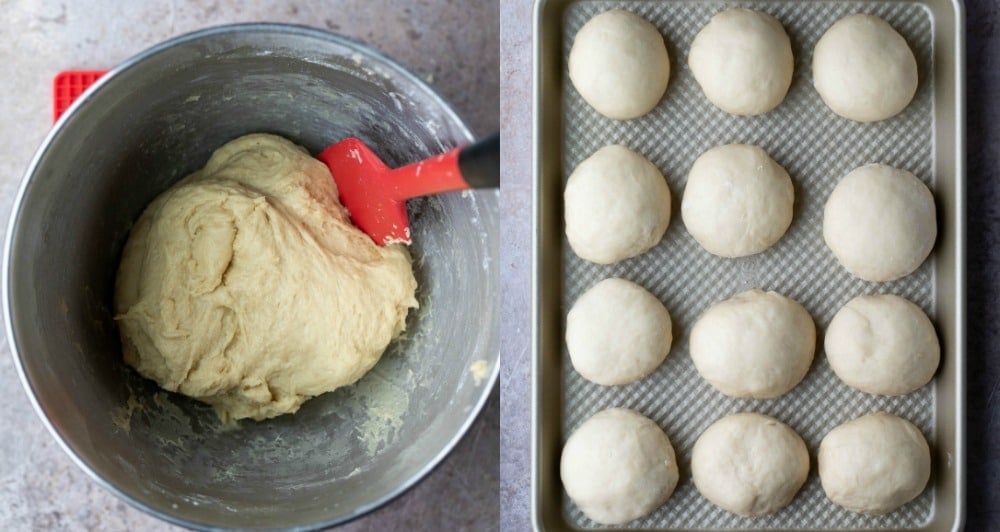
Add 2 cups of flour and continue adding flour a little at a time until it forms a sticky dough. You may not need to add all of the flour, and that’s ok.
Shape the dough into 12 rolls.
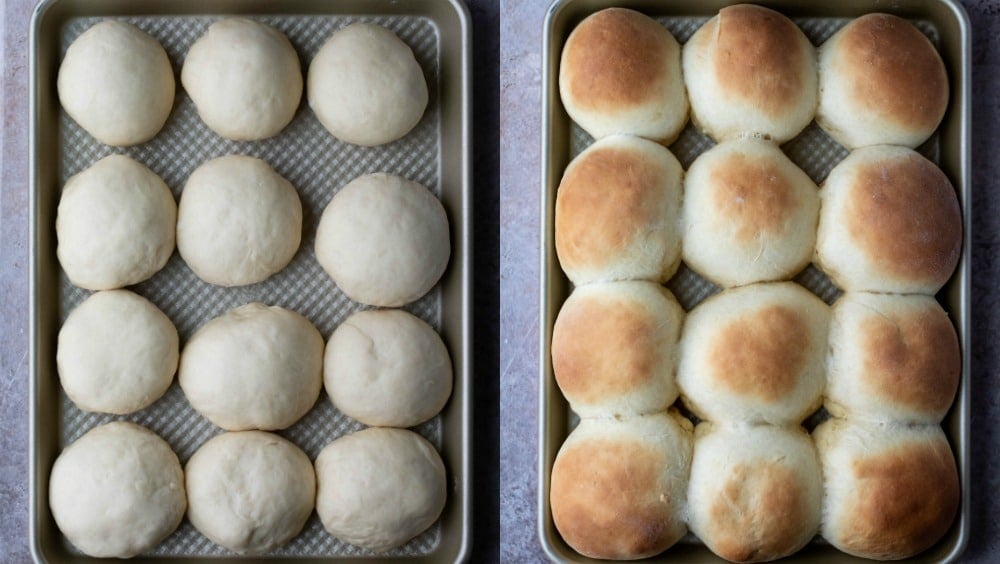
Cover and let the dough rise for 10 minutes in a warm spot. Uncover and bake until golden brown.
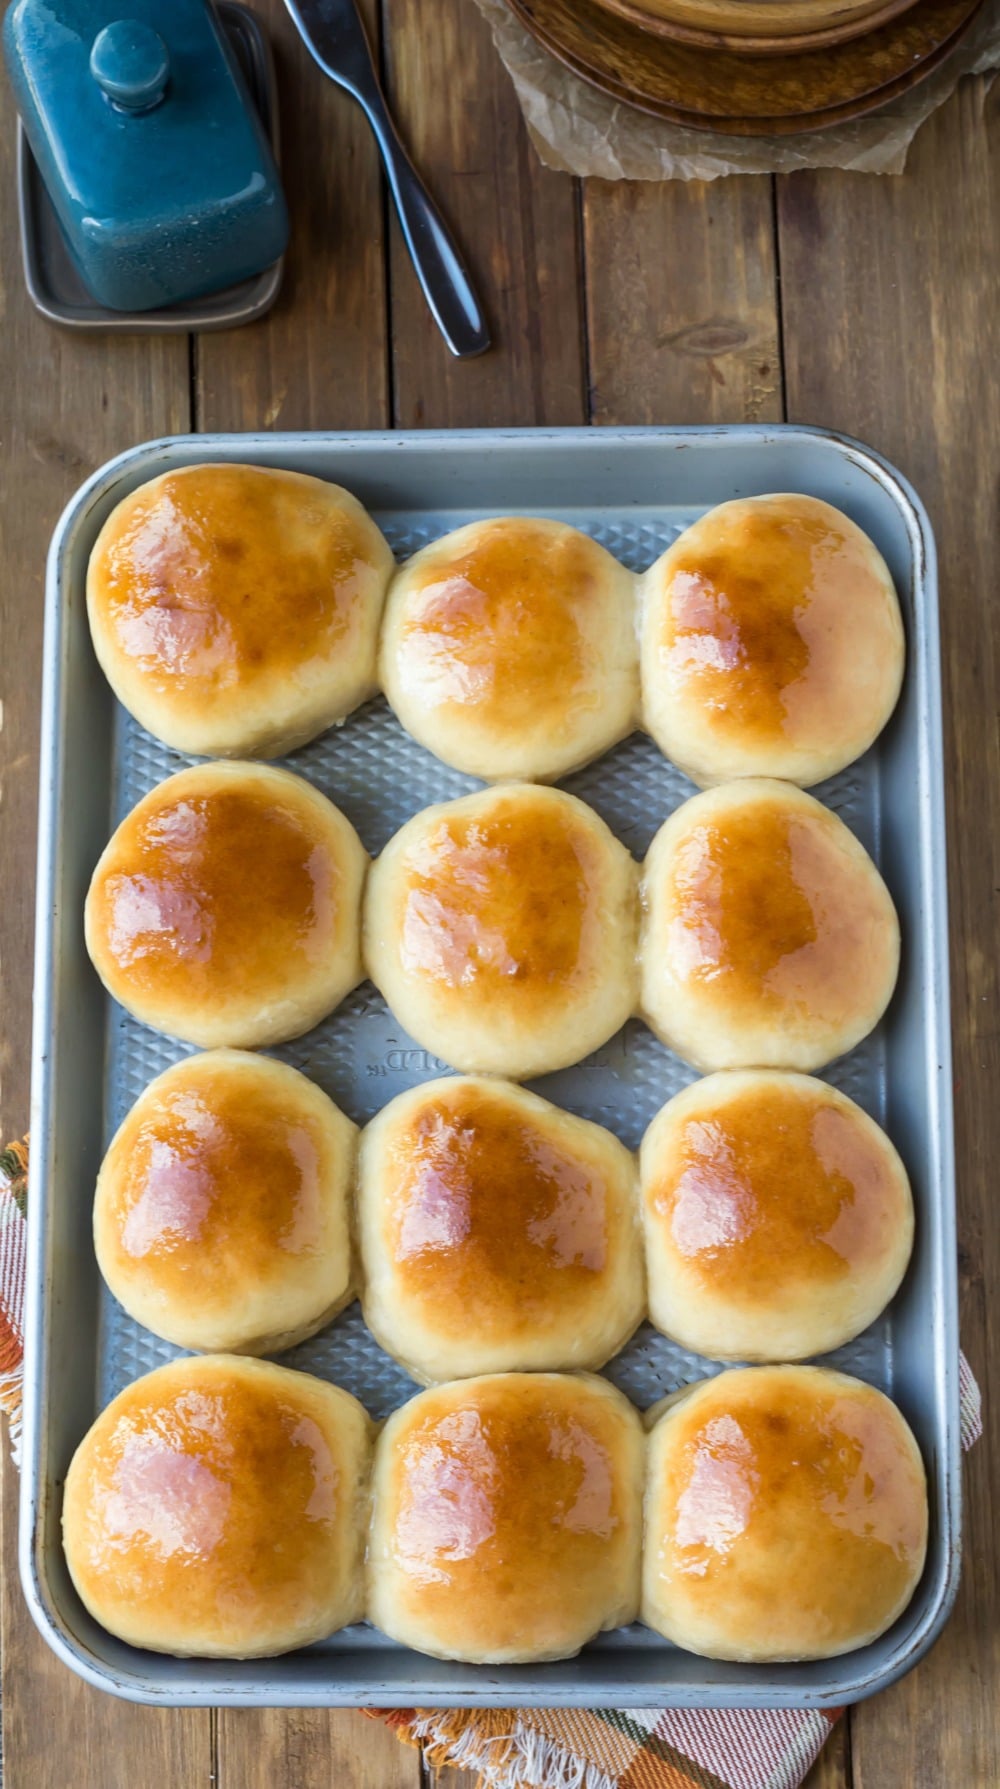
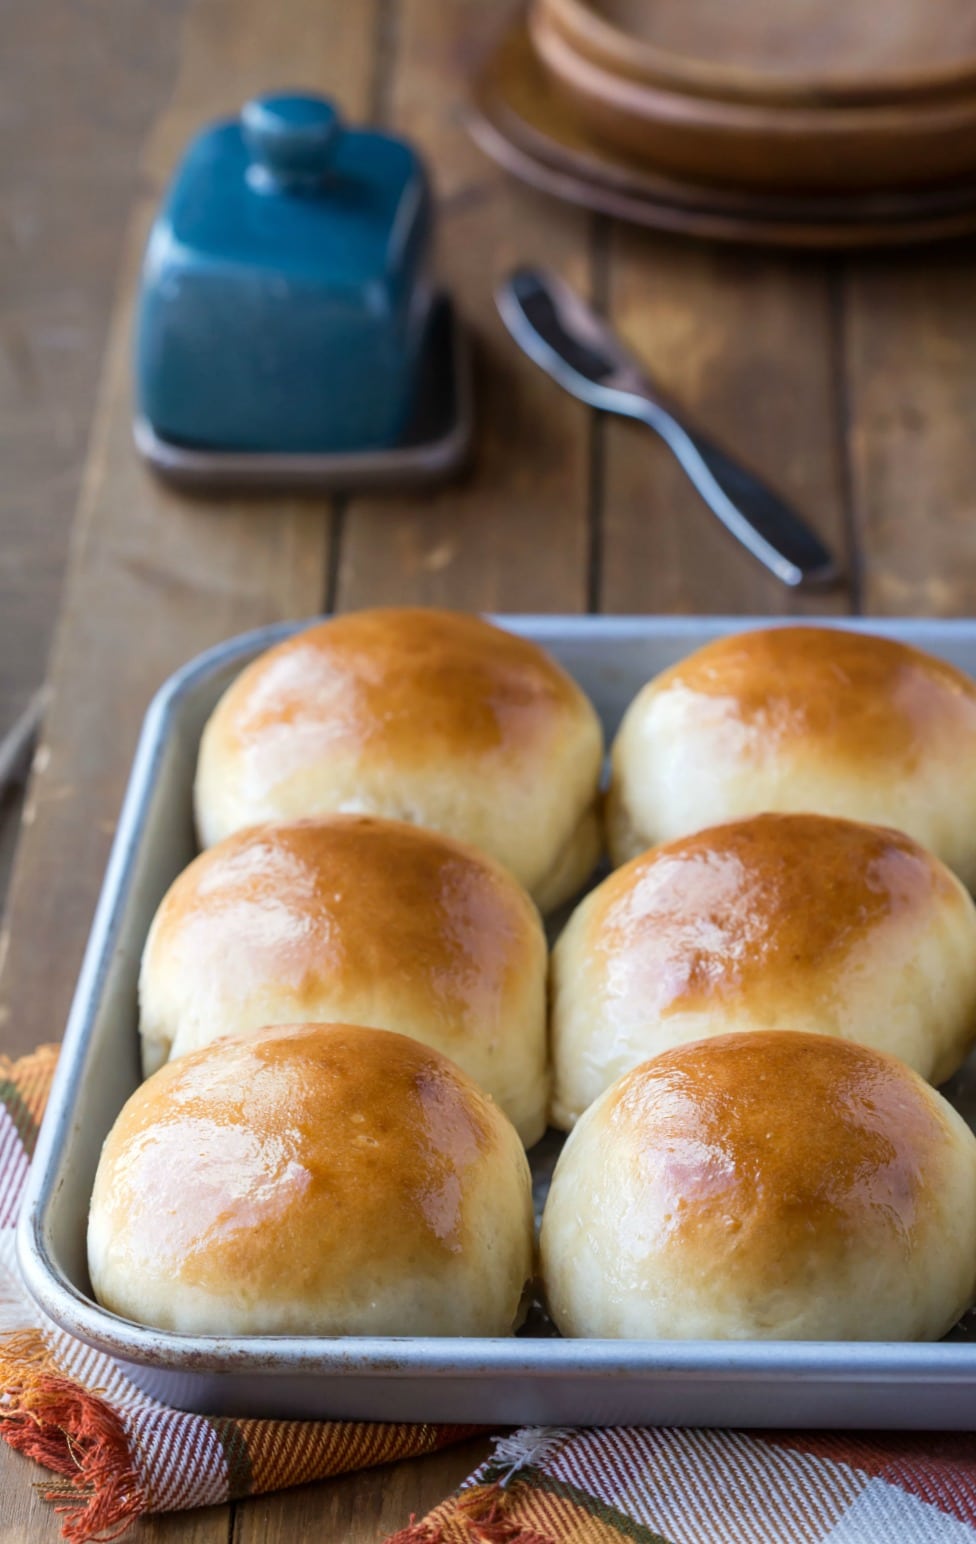
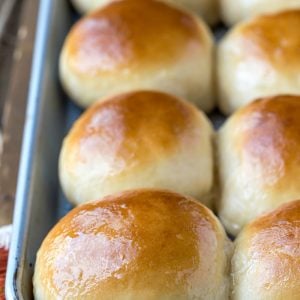
Brush the baked rolls with melted butter.
Tips
- Rising: Since the rising time is so short, it really helps the rolls to rise if they are in a warm spot.
- How to make the perfect spot for your rolls to rise: If your kitchen isn’t warm, simply preheat your cold oven to 350F for exactly 60 seconds. Turn the oven off, and you now have a great spot for your rolls to rise. You can also place the rolls near your oven if you have it on. If you don’t have a warm spot, you may find that your rolls don’t rise within the 10 minutes, and you may need to give them additional time to rise.
- Brushing the rolls: If you want a stronger honey flavor to the rolls, add a tablespoon of additional honey to the butter and brush the rolls with honey butter after baking.
Storage
The rolls are best eaten when fresh. However, the rolls can be stored in an airtight container for up to 3 days.
If you’ve tried this 30 minute honey butter roll recipe, don’t forget to rate the recipe and leave me a comment below. I love to hear from people who’ve made my recipes!
You can SUBSCRIBE to receive my latest recipe newsletters or FOLLOW ME on FACEBOOK, INSTAGRAM and PINTEREST for even more delicious food.

30 Minute Honey Butter Rolls
Equipment
Ingredients
- ⅓ cup butter
- 1 cup milk
- 2 tablespoons instant yeast
- ⅓ cup honey
- ½ teaspoon salt
- 1 large egg
- 3 ½ – 4 ½ cups all-purpose flour
- 2 tablespoons butter melted
Instructions
- Preheat oven to 400 F. Lightly grease a quarter sheet pan or a 9×13-inch rimmed cookie sheet.
- In a small saucepan, melt butter.⅓ cup butter
- When butter is mostly melted, stir in milk, and heat mixture to 100-110 F.1 cup milk
- Meanwhile, add yeast and honey to the bowl of a stand mixer fitted with a paddle attachment (or a large mixing bowl if mixing by hand).2 tablespoons instant yeast, ⅓ cup honey
- When milk mixture is at temperature, add to yeast and honey; stir to combine.
- Add salt and egg, and stir until combined.½ teaspoon salt, 1 large egg
- Stir in 2 cups all-purpose flour.
- Add remaining flour 1/4 cup at a time until dough clings to paddle and cleans the sides of the bowl. Dough will still be pretty sticky.
- With floured hands, shape dough into 12 rolls, and place dough on prepared baking sheet.
- Cover, and let dough rest for 10 minutes in a warm spot.
- Bake for 10-12 minutes, or until lightly golden brown.
- When rolls are done baking, brush with 2 tablespoons melted butter.2 tablespoons butter
Video
Notes
- Butter: I like to use salted butter in these rolls. If using unsalted butter, increase the salt in the rolls to 1 teaspoon.
- Milk: You can use anything from skim to whole milk. Using whole milk will give you a richer, softer roll.
- Milk temperature: It’s important that the milk/butter mixture isn’t too hot. If you don’t have a thermometer, then the mixture should feel like warm bath water. If it’s too hot for you, it’s too hot for the yeast and can kill the yeast.
- Yeast: There are 2 1/4 teaspoons of yeast in a packet. If you are using packets, you will need 3 packets to give you enough for 6 teaspoons (which is the equivalent of 2 tablespoons) of yeast.
If you would prefer to use active dry yeast, substitute an equal amount for the instant yeast. After step 5, let the mixture sit for 5-10 minutes, or until foamy. Then, continue with the recipe as written. If the yeast doesn’t foam, start over. Otherwise, your rolls won’t rise. - Flour: Be sure to only use as much flour as is necessary to give you a sticky dough. Using too much flour will give you heavy, dry, or doughy rolls.
- Rising: Since the rising time is so short, it really helps the rolls to rise if they are in a warm spot. If your kitchen isn’t warm, simply preheat your cold oven to 350F for exactly 60 seconds. Turn the oven off, and you now have a great spot for your rolls to rise.
- Brushing the rolls: If you want a stronger honey flavor to the rolls, add a tablespoon of additional honey to the butter and brush the rolls with honey butter after baking.
- Nutrition values are estimates.
Nutrition
Did You Make This Recipe?
Share it with me on Instagram @i_heart_eating and follow on Youtube @katedean and Pinterest @katedean for more!
More 30 minute bread recipes!
Originally published 9/15/14. Updated with new photos and tips 2/29/20.
Reader Interactions
Love this recipe?
Share your thoughts below and let’s chat! Make sure to connect with me on your favorite social platform below and show me what you made!


Comments & Reviews
Sharon says
So tasty and easy! I followed the directions, but had to add about 1/2 cup additional flour as I could not work with the dough because it was too sticky! Anyway, a terrific recipe when you have very little time but need (or hey, just want) to add a special something to a meal! Recommend highly!
Kate Dean says
Thank you!
Portia Smith says
My family fell in love with these rolls, and they are so easy!
Kate Dean says
Thank you!
Linda says
Very easy and delicious, however, they’re very dense how do I lighten them up?
Kate Dean says
Hi! Was the dough still fairly sticky when you were making it?
HM says
I’ve never used a Pinterest recipe where it didn’t list the full details of what needed to happen. I’m a mom on the go and rushed to make these, there was a rise time not mentioned in step 5, only in the notes. Maybe a blonde moment for me as I bake everyday but when you’re on autopilot you expect the recipe to list every step.
Kate says
I’m unsure as to what wasn’t listed. The rising time is in step 10 “Cover, and let dough rest for 10 minutes in a warm spot”.