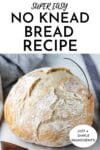
Best No-Knead Bread recipe! This easy, 4-ingredient bread recipe makes beautiful loaves of artisan bread in a Dutch oven.

This no-knead bread is amazing! I don’t want to over exaggerate how fantastic this bread is, but it’s pretty much life-changing.
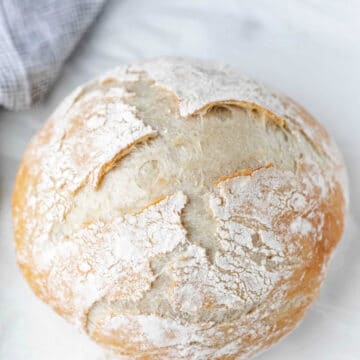
Not only does it look like expensive, artisan bread, but it also tastes fantastic. This bread couldn’t be any easier to make; I had the recipe memorized after the first time I made it.
Seriously, making the bread this way is easier than making bread in a bread machine (and that’s saying something). So if you’ve never baked homemade bread before, this is a great recipe to start with.
Why you’ll love no-knead bread
- Simple ingredients! This bread is made with just 4 pantry-staple ingredients.
- Minimal hands-on time! The bread has a long resting time, but it only requires a few minutes of hands-on time.
- Delicious bread! Best of all, this recipe makes a fantastic loaf of bread.
Ingredient notes
- All-purpose flour: Please see the note under the FAQ section about using bread flour.
- Salt: The salt helps to give the bread flavor.
- Yeast: I’ve used instant yeast and active dry yeast. Either will work.
- Water: Lukewarm water should feel just a touch cooler than bath water.
How to make no-knead bread

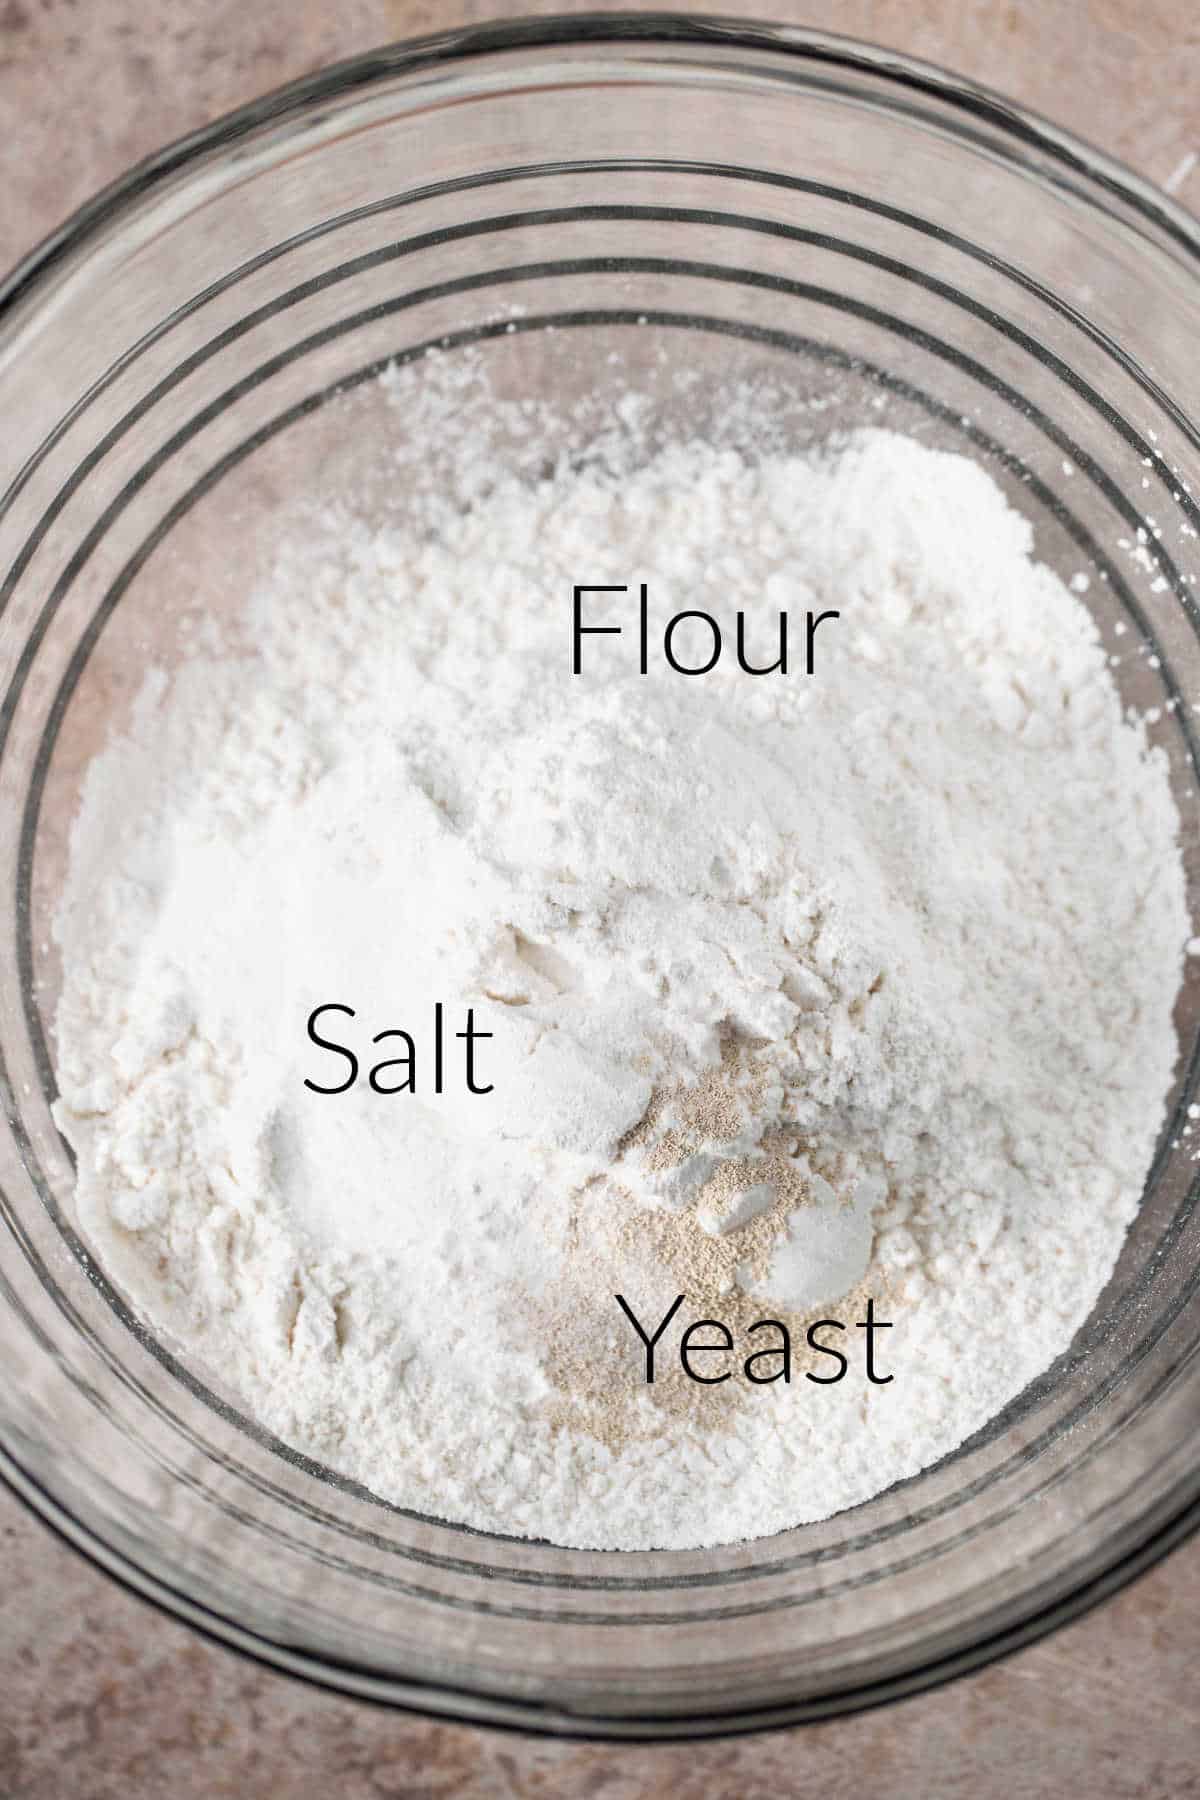
Step 1: Combine flour, salt, and yeast together in a large bowl.
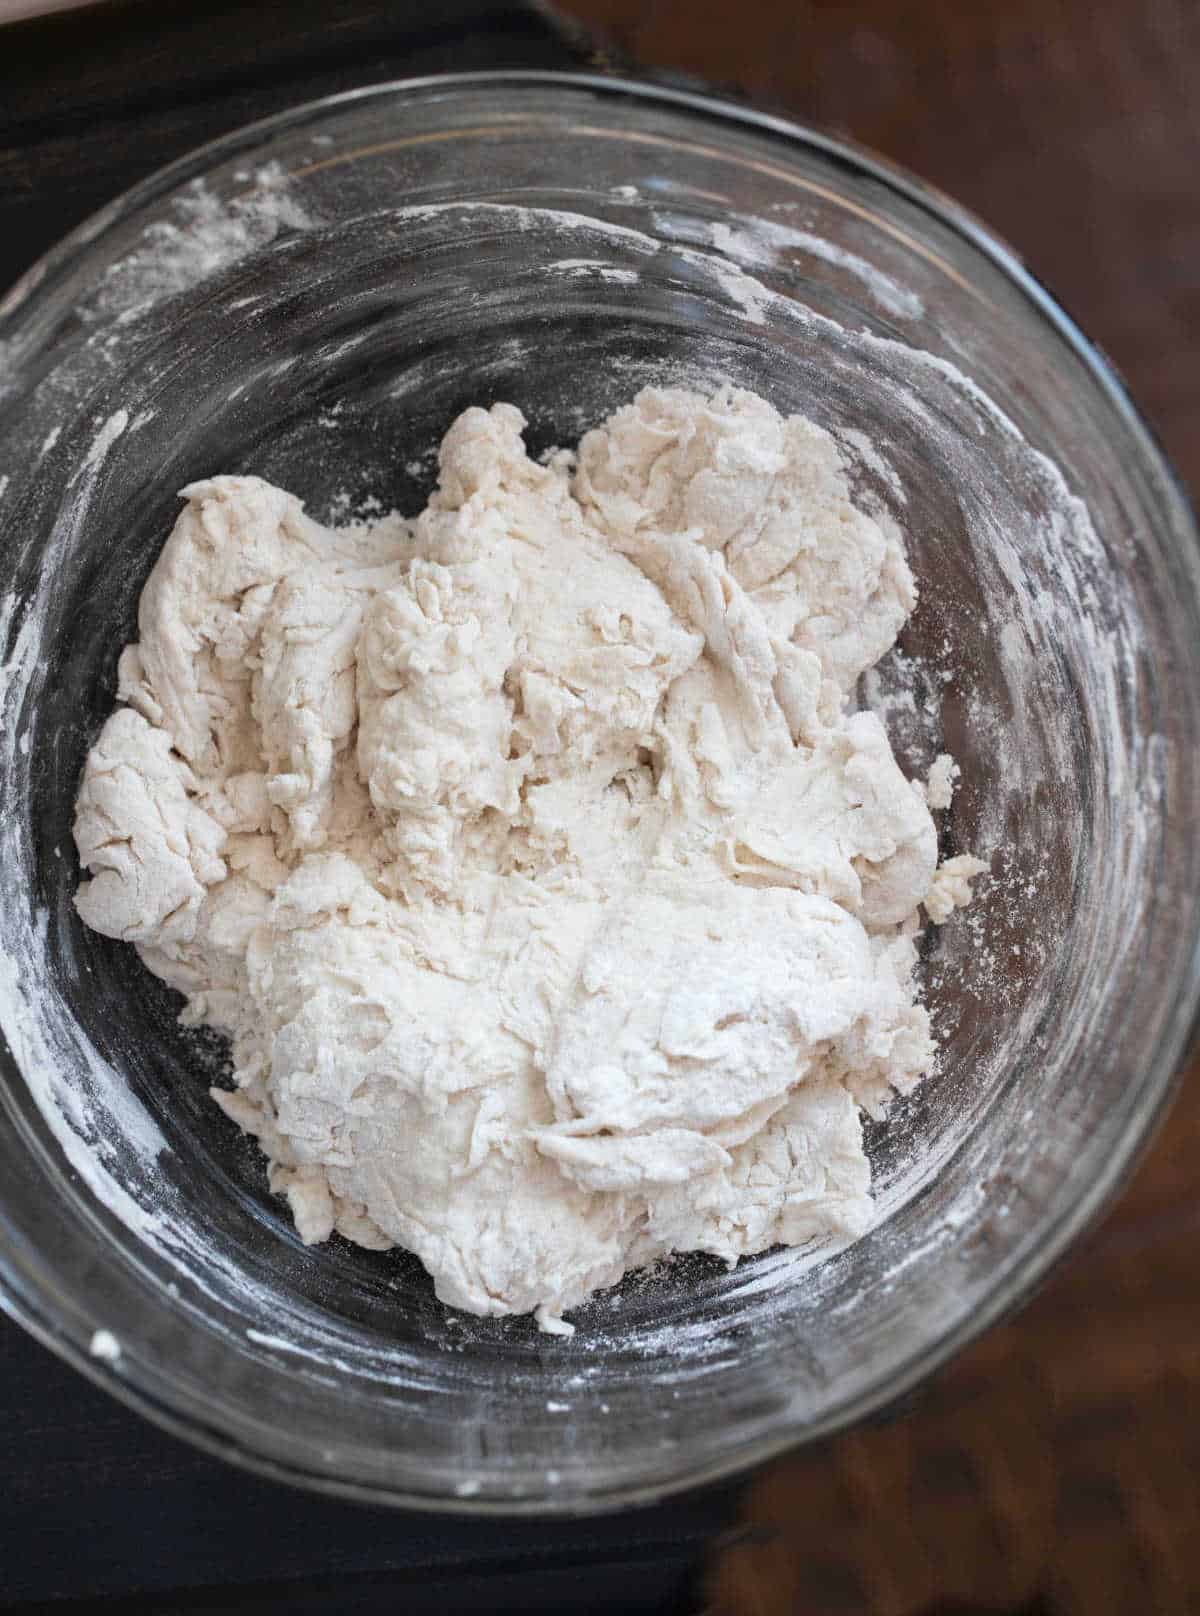
Step 2: Add the water, and stir to combine. The dough will be shaggy.
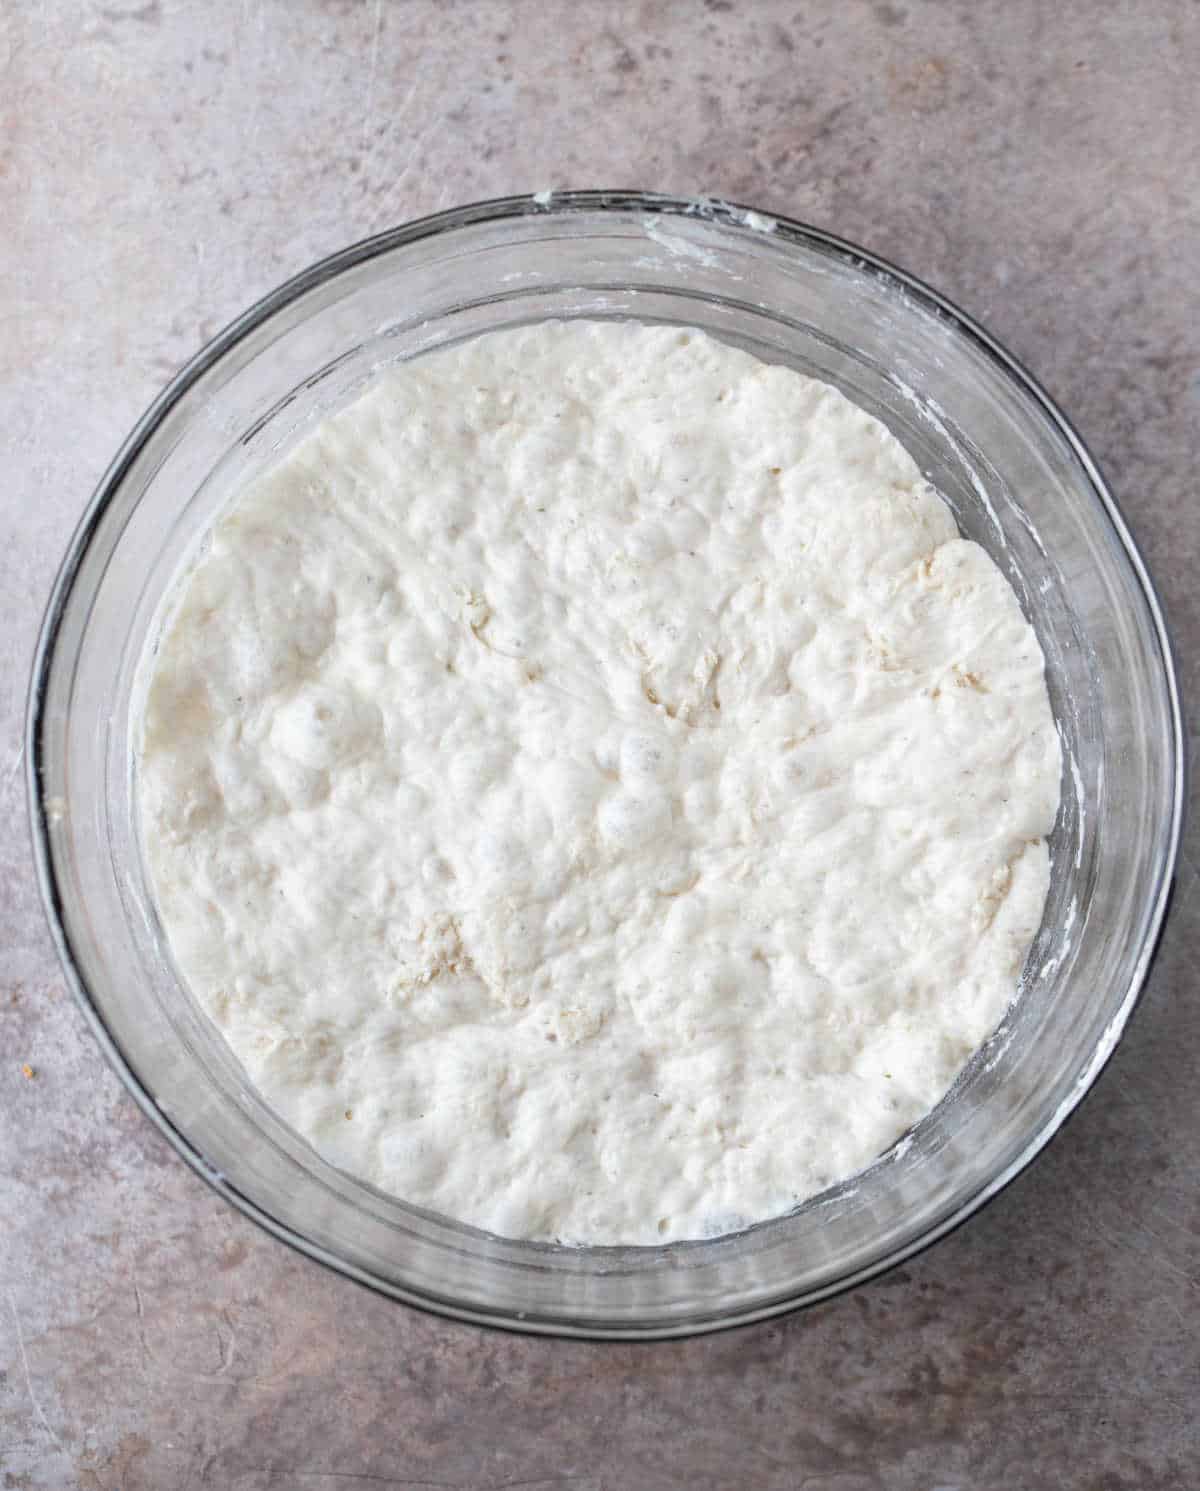
Step 3: Cover, and let it rise for about 12-18 hours.
Top tip >> Be sure to put the mixture into a container that’s large enough to hold the dough as it rises and expands.
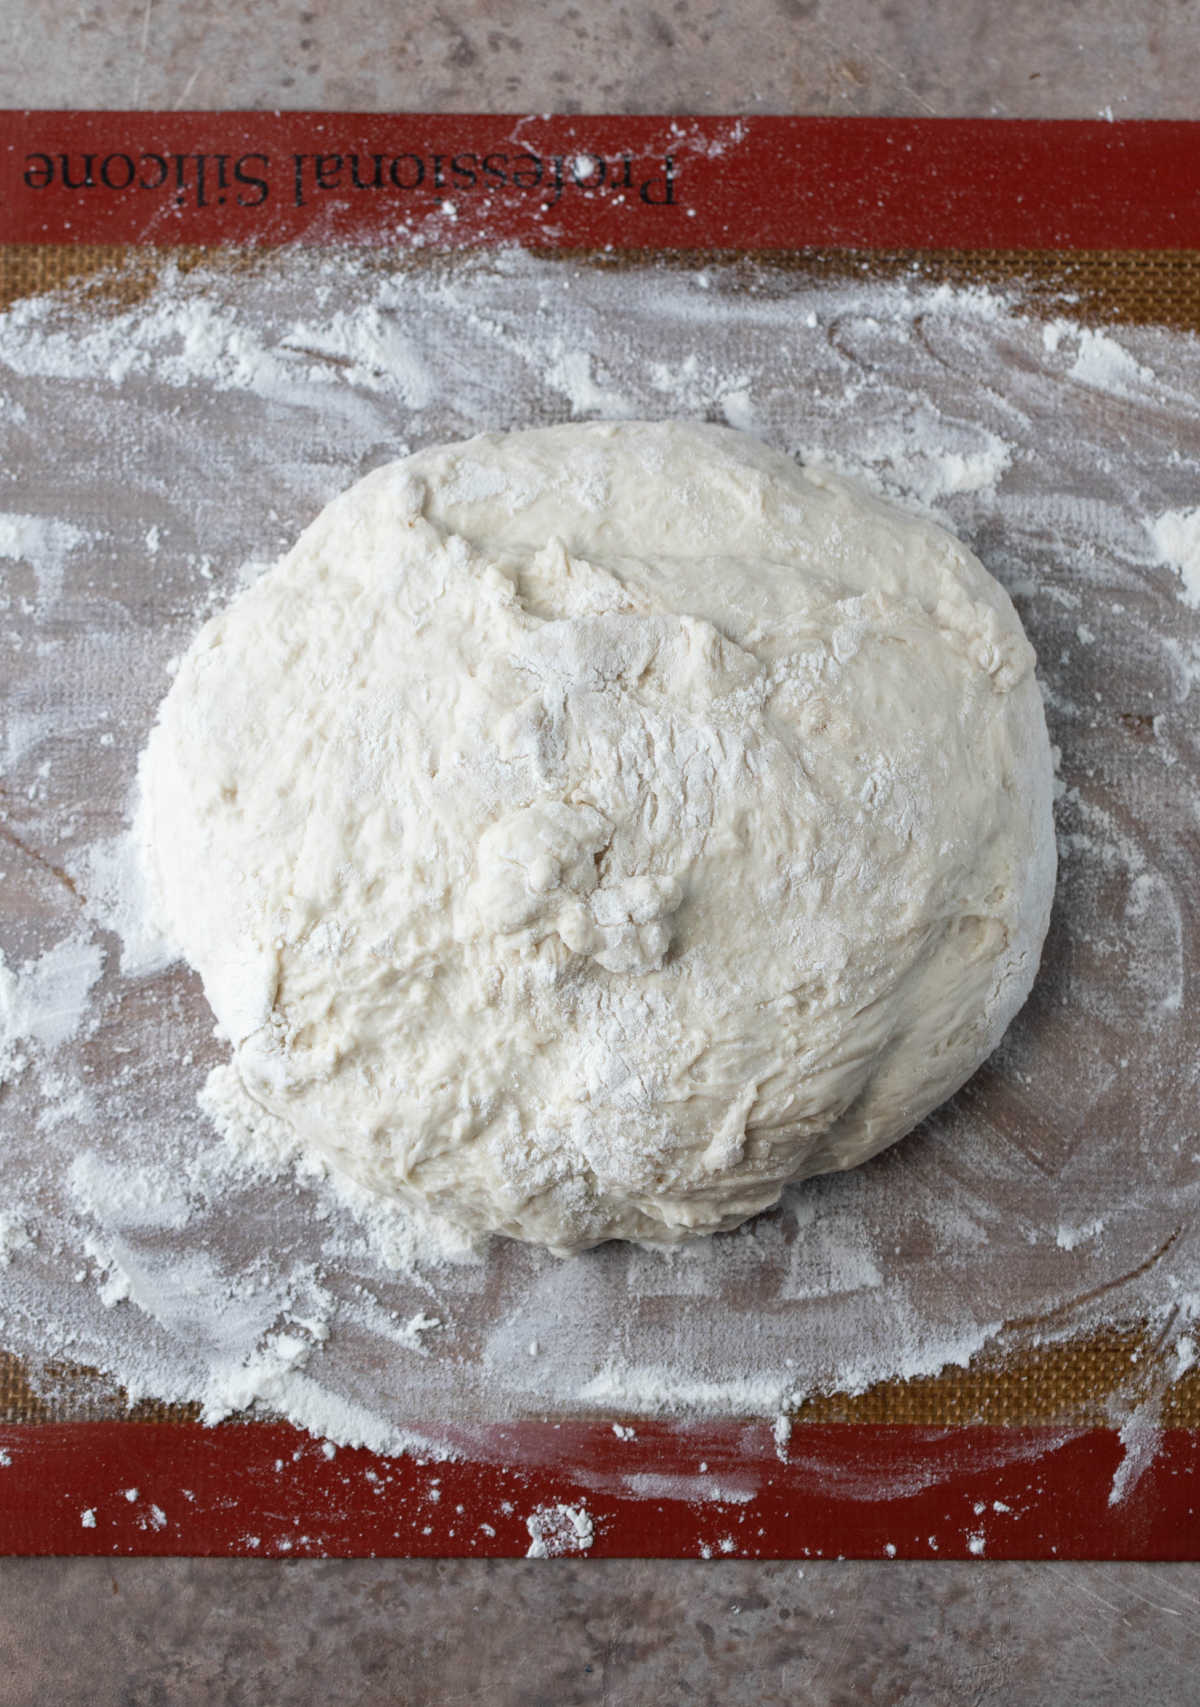
Step 4: Once the dough has risen, turn the dough out onto a floured work surface and cover with greased plastic wrap while the Dutch oven heats up in the oven.
Top tip >> I like to use a silicone baking mat because it makes it easy to turn the dough into the Dutch oven.
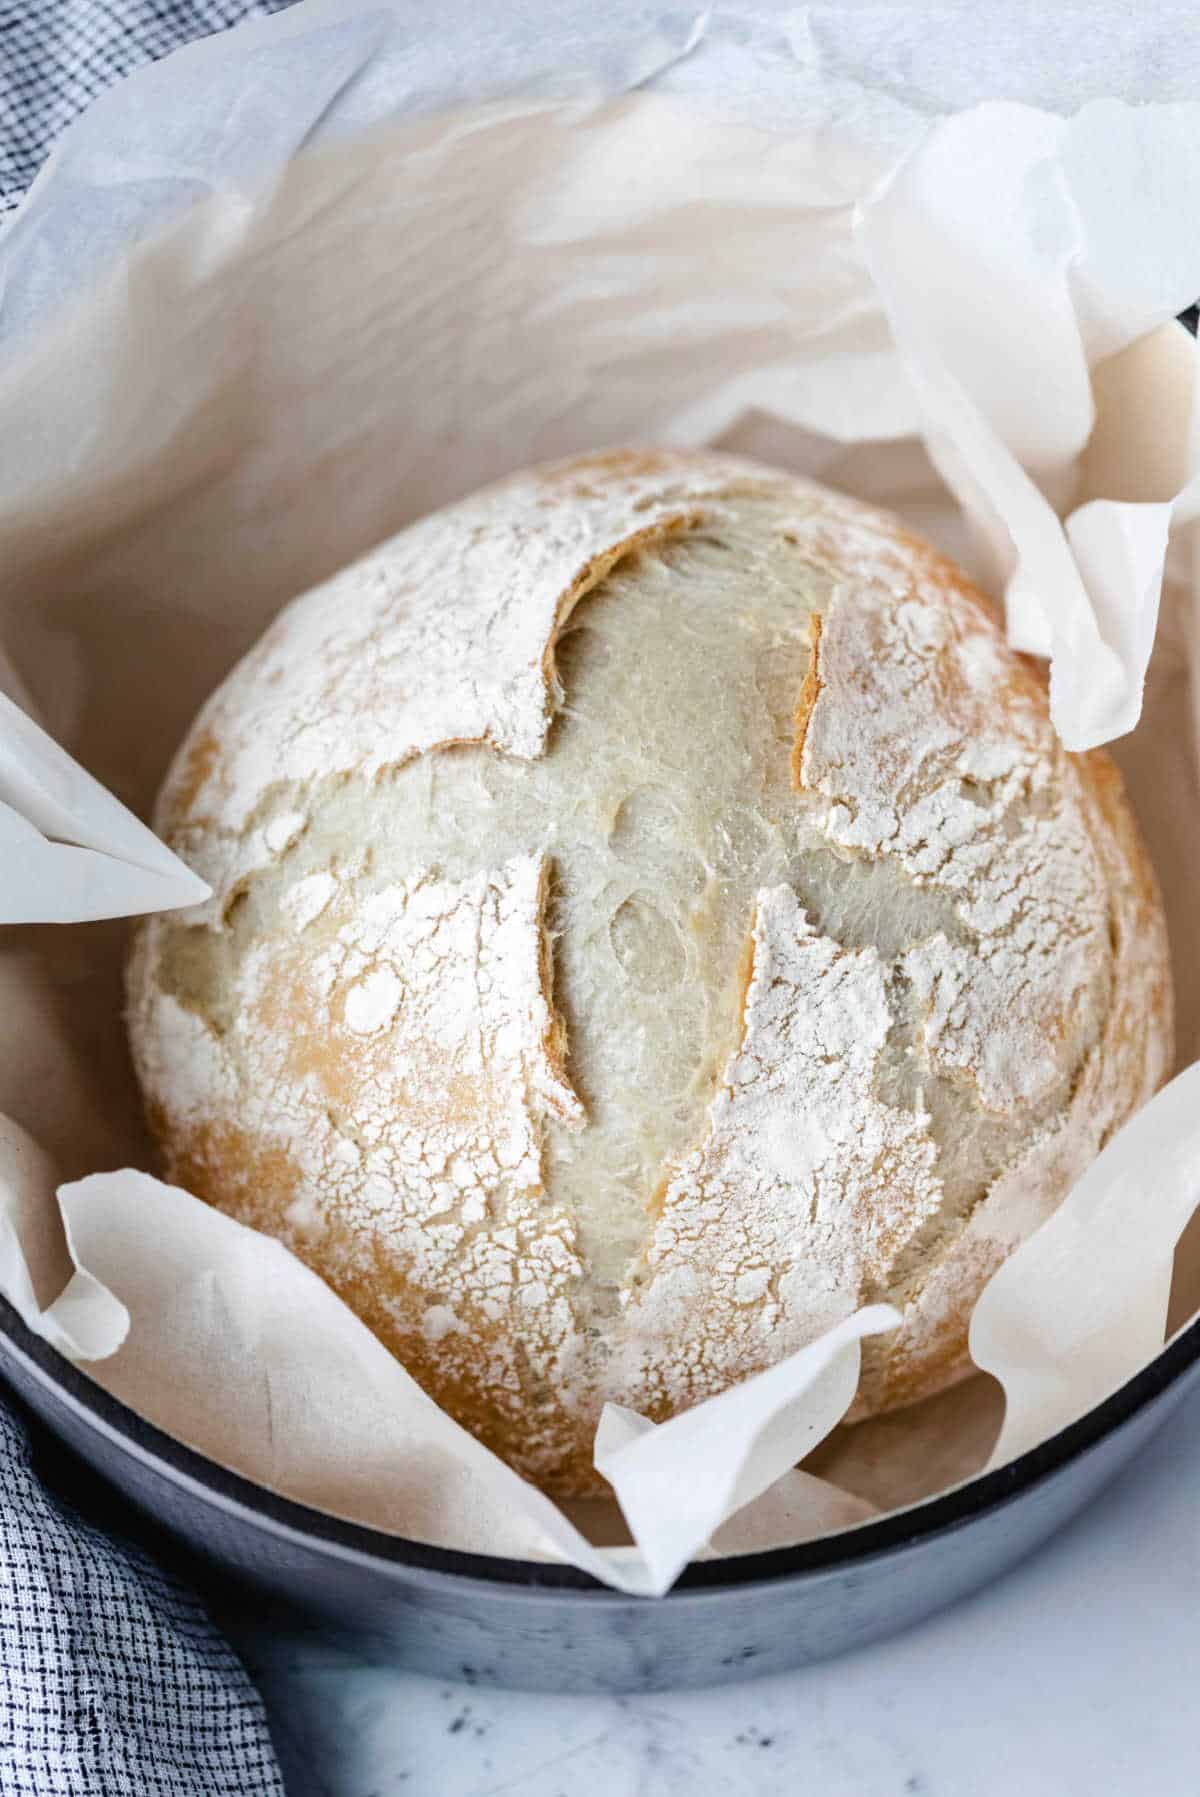
Step 5: Turn the dough into the pre-heated Dutch oven.

Step 6: Cover, and bake.
Tips
- If you have a silicone baking mat or parchment paper, either will work really well as a moveable surface for letting the dough rise.
- I’ve made this bread in both a Dutch oven and in Corningware. If you use something other than a Dutch oven, just make sure that it’s oven safe for the temperature.
- If you don’t have a lid, (carefully) cover your pot with a piece of aluminum foil.
- I included directions for making the bread softer or crustier. We like it with a chewy, slightly crusty crust, so I use the plastic bag method with our bread.
- If you like a harder, crustier crust, just skip the bag and let it cool on the rack.
Recipe FAQs
I’ve let the dough rise for up to 36 hours before baking it. The dough just gets a little tangier as it sits.
You can! The bread will have a thicker crust, and you’ll need to increase the water in the recipe to 1 and 2/3 cups of lukewarm water.
Sure! You’ll just need a larger Dutch oven to bake the bread in.
No knead bread variations
No knead bread is a great blank canvas for all sorts of add-ins! I’ve made all sorts of varieties, including No Knead Cranberry Nut Bread and no knead garlic herb bread.
More bread recipes!
If you’ve tried this no-knead bread recipe, don’t forget to rate the recipe and leave me a comment below. I love to hear from people who’ve made my recipes!
You can subscribe to receive my latest recipe newsletters or follow me on Facebook, Instagram and Pinterest for even more delicious food.

No-Knead Bread
Ingredients
- 3 cups all-purpose flour
- 1 ½ teaspoons salt
- ½ teaspoon active dry yeast
- 1 ½ cups lukewarm water1
Instructions
- In a large mixing bowl, whisk together flour, salt, and yeast.3 cups all-purpose flour, 1 ½ teaspoons salt, ½ teaspoon active dry yeast
- Add water and mix until a shaggy mixture forms.1 ½ cups lukewarm water1
- Cover bowl with greased plastic wrap and set aside for 12 – 18 hours. Making it the night before works really well.
- Heat oven to 450 F.
- When the oven has reached 450 F, place a Dutch oven and heat the pot for 30 minutes.
- Meanwhile, pour dough onto a very heavily floured, movable surface (silicone baking mat, cutting board). With floured hands, shape dough into a ball.
- Cover with greased plastic wrap and let it sit while the pot is heating.
- Remove hot pot from the oven, drop in the dough, and cover.2
- Return to oven for 30 minutes.
- For a crispier loaf, uncover, and continue baking for 5-10 additional minutes.
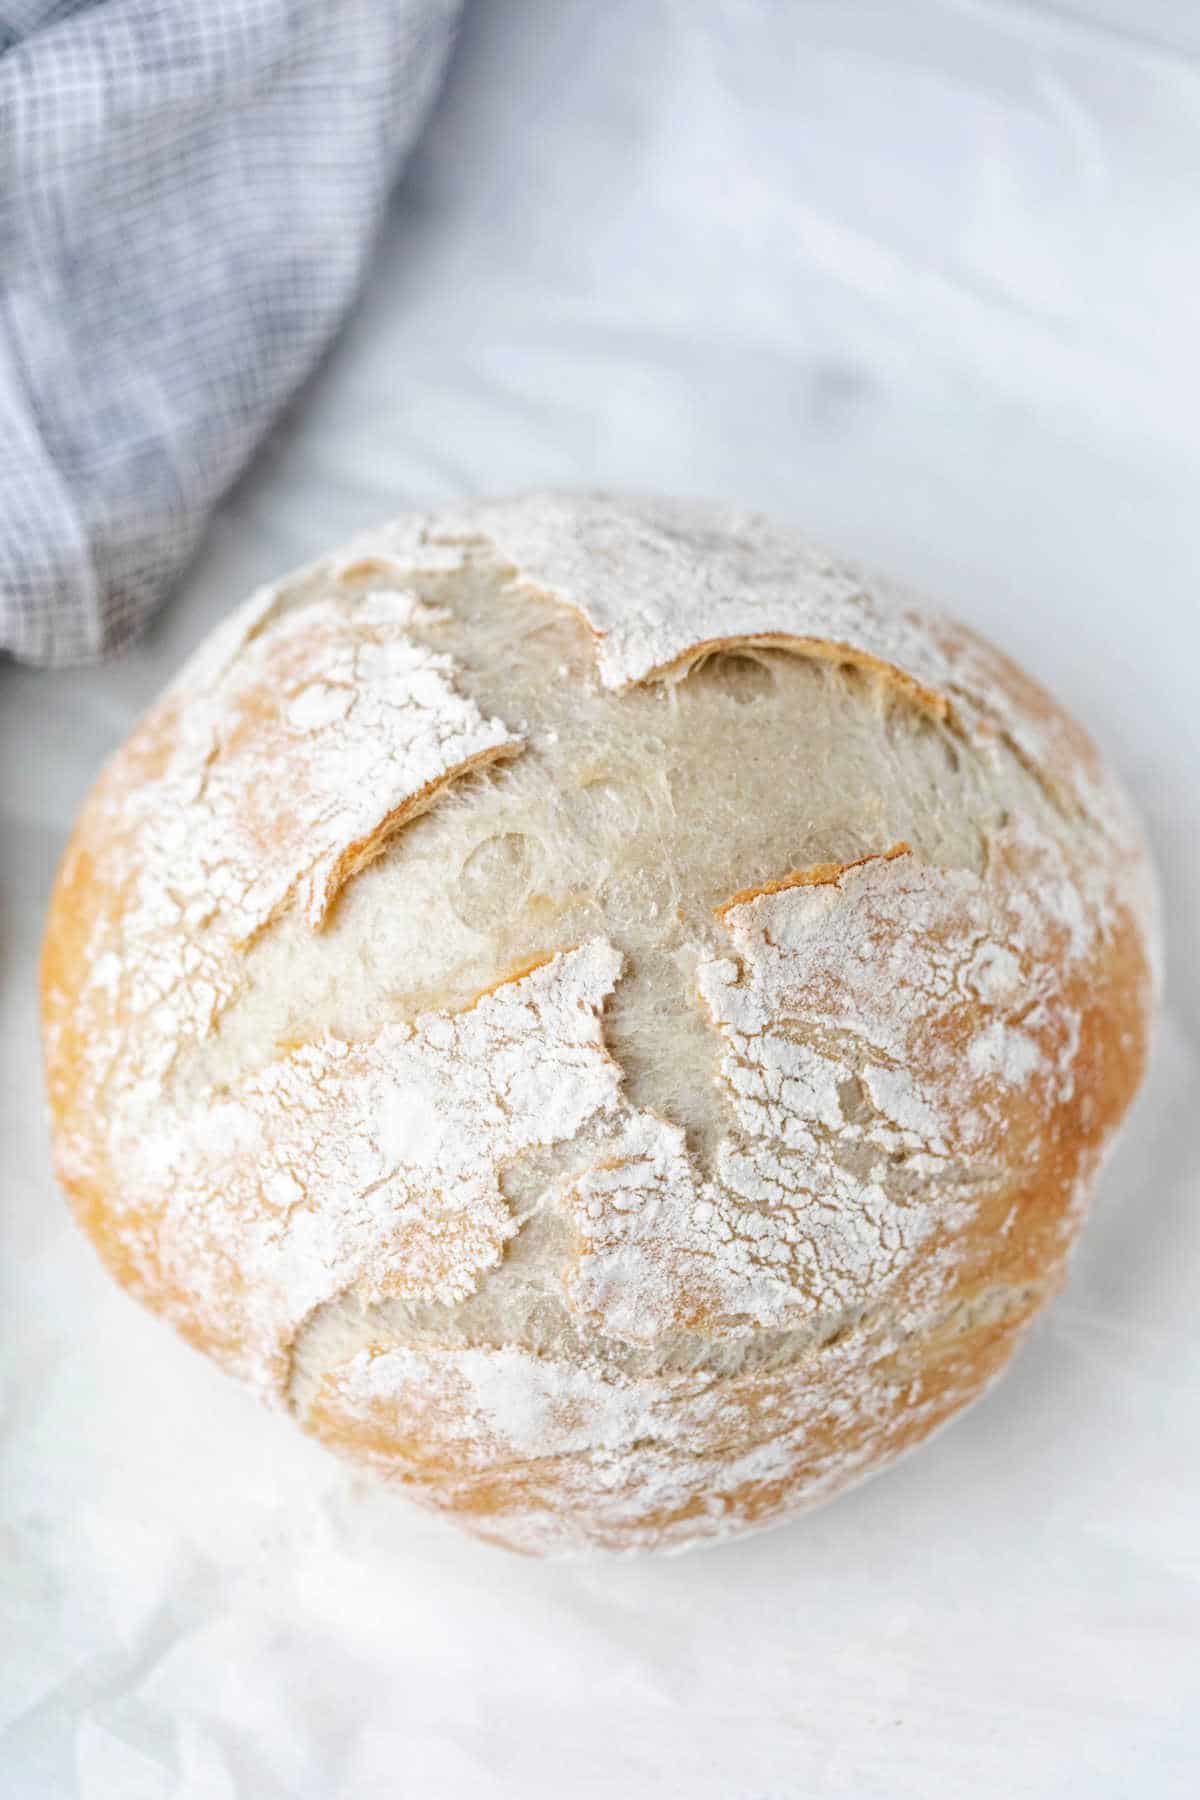
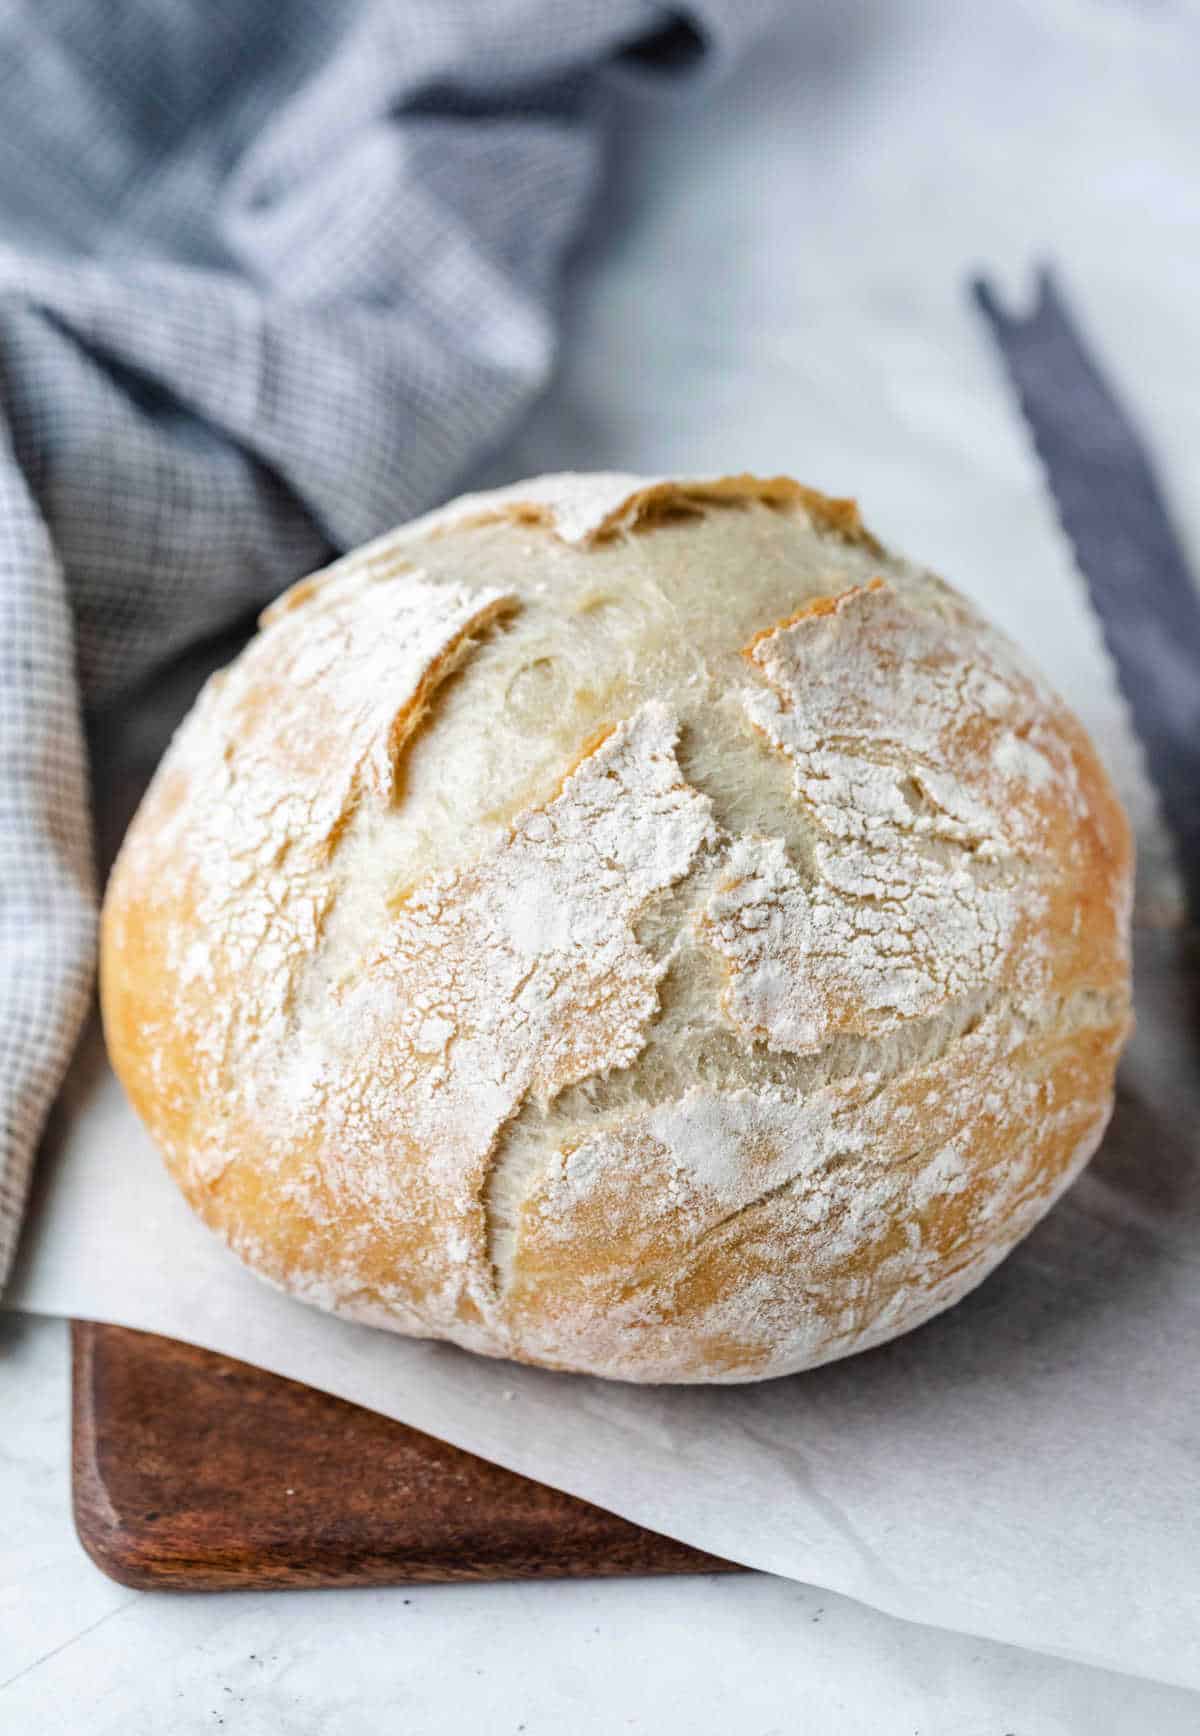
- Remove bread from oven and place on a cooling rack to cool.
- For softer bread, let bread cool for 5 minutes on a rack. Then, place in a plastic bag but do not seal.
- For crustier bread, let cool to room temperature on rack.
Video
Notes
- The water should be about 80F. It should feel about like room temperature.
- If your Dutch oven doesn’t have a lid, you can use foil. Just be very careful when covering the pot as it will be hot.
- Nutritional values are estimates.
Nutrition
Did You Make This Recipe?
Share it with me on Instagram @i_heart_eating and follow on Youtube @katedean and Pinterest @katedean for more!
Recipe adapted from Jim Lahey’s no-knead bread recipe.
First published 3/14/12. Updated with new pictures and tips 8/29/19. Updated again on 3/5/22 with additional FAQs and information.
Reader Interactions
Love this recipe?
Share your thoughts below and let’s chat! Make sure to connect with me on your favorite social platform below and show me what you made!


Comments & Reviews
Maryhomemaker says
Great recipe made in a corningware dish, which took 40 minutes rather than 30 at 450 degrees. I shaped it longer so cut three slits . I covered with tin foil. Bread is sooo crispy on outside and chewy perfection on inside. My son and husband literally at almost all of it the first time made. Big thumbs up!
Kate says
Thank you for sharing that!
Beth says
I learned how to make many different kinds of bread during quarantine and this is the easiest and absolute BEST recipe. I make bread several time a week to give to friends and family. They all rave about how good this bread is.
Kate says
Thank you so much! I’m so glad that it has been a hit! =)
Madhavi J says
The recipe looks so tempting and easy to make. I want to try it out… But I do not have a dutch oven!! Is there any alternative for baking this bread?
Kate says
I’ve used a corningware dish covered with aluminum foil. You just need a dish that is oven-rated to withstand the heat (and one without a plastic handle on the lid).
Olga Matos says
Scrumptious bread and so easy for beginners like me.
Kate says
Thank you!
Verena Rousseau says
I would like to try this recipe, but I only have a large Corningware dish with a glass lid. Could I use the glass lid for baking the bread. I would start it all in a cold oven so everything heats up gradually.
Kate says
I haven’t tried using a glass lid to bake the bread. I have used my (older) Corningware dish, but I covered the dish with foil.
Annie says
Can I use milk instead of water?
Kate says
I wouldn’t recommend it. The dough sits out on the counter for 12-18 hours before baking.
Suzanne Hicks says
Love this..Going to make it soon..
Kate says
Thanks! Hope you enjoy it! =)
Natalie Hurt says
So easy! Busy mom life win!
Can’t wait to dig in
Kate says
Thanks! Hope you enjoy it. =)
Carol says
What size Dutch oven, or other pan, would you recommend for this bread?
Kate says
Hi! A 5 quart Dutch oven works well for this recipe. Hope that helps!
Kuba says
Great bread and easy to make. Made it many times.
Kate says
Thank you! I’m so glad that you like the recipe! =)
Jo Woll says
Hi Kate,
Do you use a standing mixer for the whisking of the bread?
Also what do you use to grease the plastic
wrap?
Lastly, I’m assuming you mean to take the bread out of the pot after baking & let cool directly on the rack?
Sorry but I’ve never made bread before.
Thank you
Jo
Kate says
Hi, Jo!
No need to apologize! I’m happy to answer questions. =) I don’t. I just mix it by hand. I start off by whisking it, and then I switch to a spatula to finish mixing in the flour. The dough will be shaggy and drier than a normal bread dough. As it sits, though, it will become a wet dough. I spritz the plastic wrap with a little nonstick cooking spray. Yes, you will take it out of the pot and let it cool on the cooling rack. If you have any other questions, please feel free to ask!
Linda says
This is a wonderful recipe! I’ve made it for years. Thanks for sharing!
Kaisha says
I don’t have a cast iron pot–is there another that would work? I have a Rachel Ray Casseround, and other glass and metal baking dishes (casserole dishes, bread loaf pans, etc). What would you suggest I use?
Kate says
Yes, you can use something else. I’ve used my Corningware baking dishes and covered them tightly with aluminum foil. I think just about anything would work as long as it will withstand the high temperatures.
Kaisha says
thank you! :)
Kaisha says
If I wanted to split it into two loaves in regular dark non-stick bread pans, do you know how much I would have to cut down on the baking time? Especially for the part before you take off the lid/cover? Have you done that yet?
Kate says
I’m sorry, but I don’t know. I’ve never tried to bake it as a loaf. If you try it, I’d be interested to hear how it turns out. Good luck! =)
Kaisha says
I split the dough into two loaves and baked them covered with aluminum foil for 15 minutes at 400, then for ten minutes after taking the foil off–dang. Perfectly crispy on the outside! I loved this! :)
Kate says
Thanks for coming back to share that! I’m so glad that you were able to make that work!! That’s awesome! =)
Renee @Two in the Kitchen says
This bread looks so comforting and the picture is gorgeous. Saw this on FoodGawker and had to stop by!
Kate says
Thanks so much! And thanks for stopping by!! =)
Marie Shanahan says
Would this come out the same using all 100% whole wheat flour? I’d love to try this with wheat flour and maybe some honey and dried cherries. :)
Kate says
I haven’t tried it with 100% whole wheat flour, but I think that it would work. I would guess that it would be more dense, but I think it would work otherwise. I’ve used dried fruit in it, and that works out. My only note about the honey would be that yeast feed on sugar, and since this recipe has such a long rising time, it may over-rise. So, you may need to adjust the time. If you do try it, I would really like for you to let me know how it works out! =)
Marie Shanahan says
Thanks so much for your reply. I certainly will try it and get back to you. I didn’t know about the reaction between honey and yeast :O!! ..but I do now. LOL :)
Kate says
No problem! Good luck, and I’ll be interested to hear how it goes! =)
Jen says
I do not have a pan of any kind that is oven proof or has a lid can I use a pizza stone? I also don’t have plastic wrap can I just put a towel over the mix while it’s rising?
Kate says
I haven’t tried it with a pizza stone, but it may work that way. I’m not sure how long it would need to bake it you made it that way. Maybe? I’m not sure whether the towel would allow it to dry out since it has such a long rising time. If you try it, please let me know how it works out! =)
Holly says
Would this recipe work with a pampered chef deep dish baker??
Thanks!
Kate says
Maybe? I’m not familiar with that baker, but I’ve made this bread in a dutch oven and in a Corningware baker with aluminum foil covering it. So, I would guess that it would work (as long as it can withstand the heat), but I’m not 100% sure.
Nicki says
I had never used yeast before this recipe (and I’m 42 yrs old!). Incredibly easy! Fun to make with different beers instead of the water. My favorite variation, however, was a gift from a friend…she added 1/4 cup sunflower seeds. Wow!
Kate says
What great tips! Thanks!! I love sunflower seeds, so I’ll be trying that. Thanks for sharing!! =)
Laura says
Hi there,
Did you use active dry yeast or instant yeast for this recipe? I’m assuming instant, since you didn’t have to let it proof in warm liquid before mixing in the dry ingredients.
Kate says
I think I’ve actually used both depending on what I have on hand. However, you’re right – instant yeast does work well since there isn’t a proofing step. If you have any other questions, please feel free to ask!
Greg Hubbard says
Hi Kate… I used a round cake pan to bake the bread in, and capped it with a tin pie plate. It came out great! I sent a picture to my brother and said, ” this aught to be good!” And he replied “did you get that at Whole Foods? “. ” No, it’s home made! “. And it was excellent tasting.
Kate says
That’s awesome! I’m so glad that it turned out so well for you! Thanks for coming back to comment!
Marylynn says
I have no cast-iron pot. Would a roasting pan with lid work?
Kate says
The lid needs to be tight-fitting. If the roaster pan lid is, then it should be ok. If not, you could use aluminum foil. I’ve used it in a pinch, and it works just fine. I hope that helps!
Toya R says
I love bread and have decided I might as well learn to make it. What pulled me to this one is no need to knead… :) I think I will try this one first. You have a few others that I am looking at as well
kateheartseating says
A while back I decided the same thing. I love bread, so I figured I might as well learn to make it myself. I have learned a lot of tips and tricks over the years (from trial and a lot of error), so if you have any questions, please feel free to ask! =)