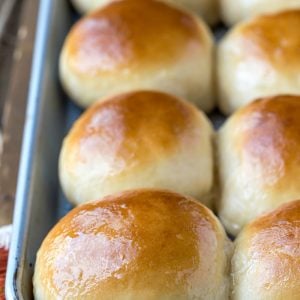
Soft 30 Minute Honey Butter Rolls are made from scratch – start to finish – in just half an hour!
My kids have gotten so used to having fresh rolls with dinner that they’re disappointed if we have a dinner without any. So, I keep working on new recipes to make quick rolls that don’t take all night to make, and I adapted this recipe from my 30 Minute Honey Wheat Roll recipe.
These 30 Minute Honey Butter Rolls are good. And fast.
Which makes them perfect for weeknight and weekends alike. Plus, they take less time to make than frozen rolls take to thaw.
So, if you’re in a hurry and want some fresh bread, give these rolls a try! And please check out the tips below to help you make perfect rolls.

Ingredient notes
These honey butter rolls are made from just a few simple ingredients. I’ve listed instant yeast in the ingredients, but there are also directions for using active dry yeast in place of the instant yeast.
- Butter: I like to use salted butter in these rolls. If using unsalted butter, increase the salt in the rolls to 1 teaspoon.
- Milk: You can use anything from skim to whole milk. Using whole milk will give you a richer, softer roll.
- Milk temperature: It’s important that the milk/butter mixture isn’t too hot. If you don’t have a thermometer, then the mixture should feel like warm bath water. If it’s too hot for you, it’s too hot for the yeast and can kill the yeast.
- Yeast: There are 2 1/4 teaspoons of yeast in a packet. If you are using packets, you will need 3 packets to give you enough for 6 teaspoons (which is the equivalent of 2 tablespoons) of yeast.
- If you would prefer to use active dry yeast, substitute an equal amount for the instant yeast. After step 5, let the mixture sit for 5-10 minutes, or until foamy. Then, continue with the recipe as written. If the yeast doesn’t foam, start over. Otherwise, your rolls won’t rise.
- Flour: Be sure to only use as much flour as is necessary to give you a sticky dough. Using too much flour will give you heavy, dry, or doughy rolls.
How to make honey butter rolls
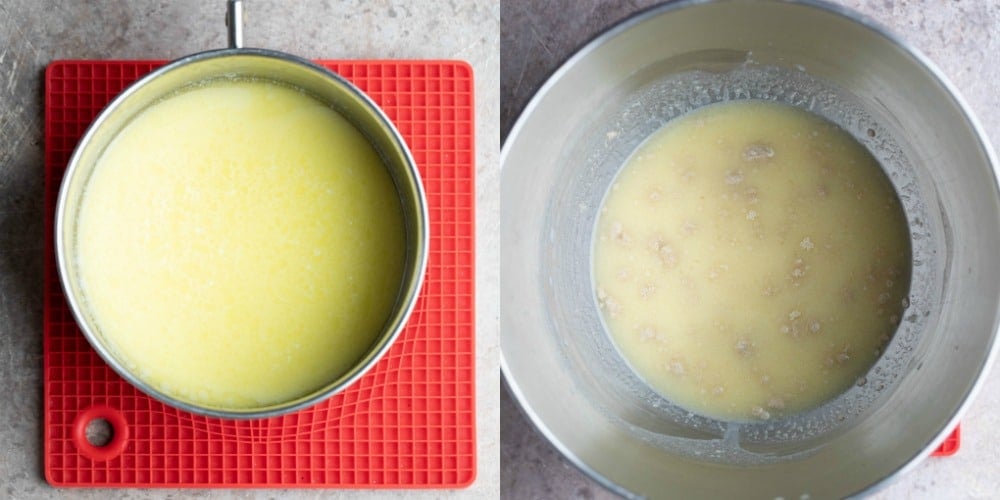
Melt butter in a saucepan. When the butter is mostly melted, stir in the milk. Heat to 100-110F.
When milk/butter mixture is at temperature, add to yeast and honey.
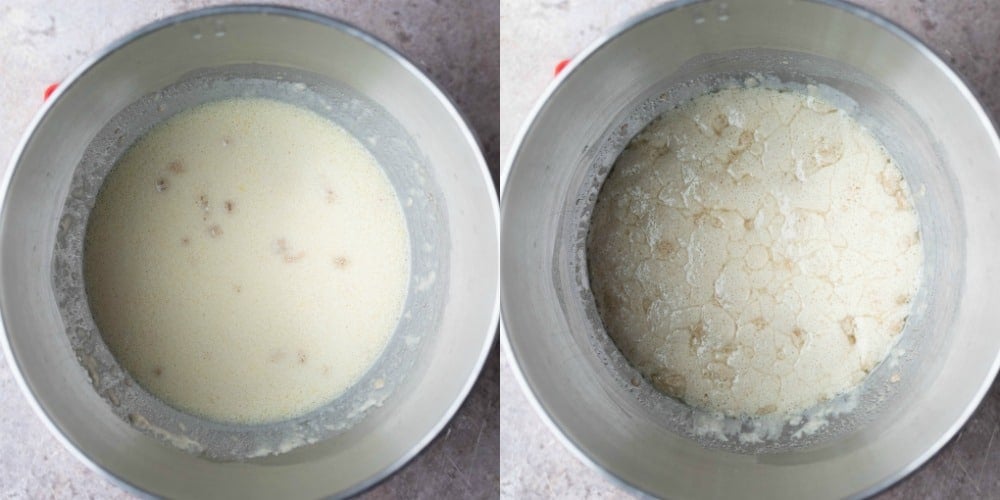
Stir to combine. If using active dry yeast, let the mixture sit for 5-10 minutes, or until foamy (picture on the right).
Stir in egg and salt.
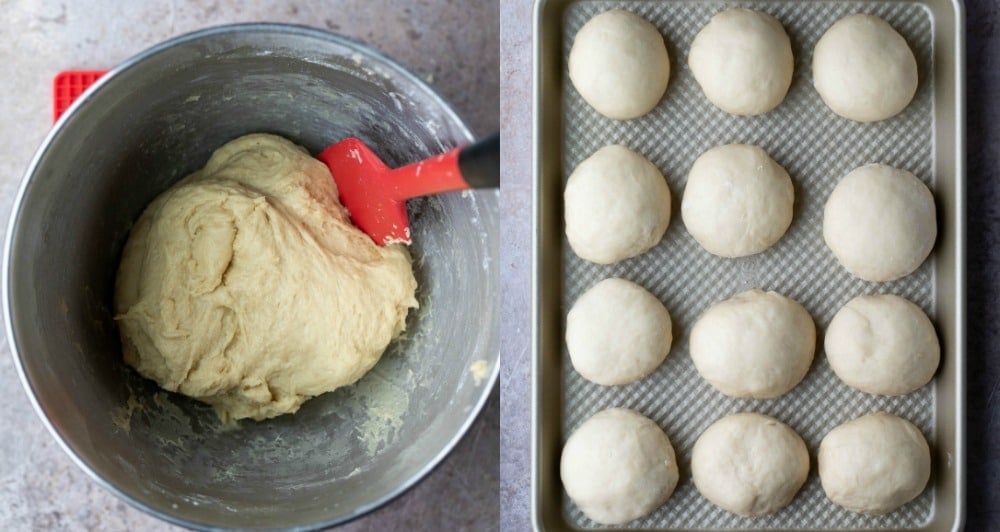
Add 2 cups of flour and continue adding flour a little at a time until it forms a sticky dough. You may not need to add all of the flour, and that’s ok.
Shape the dough into 12 rolls.
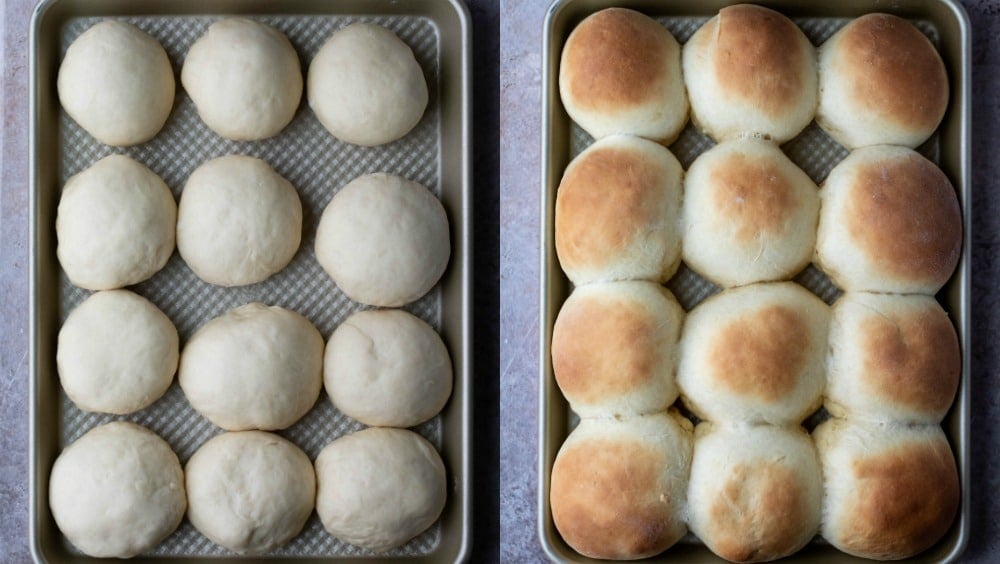
Cover and let the dough rise for 10 minutes in a warm spot. Uncover and bake until golden brown.
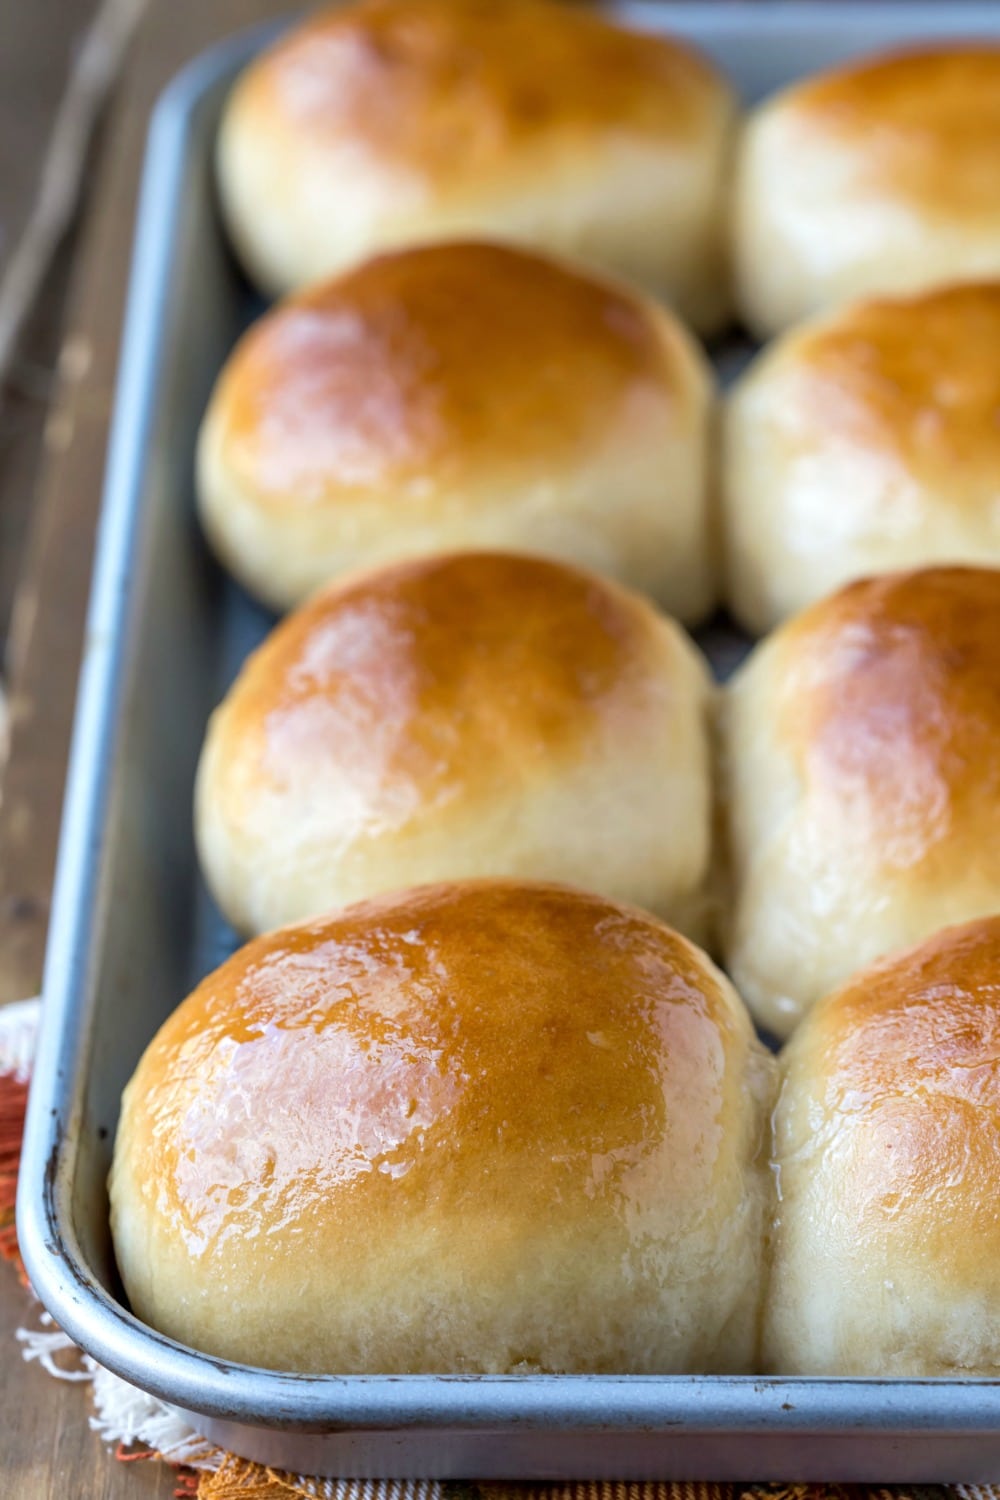
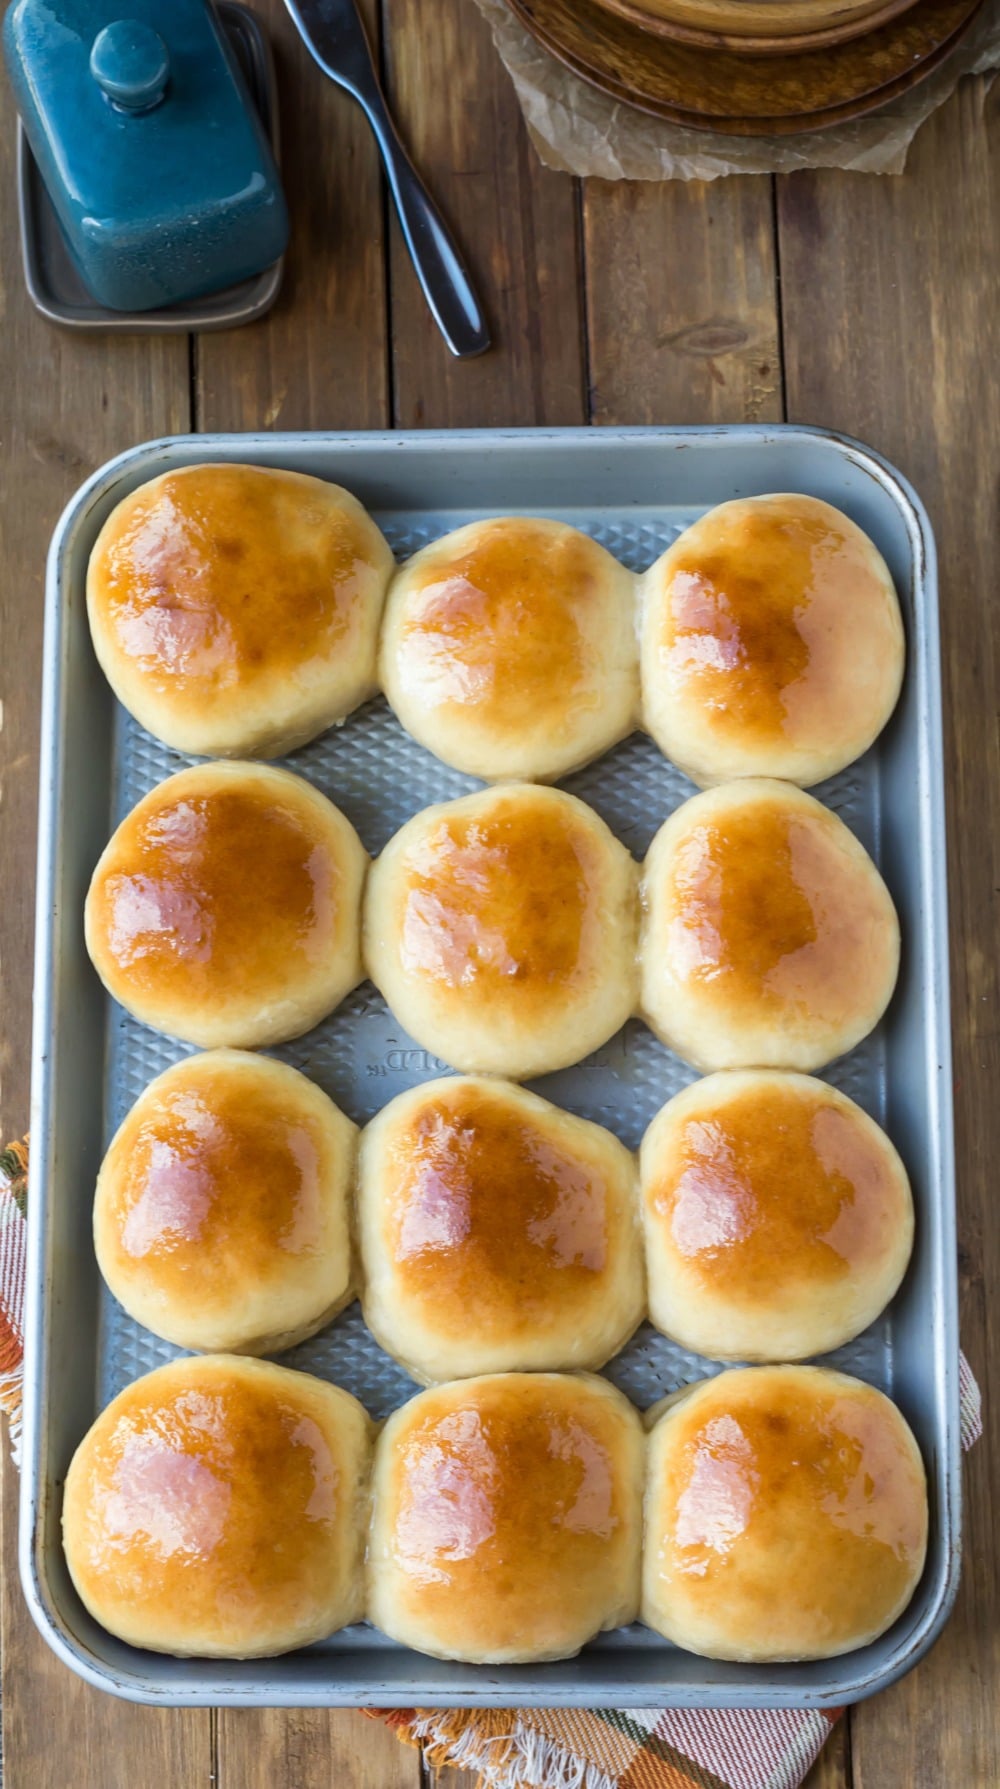
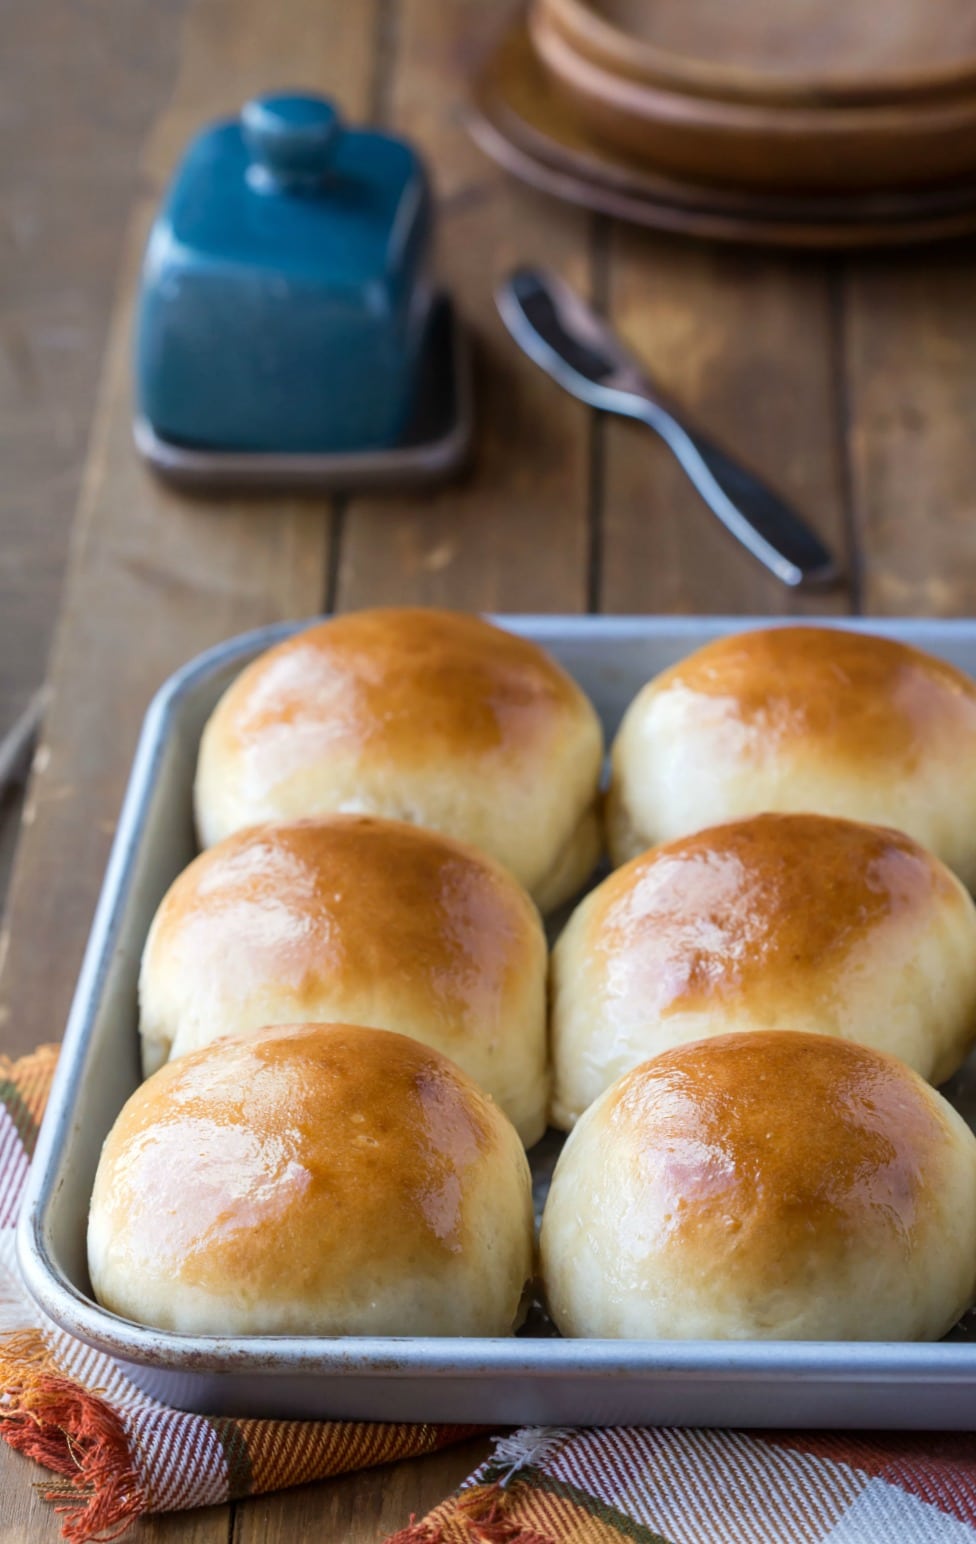
Brush the baked rolls with melted butter.
Tips
- Rising: Since the rising time is so short, it really helps the rolls to rise if they are in a warm spot.
- How to make the perfect spot for your rolls to rise: If your kitchen isn’t warm, simply preheat your cold oven to 350F for exactly 60 seconds. Turn the oven off, and you now have a great spot for your rolls to rise. You can also place the rolls near your oven if you have it on. If you don’t have a warm spot, you may find that your rolls don’t rise within the 10 minutes, and you may need to give them additional time to rise.
- Brushing the rolls: If you want a stronger honey flavor to the rolls, add a tablespoon of additional honey to the butter and brush the rolls with honey butter after baking.
Storage
The rolls are best eaten when fresh. However, the rolls can be stored in an airtight container for up to 3 days.
If you’ve tried this 30 minute honey butter roll recipe, don’t forget to rate the recipe and leave me a comment below. I love to hear from people who’ve made my recipes!
You can SUBSCRIBE to receive my latest recipe newsletters or FOLLOW ME on FACEBOOK, INSTAGRAM and PINTEREST for even more delicious food.

30 Minute Honey Butter Rolls
Equipment
- Stand mixer
Ingredients
- 1/3 cup butter
- 1 cup milk
- 2 tablespoons instant yeast
- 1/3 cup honey
- 1/2 teaspoon salt
- 1 large egg
- 3 ½ – 4 ½ cups all-purpose flour
- 2 tablespoons butter melted
Instructions
- Preheat oven to 400 F. Lightly grease a quarter sheet pan or a 9×13-inch rimmed cookie sheet.
- In a small saucepan, melt butter.
- When butter is mostly melted, stir in milk, and heat mixture to 100-110 F.
- Meanwhile, add yeast and honey to the bowl of a stand mixer fitted with a paddle attachment (or a large mixing bowl if mixing by hand).
- When milk mixture is at temperature, add to yeast and honey; stir to combine.
- Add salt and egg, and stir until combined.
- Stir in 2 cups all-purpose flour.
- Add remaining flour 1/4 cup at a time until dough clings to paddle and cleans the sides of the bowl. Dough will still be pretty sticky.
- With floured hands, shape dough into 12 rolls, and place dough on prepared baking sheet.
- Cover, and let dough rest for 10 minutes in a warm spot.
- Bake for 10-12 minutes, or until lightly golden brown.
- When rolls are done baking, brush with 2 tablespoons melted butter.
Video
Notes
- Butter: I like to use salted butter in these rolls. If using unsalted butter, increase the salt in the rolls to 1 teaspoon.
- Milk: You can use anything from skim to whole milk. Using whole milk will give you a richer, softer roll.
- Milk temperature: It’s important that the milk/butter mixture isn’t too hot. If you don’t have a thermometer, then the mixture should feel like warm bath water. If it’s too hot for you, it’s too hot for the yeast and can kill the yeast.
- Yeast: There are 2 1/4 teaspoons of yeast in a packet. If you are using packets, you will need 3 packets to give you enough for 6 teaspoons (which is the equivalent of 2 tablespoons) of yeast.
If you would prefer to use active dry yeast, substitute an equal amount for the instant yeast. After step 5, let the mixture sit for 5-10 minutes, or until foamy. Then, continue with the recipe as written. If the yeast doesn’t foam, start over. Otherwise, your rolls won’t rise. - Flour: Be sure to only use as much flour as is necessary to give you a sticky dough. Using too much flour will give you heavy, dry, or doughy rolls.
- Rising: Since the rising time is so short, it really helps the rolls to rise if they are in a warm spot. If your kitchen isn’t warm, simply preheat your cold oven to 350F for exactly 60 seconds. Turn the oven off, and you now have a great spot for your rolls to rise.
- Brushing the rolls: If you want a stronger honey flavor to the rolls, add a tablespoon of additional honey to the butter and brush the rolls with honey butter after baking.
- Nutrition values are estimates.
Nutrition
Did You Make This Recipe?
Share it with me on Instagram @i_heart_eating and follow on Youtube @katedean and Pinterest @katedean for more!
More 30 minute bread recipes!
Originally published 9/15/14. Updated with new photos and tips 2/29/20.
Reader Interactions
Love this recipe?
Share your thoughts below and let’s chat! Make sure to connect with me on your favorite social platform below and show me what you made!


Comments & Reviews
Nancy says
I love yeast rolls. These were easy and light and fluffy. But I find they don’t have much taste. Did I do something wrong?
Kate says
Hi! I don’t think you did anything wrong. Was there a certain flavor you were hoping for?
Lori says
I love making bread and rolls and this is an easy relcipe. Great directions. Thanks so much.
Kate says
Thank you!
LucyG says
Made these the other night.. made half and froze half.. there is only the 2 of us and they were gone in less than a day. DELISH!!! thank you!!!
Kate says
Glad that you liked them! Thanks!
Kathy says
I made these today for the first time for a small picnic tomorrow. Of course my hubby had to try one. He then said, “You might need to make another batch for tomorrow. They would also make great cinnamon rolls! Hint, hint!” ?
So quick, easy, and delicious! Thanks!!
Kate says
Haha! I bet they would! =) Glad you and your husband liked them!
Luanne Kleiman says
I’m missing something. If each yeast packet holds 2 1/4 tsp, then 2 packets would only equal 4 1/2 tsp, yet you say it equals 6 tsp. What am I missing?
Kate says
You weren’t missing anything. That was a typo. It should have said that you would need 3 packets of yeast to have enough for 6 teaspoons of yeast.
Linda Giddens says
The best yeast rolls ever. Thank you.
Kate says
Thank you so much!
Pokemon Fan says
This is one of the best roll recipes ever!
Kate says
Thank you so much!
Kristie says
In recipe it should say after adding milk mixture to yeast mixture, stir and let sit 10 minutes. Then start adding the flour. I missed that because I didn’t read your notes. Thanks
Kate says
The reason that it doesn’t say that in the recipe itself is because the recipe calls for instant yeast. There’s no need to proof instant yeast. You can proof it if you prefer, but the reason that it’s called instant yeast is because there’s no need to proof it.
The note that you are referencing is for substituting active dry yeast for the instant yeast. That’s why there’s the extra proofing step in the substitution directions.
Erika says
Hi! I made these the first time for Christmas and they turned out great! I made them the second time and followed just the written instructions below the ingredients list. When I was letting them rise I couldn’t figure out why they weren’t rising as much as the first time and it’s because I had skipped letting the yeast get foamy after step 5. I think having a note about letting the yeast sit added in the instructions would be helpful. I think most people follow the step by step below and might miss additional notes written above or below. I let them rise for about 20 minutes and they still turned out great, just not as fluffy as the first time!
Kate says
Hi! Were you using instant yeast or active dry? You can proof instant yeast, but you shouldn’t need to. I have some other tricks I can suggest if you notice that the rolls are rising slowly. Let me know if you’d like me to share those!
Erika says
I used active dry yeast both times. Still turned out good!
Kate says
Good! I’m glad that they turned out well. You can proof the active dry yeast just to make sure that it is active. My house is usually pretty cool, so one trick that helps me when I make these rolls is to turn the oven on to 350F for exactly 60 seconds. Then I turn the oven off. That little bit of warmth in the oven makes a great spot to let the rolls rest.
Karen Knowlton says
They turned out perfect and so good! Making them again today….this recipe is now my go to recipe for rolls. Thank you
Kate says
Thank you so much! I’m so glad that they turned out well for you!
Mari says
I just made these for dinner a couple of nights ago on a whim and I am so glad I did! They came out fantastic, so soft and fluffy and perfectly chewy! My family loved them and they were gone by the end of the meal. Making them again tonight ☺️. Thank you so much for such a great recipe!!!
Kate says
Thank you so much! I’m so glad that you liked the rolls!
Jenna says
These are our favorite rolls! So easy to throw together and delicious!!! Thank you!!! :)
Kate says
Thank you so much! I’m so glad that you liked them!
Cathy says
Thankyou for this easy recipe.I mixed them by hand and the rolls came out perfect! I let them rise about 25 min . My husband is in heaven!!!!
Kate says
Thanks! I’m glad they turned out well!
Joyce says
I kneaded this by hand because my stand mixer spoilt. Yet it turned out very very soft and fluffy. Absolutely loved it!
Kate says
Thank you!
Mildred says
Are these batter rolls? They look great!
Kate says
Thank you! No, the dough should feel like more of a traditional roll dough than a batter.
Serifa says
This recipe came out amazing! The only issue I had was my bottom came out really dark and I pulled them out at an early light golden color. I used a copper pan and parchment paper. Any other suggestions? Thanks!
Kate says
Thank you!! Copper heats up quickly, and that may be why the bottom is browning too quickly. There are a couple things that you can try. You can add extra insulation by putting another cookie sheet underneath, or you can try using a higher rack in the oven.
Denise N. says
These rolls came out fantastic. They were light and fluffy. I made sure I only added a limited amout of extra flour as recommended. I did let them rise for 30 minutes. Thank you for such a great recipe and tips.
Kate says
Thank you so much!!
Stephanie says
Am I misreading the note about yeast? If there are 2 1/4 teaspoons of yeast per envelope, then that’s 6 3/4 teaspoons of yeast. That’s more than 2 tablespoons of yeast. I hope I didn’t mess this recipe up because I measured out exactly 2 tablespoons.
Kate says
No, I put 3 packets to get 6 teaspoons when I should have said 2 packets to get 6 teaspoons. The 6 teaspoons (or 2 tablespoons) of yeast is correct. I just added an extra packet in there. I’ve updated that with the correct number of packets.
Evette says
Could one use lactose free milk with this recipe?
Kate says
Hi! I’ve used almond milk, and it worked out well. Hope that helps!
Tonette says
Easy and delicious! My daughter and I just finished making these. It just came out of the oven and the family couldn’t wait to eat them. 6 rolls gone as I’m typing this review!
My dough didn’t rise after ten minutes, so we waited a bit longer. It took about 30 mins to double in size. Probably our house is not warm enough?
Kate says
I’m so glad! My kitchen is the warmest room in my house, and I think that makes a difference. You can create a warm spot by preheating your oven to 350F for exactly 60 seconds. At the end of the 60 seconds, turn your oven off, and you’ll have a warm, draft-free place that encourages the rolls to rise.
Sueq says
I just made these and they were delicious! I will say it took longer than the 30 minutes stated in the recipe. I used the honey and butter to brush the tops. Big hit with my family!
Kate says
Thank you so much! I think it gets faster the more you make them. =)
Carole says
Can you freeze the cooked or uncooked honey rolls?
Kate says
Hi! I’ve frozen the baked rolls, and they froze/warmed well. I haven’t tried to freeze the uncooked rolls.