
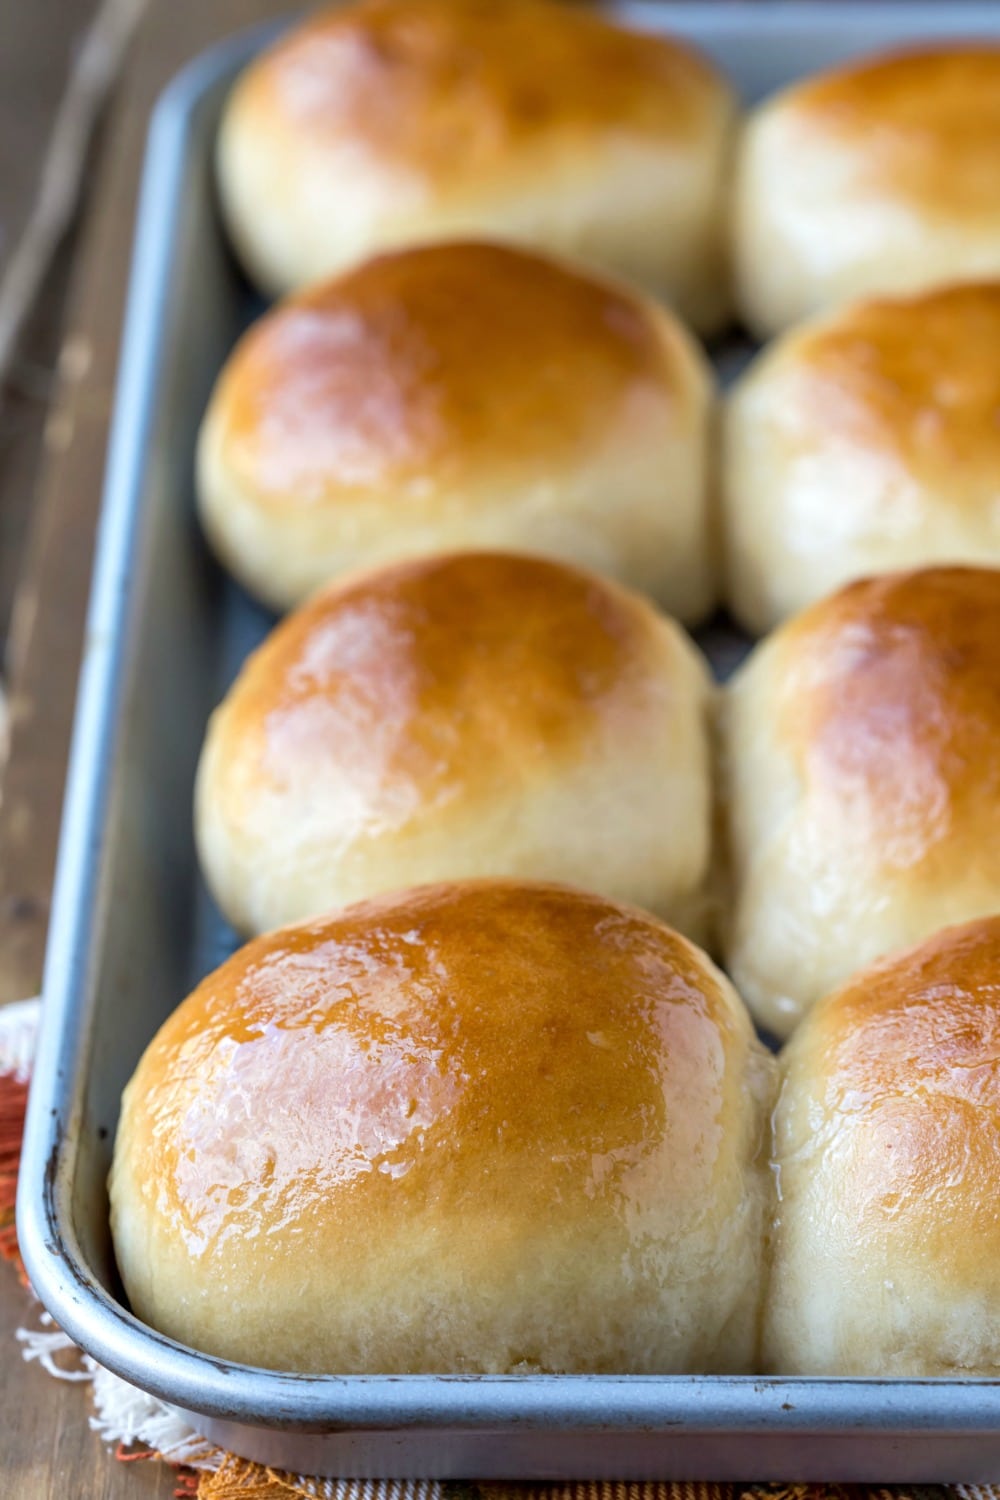
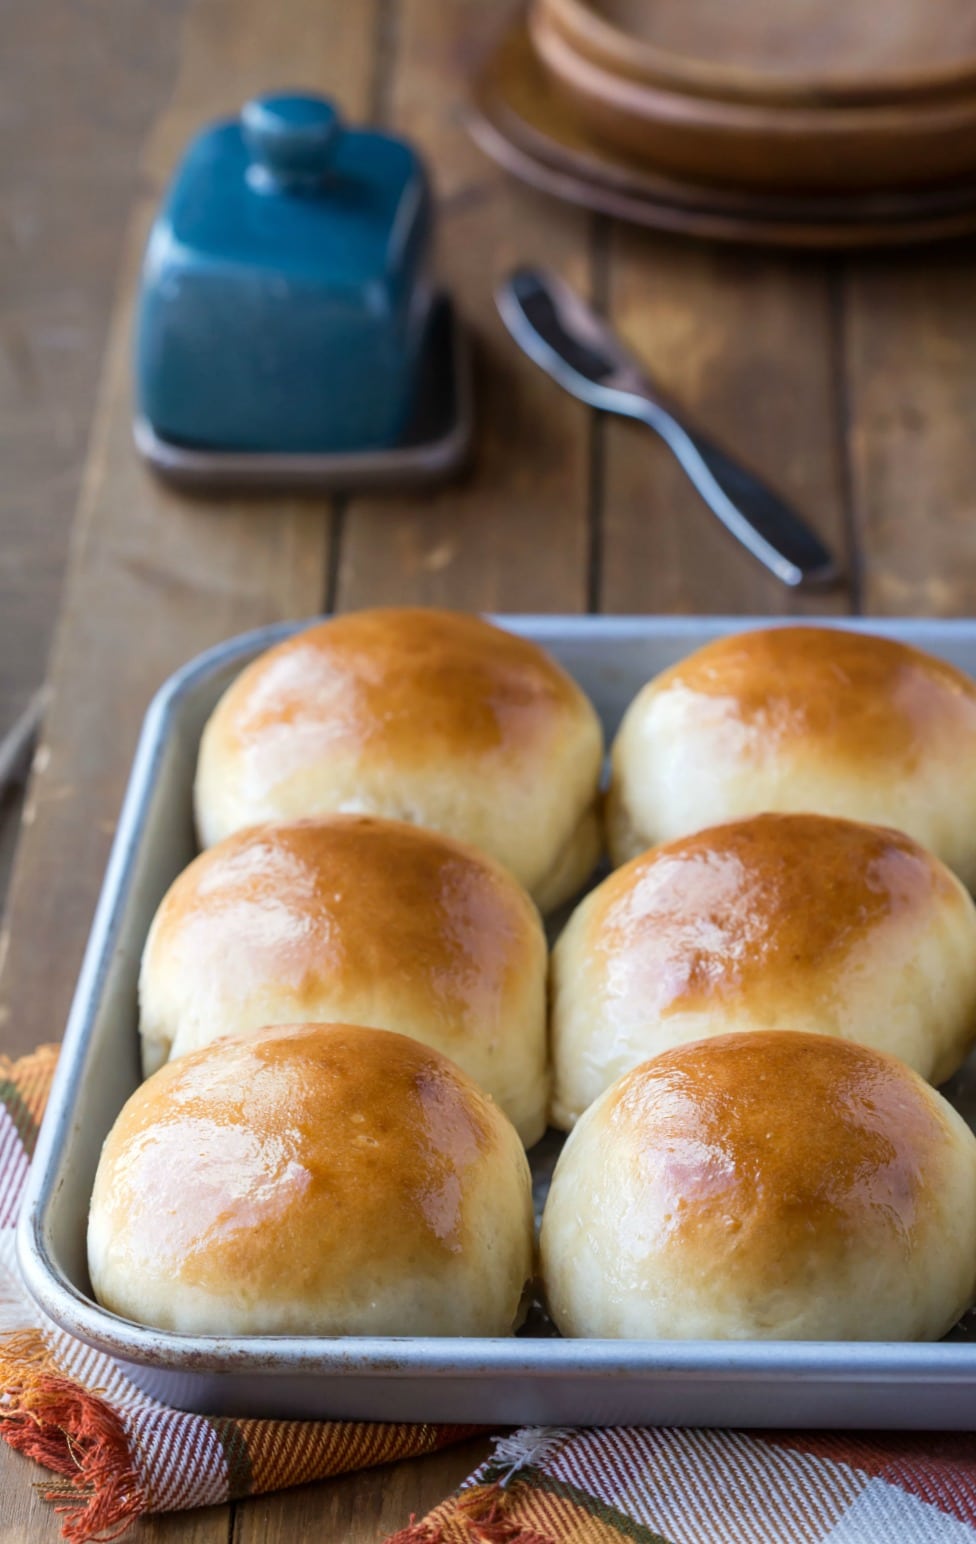
Soft 30 Minute Honey Butter Rolls are made from scratch – start to finish – in just half an hour!
My kids have gotten so used to having fresh rolls with dinner that they’re disappointed if we have a dinner without any. So, I keep working on new recipes to make quick rolls that don’t take all night to make, and I adapted this recipe from my 30 Minute Honey Wheat Roll recipe.
These 30 Minute Honey Butter Rolls are good. And fast.
Which makes them perfect for weeknight and weekends alike. Plus, they take less time to make than frozen rolls take to thaw.
So, if you’re in a hurry and want some fresh bread, give these rolls a try! And please check out the tips below to help you make perfect rolls.

Ingredient notes
These honey butter rolls are made from just a few simple ingredients. I’ve listed instant yeast in the ingredients, but there are also directions for using active dry yeast in place of the instant yeast.
- Butter: I like to use salted butter in these rolls. If using unsalted butter, increase the salt in the rolls to 1 teaspoon.
- Milk: You can use anything from skim to whole milk. Using whole milk will give you a richer, softer roll.
- Milk temperature: It’s important that the milk/butter mixture isn’t too hot. If you don’t have a thermometer, then the mixture should feel like warm bath water. If it’s too hot for you, it’s too hot for the yeast and can kill the yeast.
- Yeast: There are 2 1/4 teaspoons of yeast in a packet. If you are using packets, you will need 3 packets to give you enough for 6 teaspoons (which is the equivalent of 2 tablespoons) of yeast.
- If you would prefer to use active dry yeast, substitute an equal amount for the instant yeast. After step 5, let the mixture sit for 5-10 minutes, or until foamy. Then, continue with the recipe as written. If the yeast doesn’t foam, start over. Otherwise, your rolls won’t rise.
- Flour: Be sure to only use as much flour as is necessary to give you a sticky dough. Using too much flour will give you heavy, dry, or doughy rolls.
How to make honey butter rolls
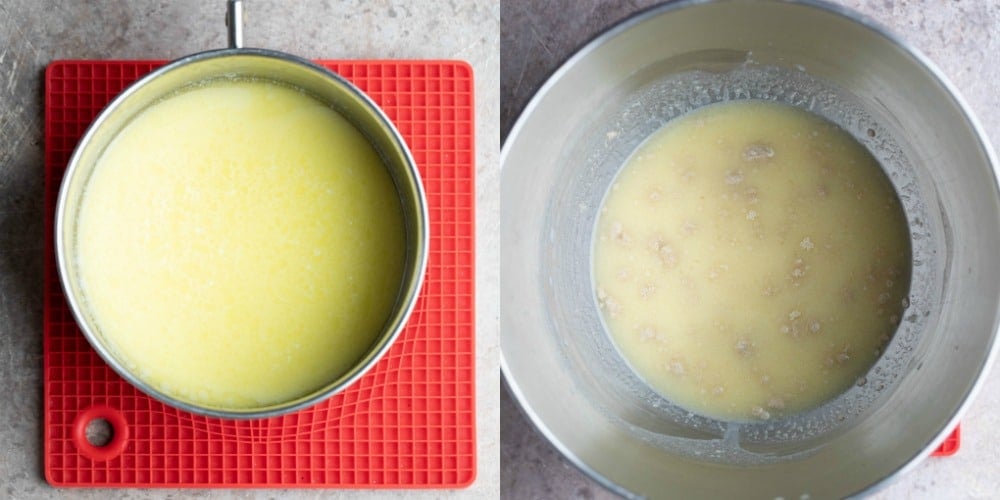
Melt butter in a saucepan. When the butter is mostly melted, stir in the milk. Heat to 100-110F.
When milk/butter mixture is at temperature, add to yeast and honey.
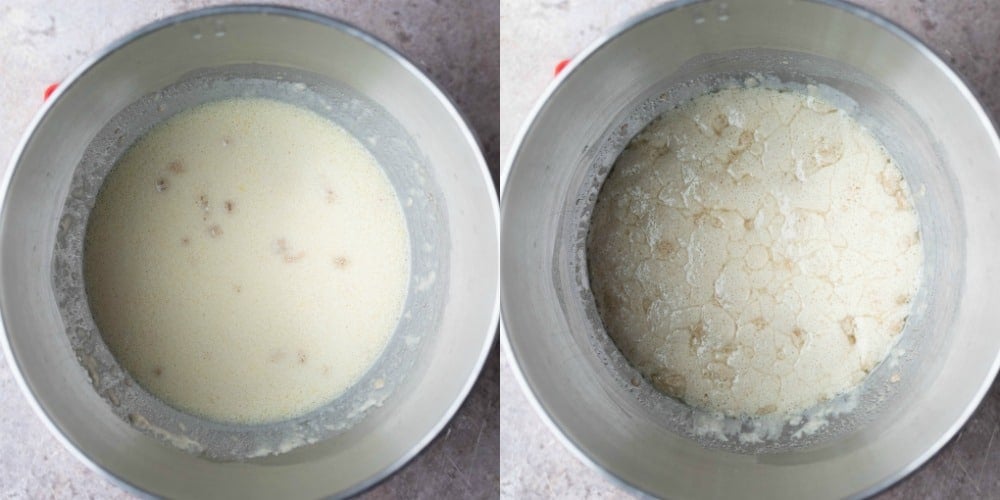
Stir to combine. If using active dry yeast, let the mixture sit for 5-10 minutes, or until foamy (picture on the right).
Stir in egg and salt.
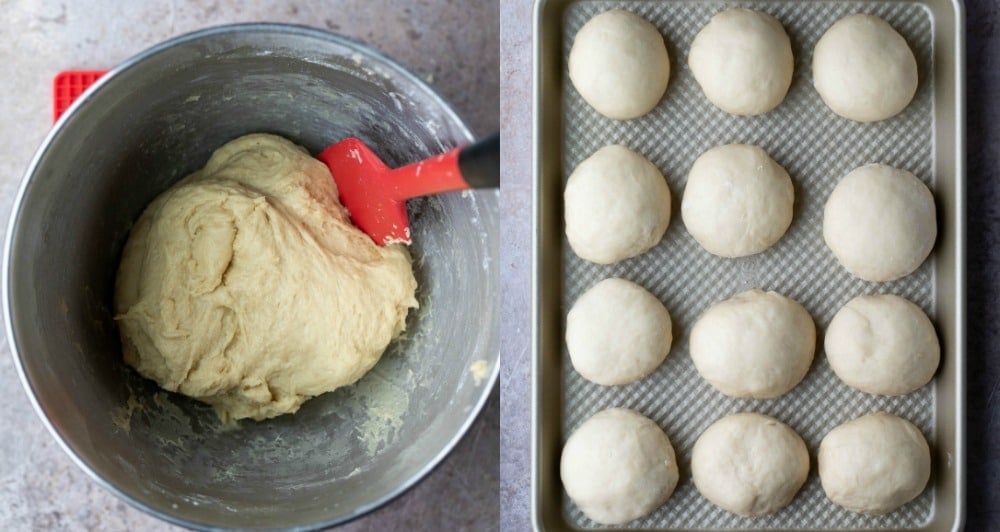
Add 2 cups of flour and continue adding flour a little at a time until it forms a sticky dough. You may not need to add all of the flour, and that’s ok.
Shape the dough into 12 rolls.
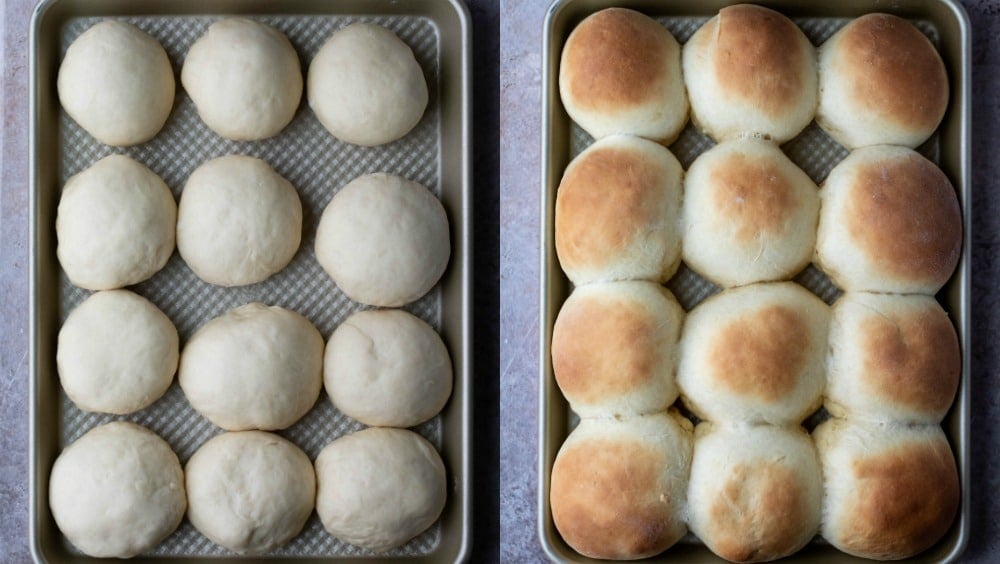
Cover and let the dough rise for 10 minutes in a warm spot. Uncover and bake until golden brown.
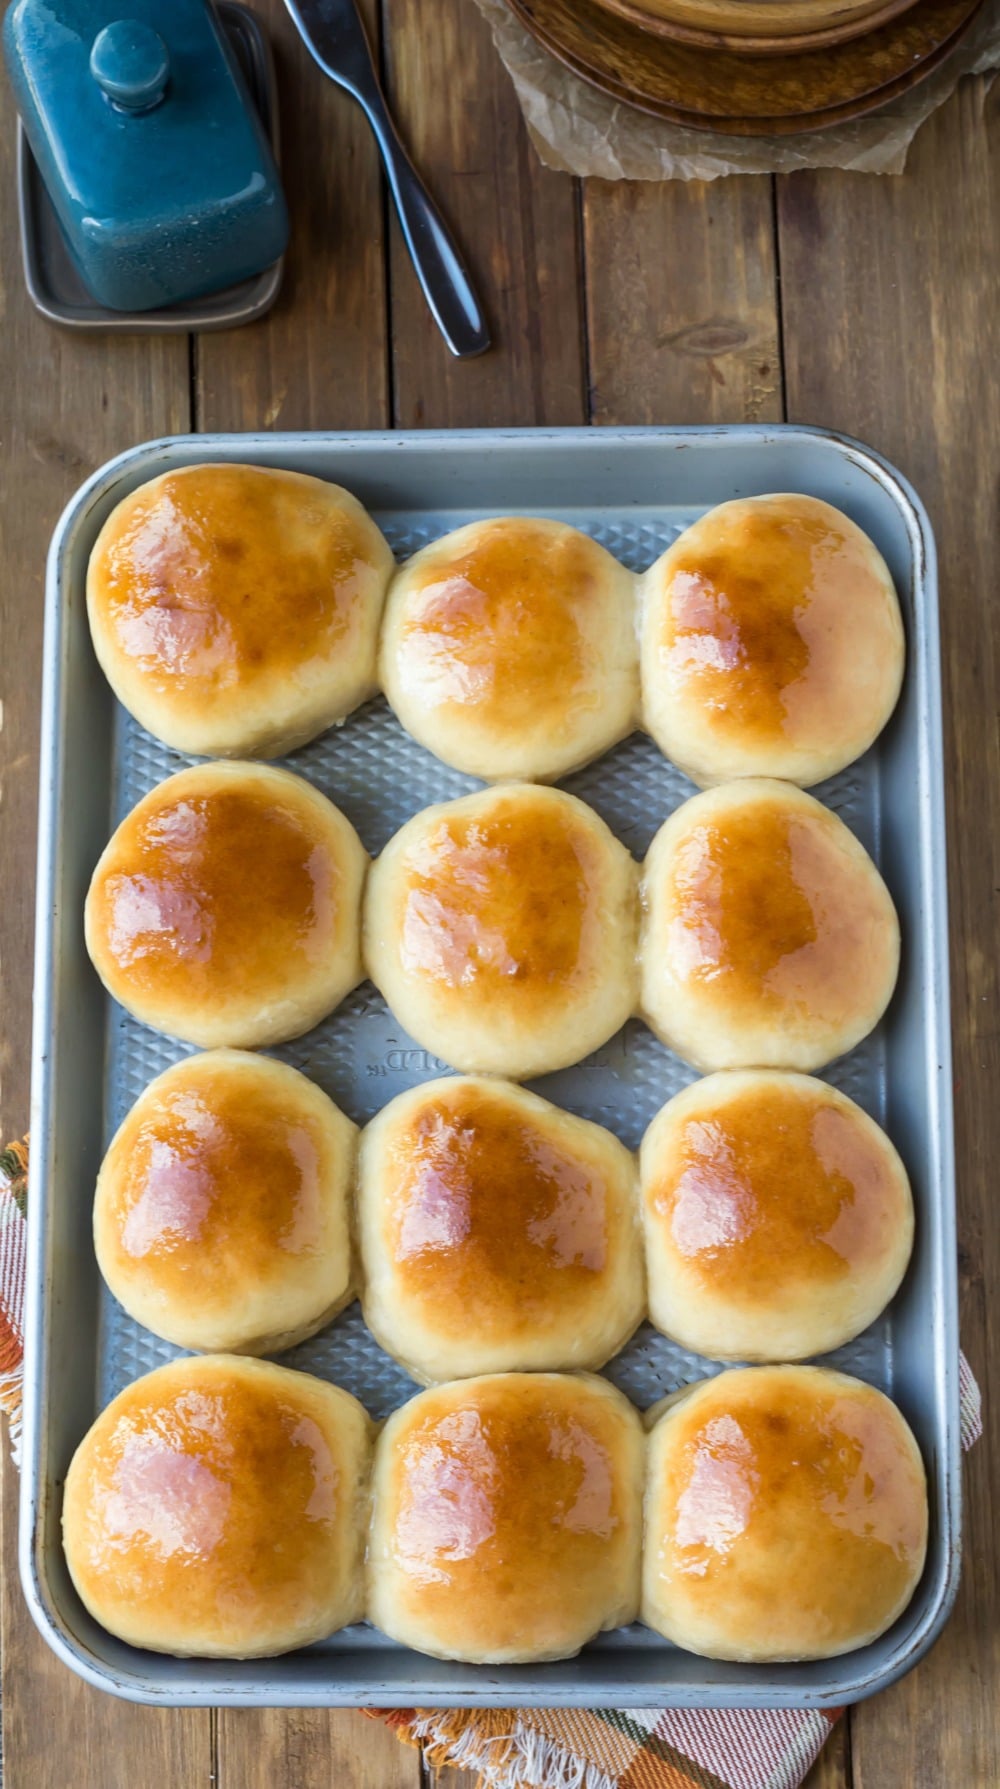
Brush the baked rolls with melted butter.
Tips
- Rising: Since the rising time is so short, it really helps the rolls to rise if they are in a warm spot.
- How to make the perfect spot for your rolls to rise: If your kitchen isn’t warm, simply preheat your cold oven to 350F for exactly 60 seconds. Turn the oven off, and you now have a great spot for your rolls to rise. You can also place the rolls near your oven if you have it on. If you don’t have a warm spot, you may find that your rolls don’t rise within the 10 minutes, and you may need to give them additional time to rise.
- Brushing the rolls: If you want a stronger honey flavor to the rolls, add a tablespoon of additional honey to the butter and brush the rolls with honey butter after baking.
Storage
The rolls are best eaten when fresh. However, the rolls can be stored in an airtight container for up to 3 days.
If you’ve tried this 30 minute honey butter roll recipe, don’t forget to rate the recipe and leave me a comment below. I love to hear from people who’ve made my recipes!
You can SUBSCRIBE to receive my latest recipe newsletters or FOLLOW ME on FACEBOOK, INSTAGRAM and PINTEREST for even more delicious food.

30 Minute Honey Butter Rolls
Equipment
Ingredients
- ⅓ cup butter
- 1 cup milk
- 2 tablespoons instant yeast
- ⅓ cup honey
- ½ teaspoon salt
- 1 large egg
- 3 ½ – 4 ½ cups all-purpose flour
- 2 tablespoons butter melted
Instructions
- Preheat oven to 400 F. Lightly grease a quarter sheet pan or a 9×13-inch rimmed cookie sheet.
- In a small saucepan, melt butter.⅓ cup butter
- When butter is mostly melted, stir in milk, and heat mixture to 100-110 F.1 cup milk
- Meanwhile, add yeast and honey to the bowl of a stand mixer fitted with a paddle attachment (or a large mixing bowl if mixing by hand).2 tablespoons instant yeast, ⅓ cup honey
- When milk mixture is at temperature, add to yeast and honey; stir to combine.
- Add salt and egg, and stir until combined.½ teaspoon salt, 1 large egg
- Stir in 2 cups all-purpose flour.
- Add remaining flour 1/4 cup at a time until dough clings to paddle and cleans the sides of the bowl. Dough will still be pretty sticky.
- With floured hands, shape dough into 12 rolls, and place dough on prepared baking sheet.
- Cover, and let dough rest for 10 minutes in a warm spot.
- Bake for 10-12 minutes, or until lightly golden brown.
- When rolls are done baking, brush with 2 tablespoons melted butter.2 tablespoons butter
Video
Notes
- Butter: I like to use salted butter in these rolls. If using unsalted butter, increase the salt in the rolls to 1 teaspoon.
- Milk: You can use anything from skim to whole milk. Using whole milk will give you a richer, softer roll.
- Milk temperature: It’s important that the milk/butter mixture isn’t too hot. If you don’t have a thermometer, then the mixture should feel like warm bath water. If it’s too hot for you, it’s too hot for the yeast and can kill the yeast.
- Yeast: There are 2 1/4 teaspoons of yeast in a packet. If you are using packets, you will need 3 packets to give you enough for 6 teaspoons (which is the equivalent of 2 tablespoons) of yeast.
If you would prefer to use active dry yeast, substitute an equal amount for the instant yeast. After step 5, let the mixture sit for 5-10 minutes, or until foamy. Then, continue with the recipe as written. If the yeast doesn’t foam, start over. Otherwise, your rolls won’t rise. - Flour: Be sure to only use as much flour as is necessary to give you a sticky dough. Using too much flour will give you heavy, dry, or doughy rolls.
- Rising: Since the rising time is so short, it really helps the rolls to rise if they are in a warm spot. If your kitchen isn’t warm, simply preheat your cold oven to 350F for exactly 60 seconds. Turn the oven off, and you now have a great spot for your rolls to rise.
- Brushing the rolls: If you want a stronger honey flavor to the rolls, add a tablespoon of additional honey to the butter and brush the rolls with honey butter after baking.
- Nutrition values are estimates.
Nutrition
Did You Make This Recipe?
Share it with me on Instagram @i_heart_eating and follow on Youtube @katedean and Pinterest @katedean for more!
More 30 minute bread recipes!
Originally published 9/15/14. Updated with new photos and tips 2/29/20.
Reader Interactions
Love this recipe?
Share your thoughts below and let’s chat! Make sure to connect with me on your favorite social platform below and show me what you made!


Comments & Reviews
Rhonda says
since yeast is so scarce right now, do you have any other suggestions to use with your buns?
Kate says
Hi! Are you asking for a yeast substitute? I’m afraid that I don’t have a good sub for that.
Connie Freudenberg says
Can I use wheat flour with this recipe?
Kate says
I haven’t tried wheat flour in this recipe. When I’m subbing in wheat flour, I usually start with half wheat, half ap and then go from there because the wheat flour can give you a drier, denser roll.
Shannon says
Hi, these look delicious. Will this recipe work for meat and vegetable buns?
Kate says
Hi! Thank you! You could certainly use the rolls as a bun, but I haven’t to stuff them.
Shannon says
They work as a buns, and they freeze beautifully that way. This is such a wonderful recipe. Thanks so much. My mother couldn’t stop eating them. Mmmm.
Beverly tennyson says
Delish jus made!!
Kate says
Thank you! I’m so glad you liked the rolls!
Diane N says
Can these be mixed and shaped refrigerated overnight and baked the next day? If so any needed changes?
Kate says
Hi! I would reduce the yeast to 1 tablespoon. Otherwise, I think they should work well that way.
Jerron says
This is my first time really trying to bake anything bread related. My question is what do you consider a warm spot? I’ve had my rolls sitting out and covered by they don’t seem to be rising within the short time you’ve mentioned. Not sure if I messed up somewhere or not( I don’t have a stand up mixer so I was trying by hand) Recipe seemed pretty easy to follow though.
Kate says
I place my rolls near the stove if I’m cooking. Another way to create a warm spot is to preheat the oven to 350F for exactly 60 seconds and then turn the oven off. That will create a nice warm spot for the rolls to rise. By hand should be just fine! One common place where people go wrong is using water that’s too hot, which can kill the yeast. Baking bread can take a little bit of work to get the hang of it, but it’s worth it! Let me know if you have questions.
Jami says
Made twice now. Yeast stays in clumps, does not dissolve. How do you get the rolls so smooth and round?
Kate says
Hi! The yeast should dissolve into the liquid. If it isn’t dissolving when you stir it in, I would guess that it’s a problem with the temperature of your liquids. How are you checking the temperature?
Yanila Sullivan says
This is my go to recipe and its so delicious. Thank you!
Kate says
Thank you! I’m so glad that you liked the rolls! Thanks for commenting. =)
Ikram says
I just got these baby rolls out of the oven &I am tempted to comment this early. The smell is unbelievably appealing, the look &touch of them are like no other. We hadn’t tasted them yet as it is Ramadhan &iftar time is half an hour ahead.
I am thankful to your carefully written instructions. It is my very first time baking anything. Love sent across the distance from Algeria.
Kate says
Thank you! I’m glad that the instructions were helpful. =) Thank you for taking the time to comment, and I hope you enjoyed the rolls!
Ikram says
We sure did, they tasted wonderful. You’re most welcome &more power to you in all that you do.
Katy Hahlbeck says
Kate I was just looking at recipes and found this Raspberry Pretzel dessert, but I lost it. Can u please tell me where I can find it. Thanks so much. Katy
Kate says
Hi! Was this the recipe that you were looking for?
Melisa says
I just tried this recipe and the results were great! My first time ever making some kind of bread! Definitely a foolproof recipe.
Kate says
Yay!! I’m so glad that you liked the rolls! Thanks for commenting! =)
Sherri says
Could you substitute sugar for honey and how much? I live 20 miles from town and dont have honey on hand.
Kate says
Without having tested it, I’m hesitant to recommend subbing that much honey with sugar. If you don’t have honey, this roll recipe might work better for you. Please let me know if you have any other questions.
Edwin mata says
I got a little confused with the flavor 3 1/2 – 4 1/2 , but is a great recipeu
Kate says
Thank you! Sorry for the confusion! You just need to add enough flour to get the described dough. The reason that there’s a range on the flour is because different factors, like the humidity, can change how much flour you need to add. Hope that helps! =)
Lorraine says
These rolls were absolutely delicious! I made them to go with some homemade chicken soup and it was so good! The honey is what made this! I prefer honey over sugar, and that is what caught my eye when I was looking for a recipe. And the recipe was easy to follow and done quickly! Thank you for this!
Kate says
Thank you! I’m so glad that you liked the rolls! I can imagine how good they were with the soup. =) Thank you for coming back to comment!
Kahna says
Hey! I am also an avid cook and I bake nearly every day. Also, I make homemade bread, baguettes, galettes, sauces, truffles, lollipops, so many things! My husband calls me his personal chef. I’d concur! I digress; my question is do you have a method for prepping and storing for later usage? (Example, prepare recipe up to a certain step, then stop and package in plastic wrap and maybe an airtight container and freeze or refrigerate?) How would that work for this particular recipe, as I am absolutely dying to give it a whirl?!?!?!
Kate says
That’s awesome! I haven’t tested out preparing the recipe to a certain step. However, I think that this recipe might work well prepared through step 9 and then frozen. Since there is yeast die-off when rolls are frozen, the extra yeast in this recipe may work out. Again, I haven’t tried it out, but if I was going to prep them ahead, that’s where I would start. Hope that helps! =)
Samantha says
I’ve made these twice now up through step 9, then put them in the fridge, took them out an hour before baking to rise from being chilled and both times turned out great! Rave reviews from family and coworkers.
Kate says
Thank you so much for your tips! That is very helpful. =)
Rebekah Morgan says
I made these tonight for our Thanksgiving dinner. They were delicious and not one was left.
I also made some gluten free for children and just switched out the flour for the Bob Mills Gluten free 1 to 1 flour mix. They turned out great. Thank you so much for this recipe!
Kate says
Thank you so much! I’m glad that they were a hit. =) And thank you for your note about using GF flour. That’s very helpful.
Elise says
Hi Kate! Oh my Gosh! I gotta tell ya, Sister. This recipe is THE one, the go to KEEPER,period. I finally feel like a real baker, yippee! I’ve never posted a single comment on anything, ever. I’ve never used social media or had an account with any of them in all these years, and I learned computing when we still used floppy disk, ha! I’m so inspired by this recipe though that I just had to let you and your readers know. I think that there are plenty of other people who come and take a peek but just aren’t commenters. I usually read reviews because I feel like sometimes I can find hints and tips in other people’s experiences or mistakes. We all make them, and I did too initially. Although that first batch was “doughy” and dense, they were still soft and pretty delicious anyway. So, I wanted to try again and came back for a second look to see if I could get to the bottom of it. I do believe that I have solved the mystery. I only realized it by reading again the 2 T = Tablespoons, subsequently your clarification of that fact in a reply to a comment, and lastly someone else’s comment that perhaps their yeast was a dud because 2 of the 3 packets that they had used performed the same way. I used 1of 3 packets the first time as well but it was my last packet of instant. All that I had left was a jar of active dry yeast, not a fast acting yeast. I read your tip about just taking the 5-10 minutes to proof it, and simply carry on with the recipe as written. When I began to scoop out the 2 Tablespoons, it dawned on me. The packets are only 2 1/4 teaspoons. It would take nearly 3 packets to meet what the recipe calls for. It’s a simple and easy mistake for a fairly new baker, like myself to make. I sure hope that will encourage others to try it and not discredit your recipe for fear of a “doughy” outcome. It’s that time of year where folks are searching for their Holiday rolls recipe. If they try this one, their search will be over forever. For the record, I’m going to continue using the same recipe with one 2 1/4 teaspoon packet to roll out and twist for soft pretzels, it’s perfect for that. When I want the big fat yeast rolls, 2 Tableapoons it is! Thank you again! Happy Thanksgiving!
Kate says
Thank you so much! That is so helpful! I hadn’t thought about that, but that makes sense. I’m going to add a note about the yeast in case other people are having that issue. Thank you again for your super helpful comment, and Happy Thanksgiving to you, too! =)
Kimberly says
These are rolls are excellent!
Kate says
Thank you so much! I’m glad that you liked them! =)
DebraM says
The rolls came out great! what a time saver.
Kate says
Yay! I’m so glad that you liked them. Thanks for commenting! =)
Sandy says
These were delicious! I ended up with 16 rolls! I am not experienced with yeast and the last recipe (cake) I attempted using instant dry yeast did not turn out, so I was not expecting much. I used the preheated oven to sit my rolls on top of with a tea towel on top but they still had barely risen after 10 min. So after reading the comments, I let them sit longer with “press and seal” wrap on top, about 15-20 more minutes. The rolls rose a little more and finished rising in the oven. My family loved them too! Thanks for a delicious recipe!?
Kate says
Thank you! I’m glad you were able to get them to rise. =) Thank you for coming back to comment!