Soft 30 Minute Buttermilk Dinner Roll recipe that’s made from scratch in just half an hour! You’ll be amazed at how quick & easy they are!
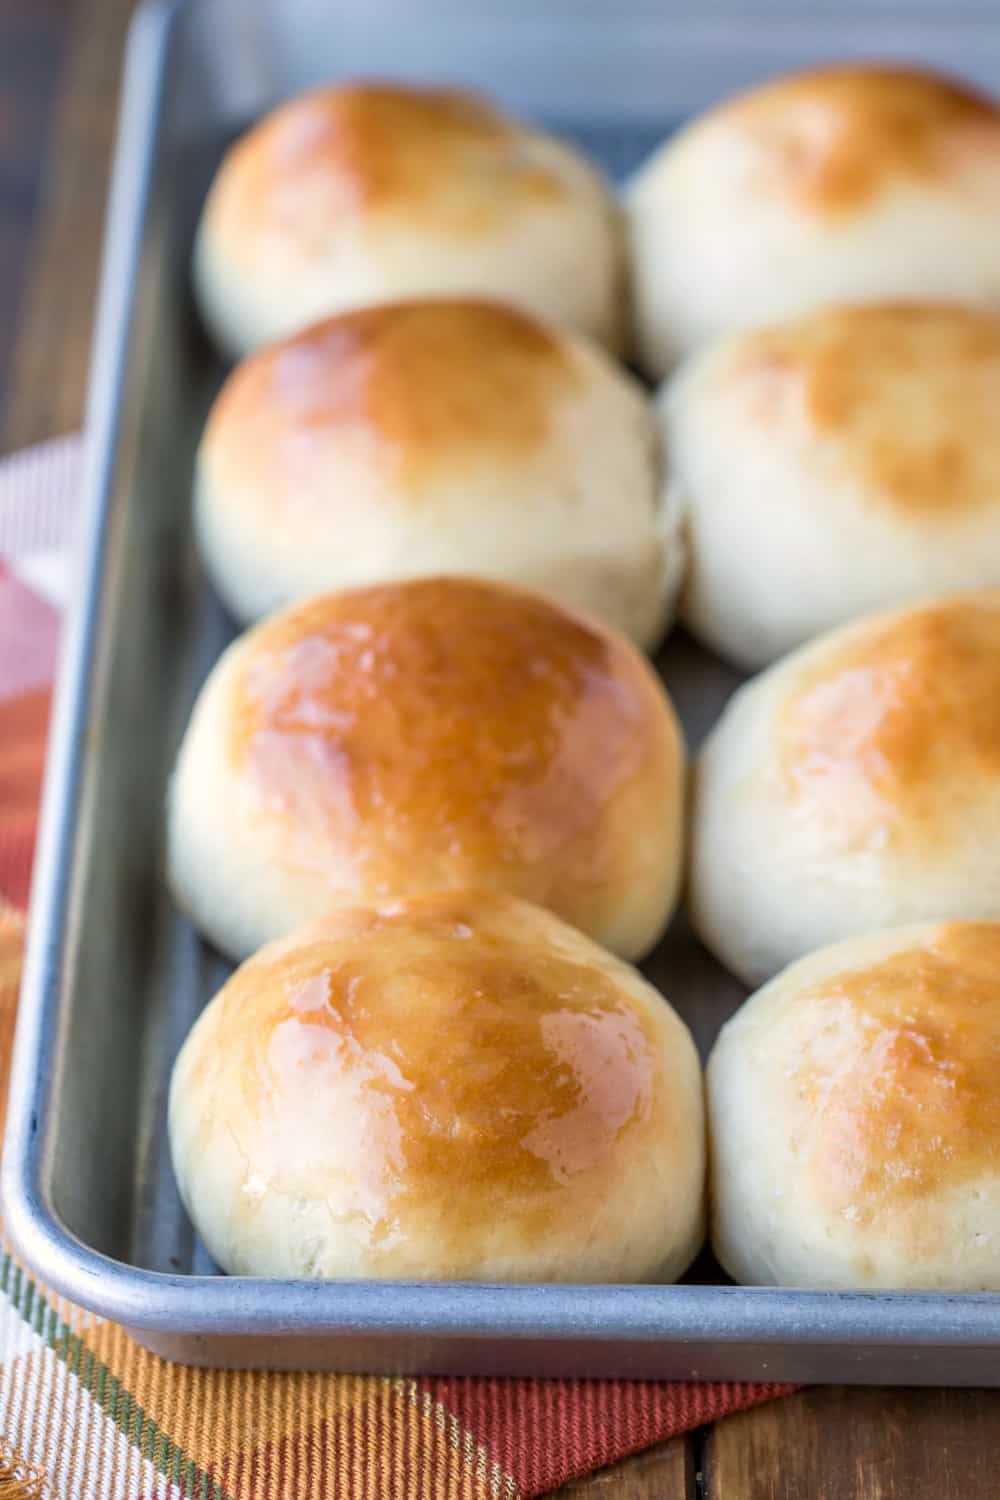
I absolutely love quick dinner roll recipes! And this 30 Minute Buttermilk Roll Recipe doesn’t disappoint!
The rolls are soft and tender (thank you, buttermilk!) with a mild flavor and a hint of sweetness. Because of their mild flavor, they work well with any number of dishes.
These easy rolls are delicious! They would be equally at home on your holiday dinner table or alongside a quick weeknight dinner.
No matter when you make these rolls, you’ll be glad you did!
How to make 30 minute buttermilk dinner rolls
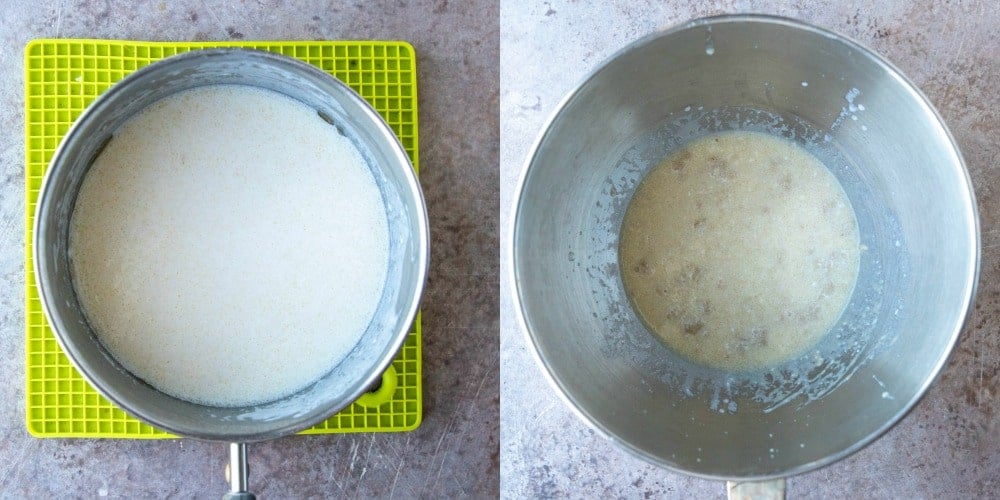
In a small saucepan, melt the butter most of the way. Once the butter is mostly melted, stir in the buttermilk and warm to about 110F.
Add the yeast and honey to a large mixing bowl (or bowl of a stand mixer). When the milk mixture is at temperature, stir into the yeast and honey.
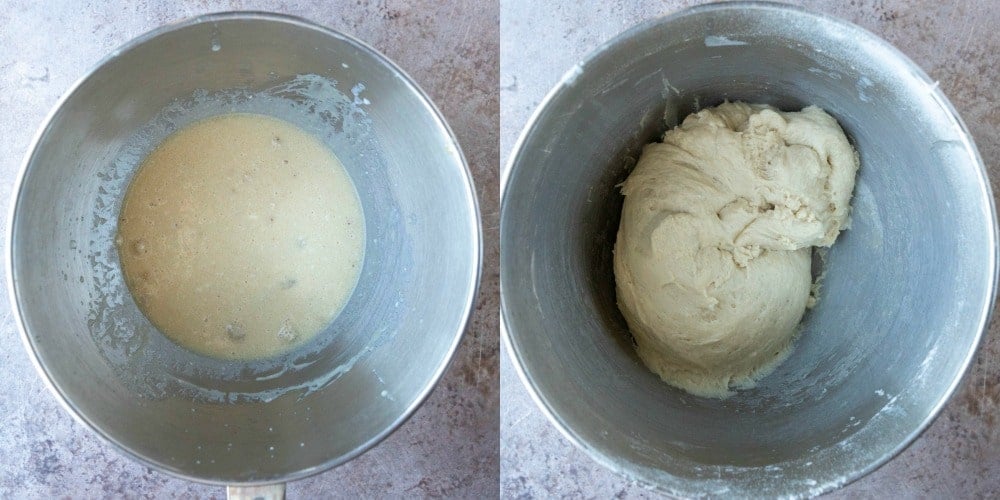
Add the egg and salt, and stir until combined. Mix in 2 cups of flour.
Continue to add flour until the dough clings to the dough hook and clears the sides of the bowl (or until it forms a soft, slightly sticky dough if mixing by hand). The dough should feel a little sticky but shouldn’t come off on your finger when you pinch it.
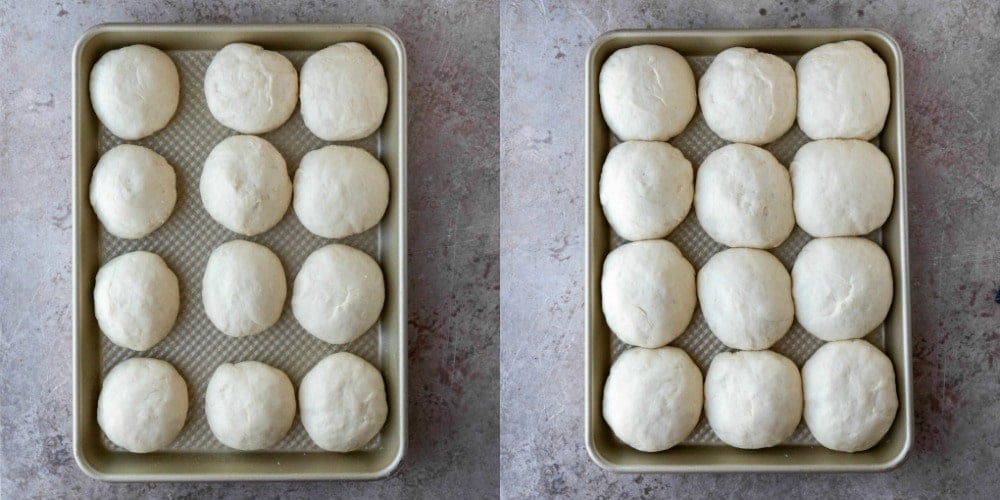
With floured hands, shape the dough into 12 rolls. Cover and let rest in a warm spot for 10 minutes.
Uncover and bake until golden brown. Brush the warm rolls with melted butter.
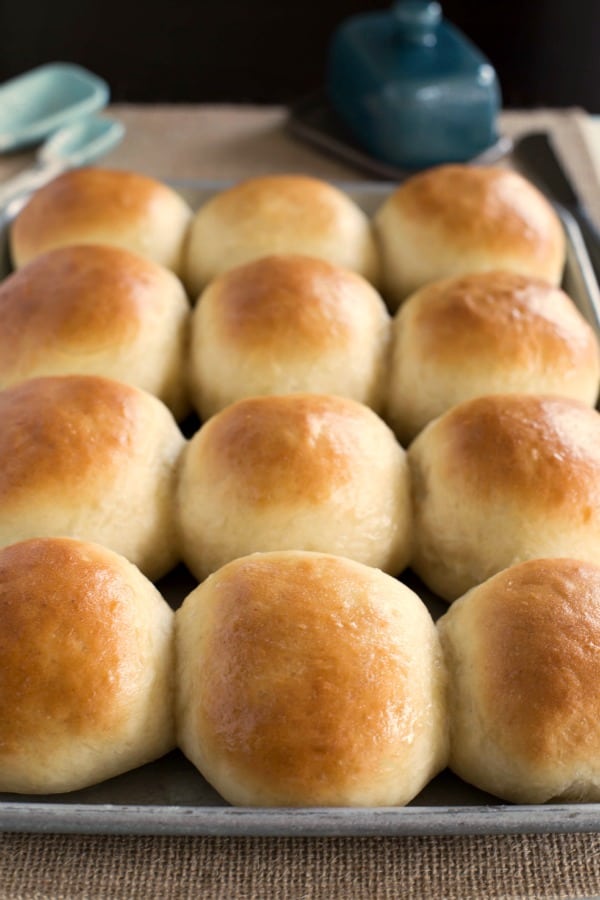
Tips
- Butter: I use salted butter in this recipe.
- Buttermilk: If you don’t have buttermilk, you can make a quick substitute with this recipe.
- Yeast: If you would prefer to use active dry yeast, substitute an equal amount for the instant yeast. After step 5, let the mixture sit for 5-10 minutes, or until foamy. Then, continue with the recipe as written.
- Flour: You don’t want to use too much flour when making rolls. Too much flour will give you a heavy, dense, or dry roll. The dough should still feel a bit sticky, and it’s better to flour your hands when shaping the rolls rather than continuing to add additional flour to the dough.
- Rising: Since the resting/rising time is so short in this recipe, it’s important that you have a warm spot for the rolls to rest in. If your kitchen is cool, you can create a warm spot by turning your oven to 350F for exactly 60 seconds and then turning the oven off. This will give you a spot that encourages the rolls to rise.
- Baking temperature: You may find that you need to decrease the given baking temperature. My older oven worked better with this recipe at 400F. However, my newer oven bakes hotter, and I find that I need to decrease the temperature to 375F in order for the rolls to completely bake though before the tops over-brown. So, please adjust the baking temperature according to the way that your oven bakes.
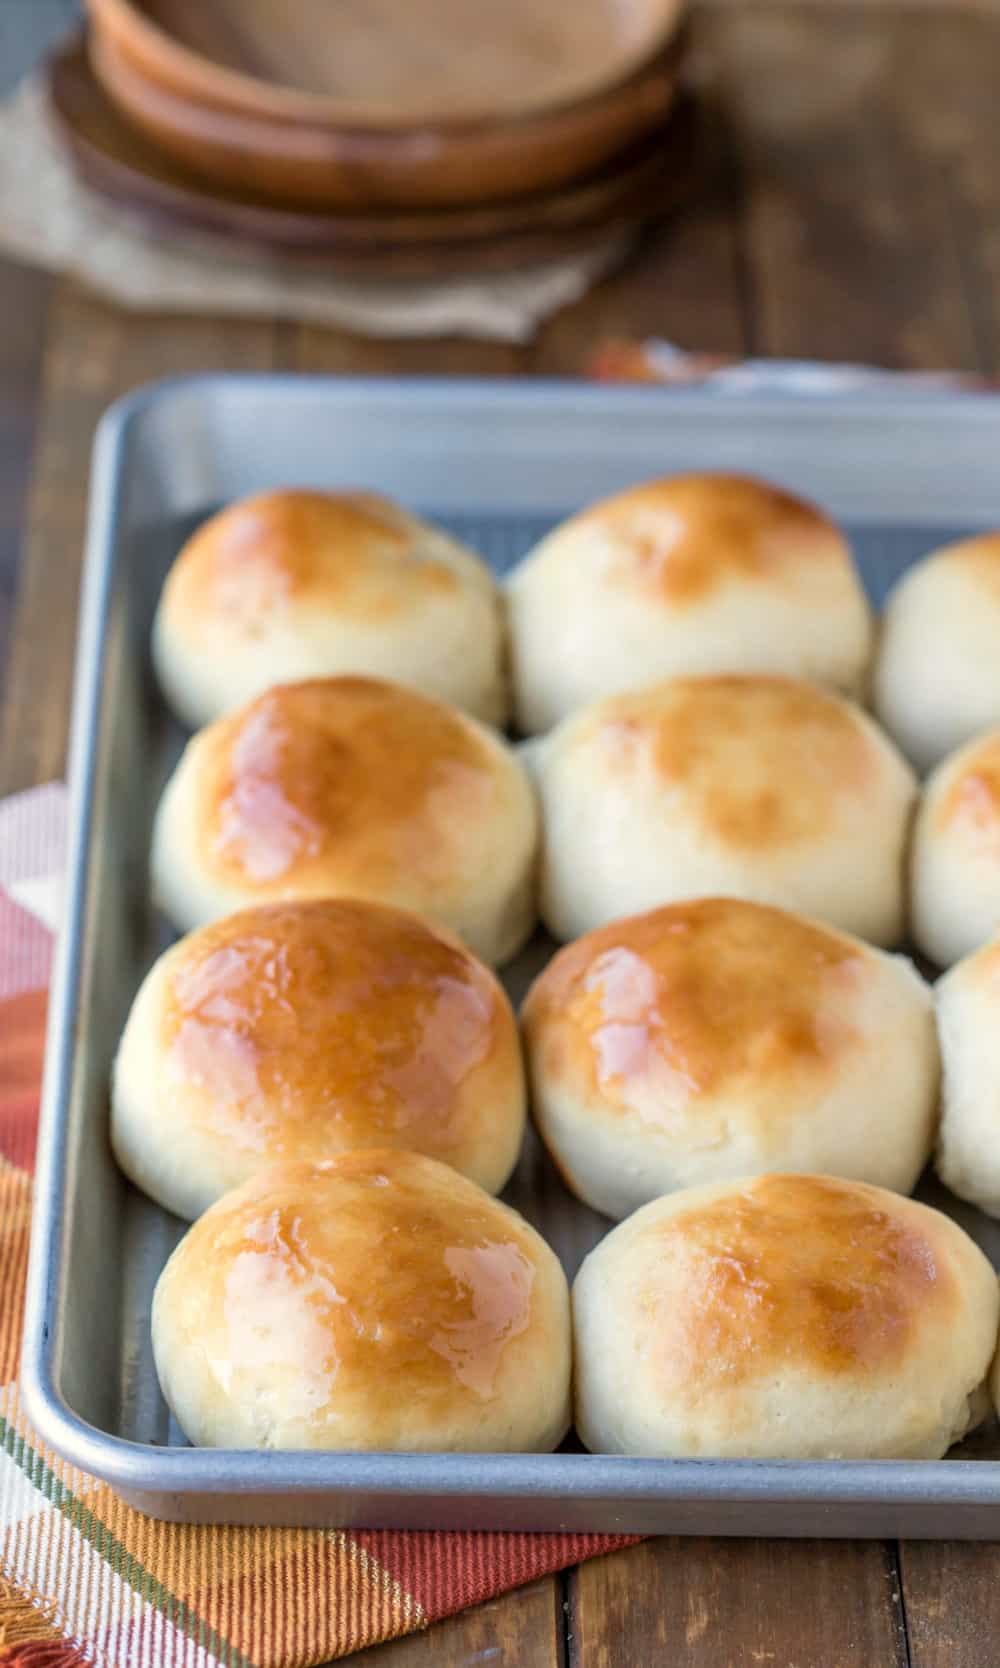
More roll recipes that are ready in 60 minutes or less!
If you’ve tried this 30 minute buttermilk roll recipe, don’t forget to rate the recipe and leave me a comment below. I love to hear from people who’ve made my recipes!
You can SUBSCRIBE to receive my latest recipe newsletters or FOLLOW ME on FACEBOOK, INSTAGRAM and PINTEREST for even more delicious food.

30 Minute Buttermilk Roll Recipe
Equipment
- 9x13 rimmed baking sheet
Ingredients
- ¼ cup butter plus extra for brushing on rolls
- 1 cup buttermilk
- 2 tablespoons instant yeast
- ¼ cup honey
- ½ teaspoon salt
- 1 large egg
- 3– 4 cups all-purpose flour I use about 3 ¼ cups
- 2 tablespoons butter melted
Instructions
- Preheat oven to 400 F. Lightly grease a half sheet pan or a 9x13-inch rimmed cookie sheet.
- In a small saucepan, melt butter.¼ cup butter
- When butter is mostly melted, stir in buttermilk, and heat mixture to 110 F.1 cup buttermilk
- Meanwhile, add yeast and honey to the bowl of a stand mixer fitted with a paddle attachment (or a large mixing bowl if mixing by hand).2 tablespoons instant yeast, ¼ cup honey
- When milk mixture is at temperature, add to yeast and honey; stir to combine.
- Add salt and egg, and stir until combined.½ teaspoon salt, 1 large egg
- Stir in 2 cups all-purpose flour.3– 4 cups all-purpose flour
- Add remaining flour 1/4 cup at a time until dough clings to paddle and cleans the sides of the bowl. Dough will feel a little sticky, but it shouldn't come off on your fingers if you pinch it.
- With floured hands, shape dough into 12 rolls, and place dough on prepared baking sheet.
- Cover, and let dough rest for 10 minutes.
- Bake for 8-12 minutes, or until lightly golden brown.
- When rolls are done baking, brush with 2 tablespoons melted butter.2 tablespoons butter
Video
Notes
- Butter: I use salted butter in this recipe.
- Buttermilk: If you don't have buttermilk, you can make a quick substitute with this recipe.
- Yeast: If you would prefer to use active dry yeast, substitute an equal amount for the instant yeast. After step 5, let the mixture sit for 5-10 minutes, or until foamy. Then, continue with the recipe as written.
- Flour: You don't want to use too much flour when making rolls. Too much flour will give you a heavy, dense, or dry roll. The dough should still feel a bit sticky, and it's better to flour your hands when shaping the rolls rather than continuing to add additional flour to the dough.
- Rising: Since the resting/rising time is so short in this recipe, it's important that you have a warm spot for the rolls to rest in. If your kitchen is cool, you can create a warm spot by turning your oven to 350F for exactly 60 seconds and then turning the oven off. This will give you a spot that encourages the rolls to rise.
- Baking temperature: You may find that you need to decrease the given baking temperature. My older oven worked better with this recipe at 400F. However, my newer oven bakes hotter, and I find that I need to decrease the temperature to 375F in order for the rolls to completely bake though before the tops over-brown. So, please adjust the baking temperature according to the way that your oven bakes.
- Nutrition values are estimates.
Nutrition
Did You Make This Recipe?
Share it with me on Instagram @i_heart_eating and follow on Youtube @katedean and Pinterest @katedean for more!
Reader Interactions
Love this recipe?
Share your thoughts below and let’s chat! Make sure to connect with me on your favorite social platform below and show me what you made!


Comments & Reviews
Janet says
Why does the ingredients list call for 3-4 cups of flour, but the directions call for 2 cups + 1/4 cup (2-1/4 cups total)?
Kate Dean says
Hi, the directions call for starting with 2 cups of flour and then adding additional flour 1/4 cup at a time until the dough reaches the correct consistency
Cynthia says
I made these for my Christmas dinner. They were a hit! Sweet and light and very delicious! They reminded me of the rolls made by the cafeteria ladies in the 60s when I was in elementary. Great rolls and they brought back wonderful memories. I’ll be sharing the recipe and making them very often.
Kate says
Thank you! I love that the rolls brought back memories!
Phyllis says
Great recipe! I am a bread maker, too, but arthritis has made me give up traditional bread making (kneading). I really appreciate you sharing this recipe. The only kneading was to form each roll. Mine came out beautiful and light despite substituting 2 cups of regular flour with two cups fresh ground hard red wheat (a 50/50 mix). Nothing better than a hot, buttery home made yeast roll. Your efforts in pulling this recipe paid off. It’s a “keeper recipe”.
Kate says
Thank you so much!
Laura Miller says
This recipe was so delicious! I used full fat buttermilk so I’m sure that didn’t hurt the flavor. They were slightly sweet and the texture held up! I will say I had to double or so the rose time for whatever reason, but other than that, easy peasy!
Kate says
Thank you!
Fifi says
Out of honey…could you use sugar and how much?
Kate says
Yes, you can use granulated sugar. Honey is much sweeter than granulated sugar, so you would need about 2/3 cup of granulated sugar. Also, granulated sugar pulls moisture while honey adds moisture. You may find that you need to add additional buttermilk or go lighter with the flour to help avoid dry dough.
Grace says
Came out wonderfully! Thank you for this.
Kate says
You’re welcome! I’m glad you liked the rolls!
Vilma says
This recipes is really good. The first time I made it. It was perfect. I tried 3 times again and I can not get them light and soft. But reading all the comments I think my mistake is in the buttermilk and butter heat! I think I’m killing the yeast processed. I’m going to try again. Because they are really good!
Thank you for sharing
Kate says
Thank you! I’m sorry that you’ve had trouble with it the other times! Absolutely! When the liquid is too hot, it will kill the yeast. Even if you’re using instant yeast, you can let it proof for 5-10 minutes to make sure that has activated before you continue. At least that way if it hasn’t, you don’t waste the rest of the ingredients.
Another factor can be room temp. If your kitchen is cool, it can slow the rising speed down. You can turn on your oven to 350F for exactly 60 seconds. Then turn it back off again. This will create a warm, draft-free spot to let the rolls rest. Hope that helps!!
Aunt Mamie says
I haven’t made anything with yeast in 10 years. Seeing this recipe for 30 minute dinner rolls sounded easy. These rolls were delicious and made the house smell wonderful. I will make for Thanksgiving. Best part – No preservatives. Hooray for homemade!
I used regular yeast and gave it an extra 10 minutes to activate/bubble before adding dry ingredients. The buttermilk balances the sweetness of the honey.
I plan to make a breakfast version using cinnamon and sugar (might add raisins pre-soaked to soften in hot water and drained) then roll out long tubes and wind up into snail shape.
Kate says
Yay!! I’m so glad! The breakfast version sounds delicious! =)
Tuti says
My rolls did not turn out as pretty as yours but the flavoring if the rolls is really good. Also, how much should the dough rise? Did I kill my yeast? My rolls the inside looks like a biscuit texture. Is that how it should look like?
Kate says
The rolls won’t rise much during that time. They’ll be just a bit larger when they’re finished rising. No, they should look like a dinner roll inside. I’ll try to make this recipe again in the next couple days so I can post photos to show you what they look like throughout the process.
Kate says
Hi! I made a batch of the rolls and took pictures of the process as I went. I’ve added those photos to the “how to make” section. Also, since I’ve made these rolls several times over the years, I added a “tips” section with tips and tricks that I’ve found as I’ve made this recipe. I hope that the photos and the tips will help for next time. Also, please feel free to ask if you have any more questions.
GiGi says
A surprisingly easy recipe that makes light fluffy rolls quickly. My family loves them.
Kate says
Thank you!
Yana says
Thank you for this awesome recipe. I also thought that 2 tablespoons of yeast is too much for the amount of flour( I don’t like to feel too much the taste the yeast)
I used 2 teaspoons of active dry yeast. Didn’t change anything else in the recipe or the process. I kneaded the dough by hand.( don’t have a standing mixer) it took me about 5-10 min to form the dough this way on the countertop. The buns turned out delicious and just as beautifully looking as on your photo:) Love the quickness of this recipe and how they taste and how they look! And the smell!..
Thank you again!
Kate says
You are very welcome! Glad that the rolls came out well for you! Thanks for commenting.
Billie says
The recipe was as promised, fast and easy. They are not as light as the ones that are kneaded and have a double rise time. But… they definitely produce a very tasty hot bread roll that can be on the table in 30 minutes. These are just perfect for the middle of the week when you want something flavorful but don’t have the 3 hours to spend on making bread rolls. I will be using this recipe on a regular basis.
Kate says
Thank you! If you’re looking for something in between the usual 3 hour roll and this 30 minute roll, you may like my 60 minute dinner rolls. They’re a little lighter and fluffier than these rolls.
Lolli says
OH MY GOSH! My son made these to go with our steak dinner last night. We could’ve just eaten these!! AH-MAZE-ING!! Definitely a keeper!
Kate says
Yay!! I’m so glad!! Thank you for taking the time to comment! =)
John Trotter says
Just found this recipe. In the ingredient list you have 2 tablespoons of instant yeast. 1 table of yeast sounds an awlful lot for the amount of flour being used.
Kate says
Hey! The amount of yeast corresponds to the rising time, not the amount of flour in the recipe. That’s why you can use 1/2 teaspoon of yeast with 3 cups of flour in a no knead bread that has an 18 hour rising time versus 2 1/4 teaspoons of yeast and 3 cups of flour in a traditional roll dough with a 1.5 hour rising time.
Since the rising time is so short for these rolls, the increased amount of yeast is necessary. Hope that helps!
Coleen Hamilton says
From what I read, dinner rolls need to be kneaded sufficiently so that the gluten forms long strings. When making biscuits, however, the biscuit dough is lightly mixed forming shorter strands of gluten. These two techniques result in the difference in texture. The instructions don’t tell you to knead the dough but just to take get from the mixer and form it into balls. I’m going to try and make this recipe however I’m going to after the dough is finished mixing I’m going to need it until it’s elastic. Then I’ll shake my rolls and let it rise.
Kate says
True! The yeast in the dinner rolls also makes a big difference in the texture of the final product. I’d be interested to hear how they come out! Thanks! =)
A. Johnson says
Made a double batch of these rolls for Thanksgiving. They are absolutely easy, quick, and delicious. I found that a 9×13 pan was too small to bake 12 rolls. I had to use a a sheet pan for each batch. I think this recipe will be a frequently used one. I have already been asked for it. Thanks for sharing it.
Kate says
Thank you!
Liz says
I tried them today but had the wrong amount of yeast. Will try them again with two tablespoon of yeast.
Do I need to let the yeast sit before I put the flower in?
Kate says
If you use instant yeast, you can just mix it in and keep going. If you use active dry yeast, you need to proof it (mix it with the sugar and liquid) and let it sit for 5-10 minutes, or until foamy, before continuing. Hope that helps!
Jamie says
I have tried this recipe 3 separate times and everytime they turn into really heavy biscuit type things that I need to throw out:(
Forst time I had the yeast measurement wrong and these past 2 times….I’m not sure:( I really want them to work cause it’s so fast. I’m using “quick-rise instant yeast” is that right????:(
Kate says
I’m sorry to hear that! Since these rolls have such a quick rising time, it’s important that the water be warm enough (but not so hot that it kills the yeast) and that they rise in a warm spot. Do you think either of those things were issues?
Coleen Hamilton says
From what I read, dinner rolls need to be needed sufficiently so that the gluten forms long strings. When making biscuits, however, the biscuit dough is lightly mixed forming shorter strands of gluten. These two techniques result in the difference in texture.
Anna Madden says
Tried these rolls, used 3 cups of flour, but they were more like a biscuit then a yeast dinner roll, family complained that they had no taste. I was expecting them to be very light and airy, mine turned out very dense.
Kate says
I’m sorry to hear that! They shouldn’t be dense like a biscuit. I’m happy to help you troubleshoot if you’d like.