
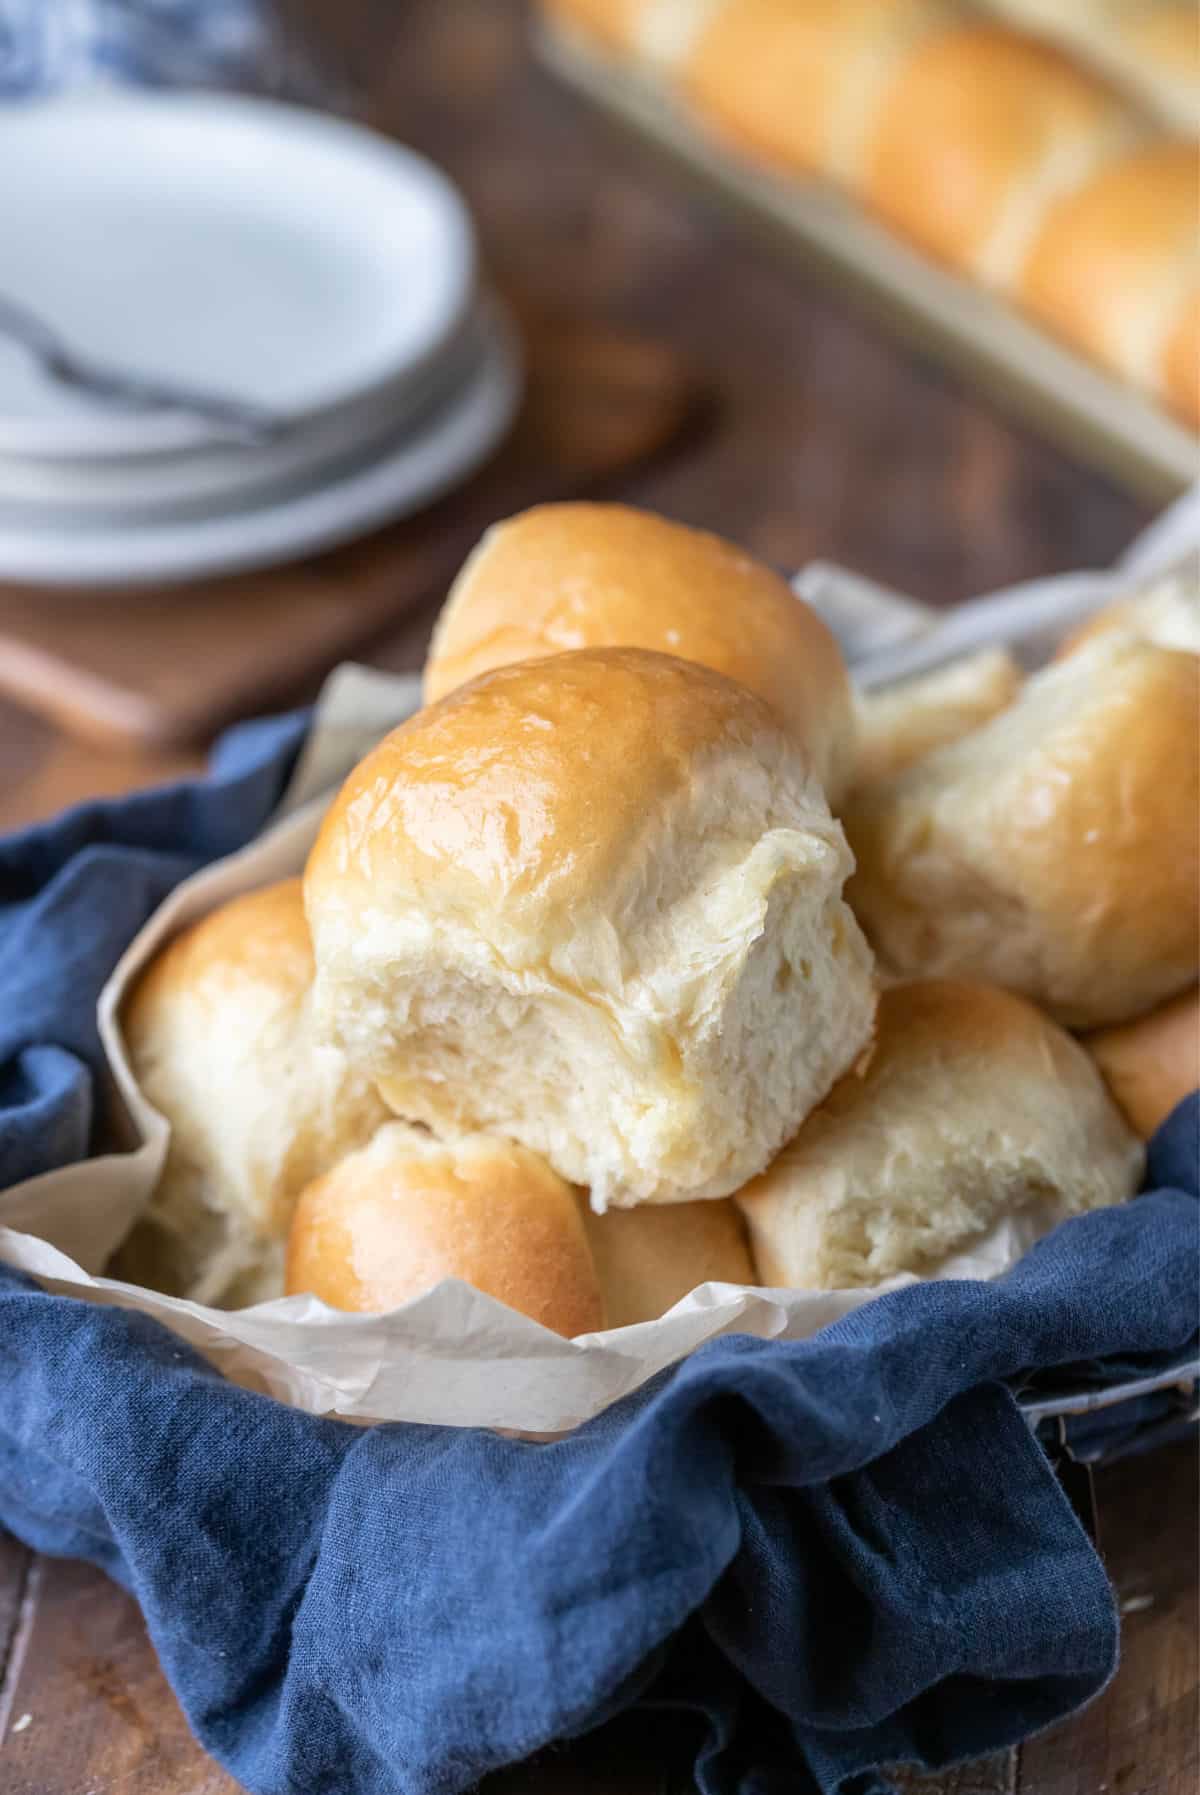
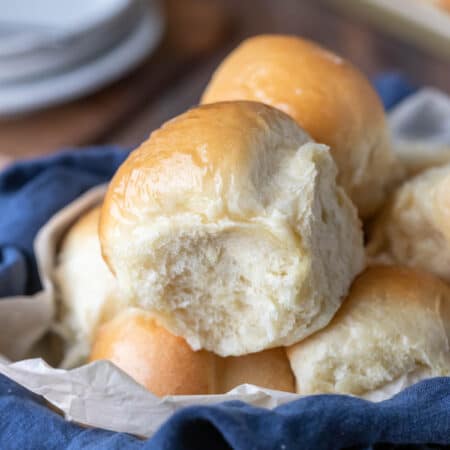
Homemade dinner rolls! Make the best soft and fluffy dinner rolls with this easy recipe! These old fashioned rolls are so simple to make.

My family can’t get enough homemade bread! Homemade bread is just one of those things that can’t be beat.
The smell of baking bread is enough to bring even my pickiest kid to the table. But a lot of people find working with yeast and making homemade dinner rolls to be intimidating.
So, let’s fix that! I’ve included step-by-step photos, tips, and plenty of notes to help you make amazing dinner rolls.
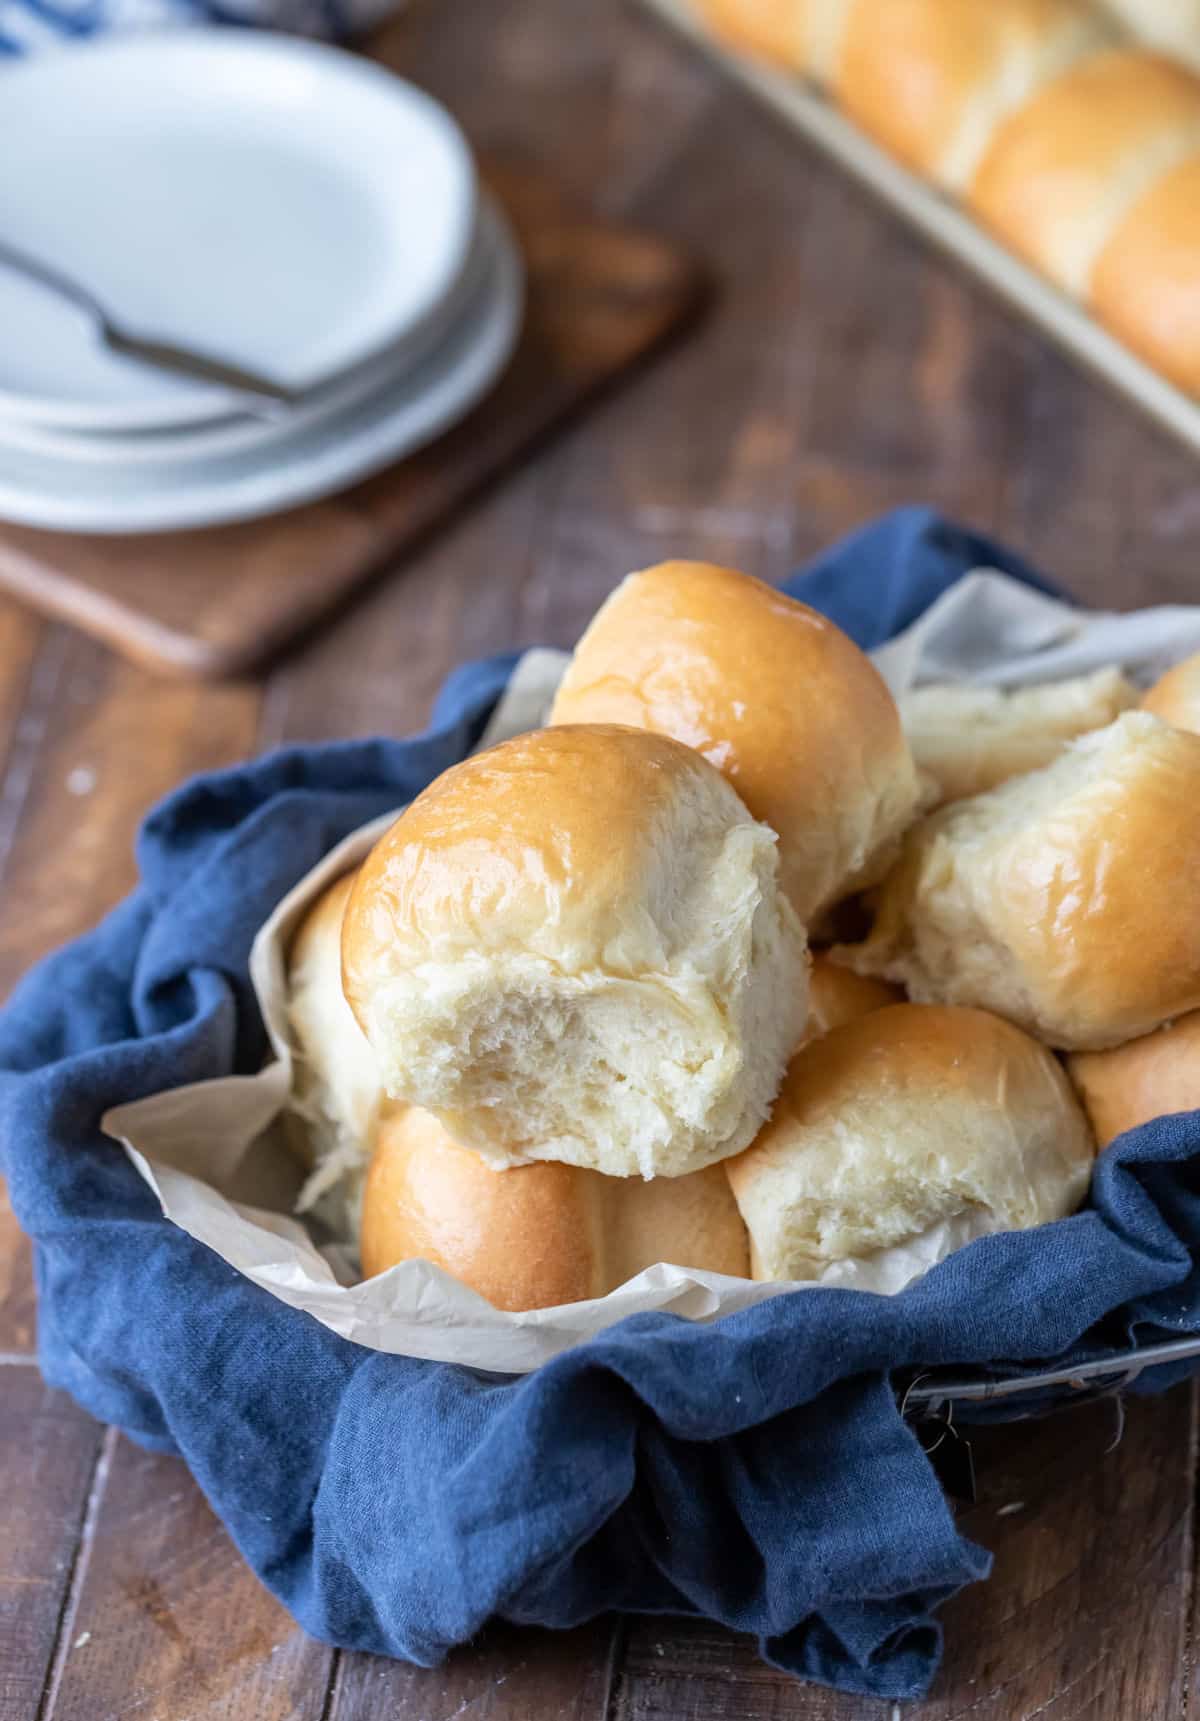
And the rolls definitely are amazing! They are soft and fluffy, old-fashioned homemade dinner rolls. Give this dinner roll recipe a try, and you’ll find these rolls make a lovely side for weeknight and holiday dinners alike!
“I have made these several times and we love them! I didn’t know it could be so easy and quick to have fresh rolls on the dinner table☺️ my little girls love helping make the rolls too. Delish👍” – Janna
How to make dinner rolls (from scratch)
Here you’ll find step-by-step photos showing how to make this recipe. The full recipe, including ingredients, is given below.
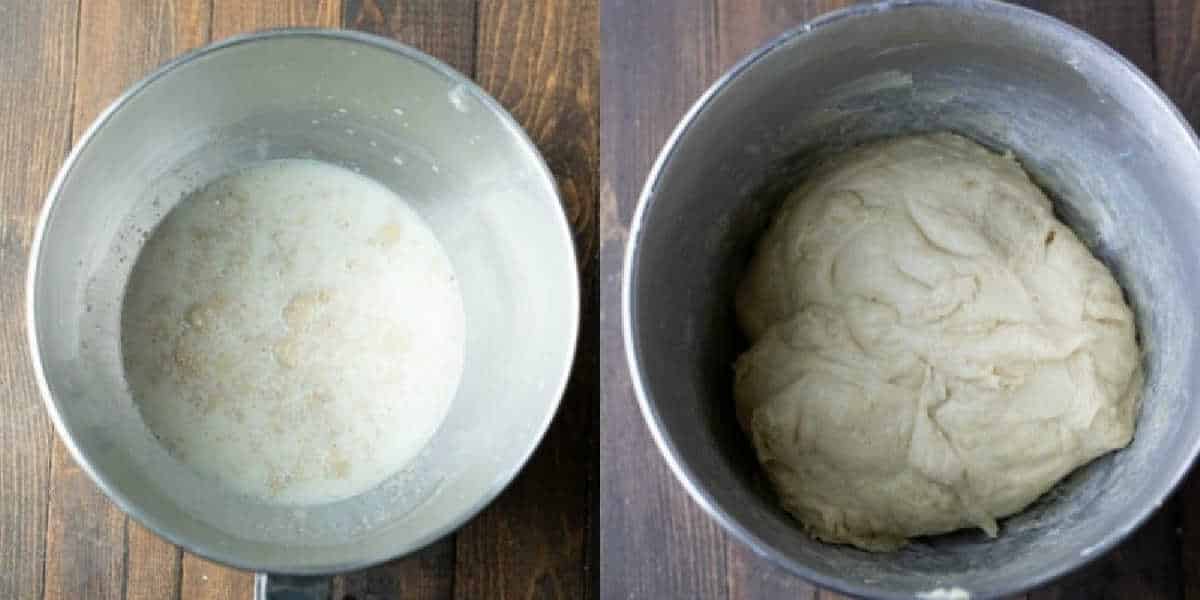
Step 1: Begin by mixing 3 cups of flour, yeast, sugar, salt, milk, butter, and egg in a mixing bowl until combined.
Step 2: Continue adding flour until a soft dough forms.
Step 3: The dough should cling to the dough hook and clear the sides of the bowl, and the dough should feel soft and slightly sticky but shouldn’t come off on your fingers when you pinch it.
Step 4: After kneading, cover the dough and let it rise.
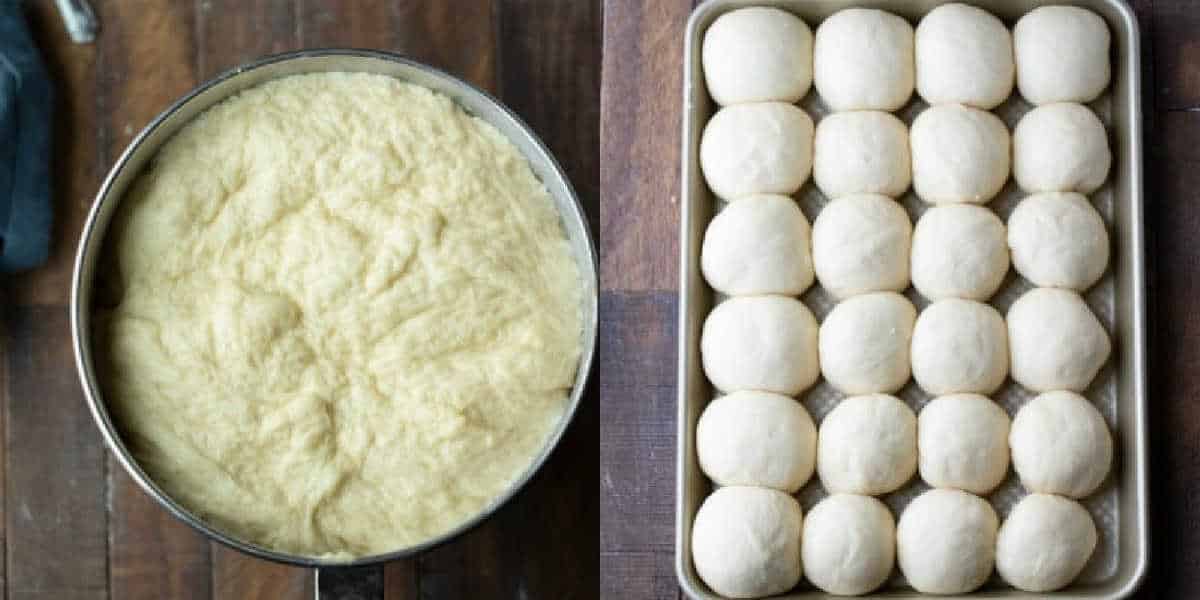
Step 5: After the dough rises, divide the dough into 24 pieces.
Tip >> I divide the dough in half. Then, I divide each half in half to form 4 pieces. I then divide each of the 4 pieces in half again to form 8 equal pieces. Each of those pieces I divide into 3 rolls to form 24 rolls.
Step 6: Place the dough onto the prepared baking sheet. Cover, and let the rolls rise.
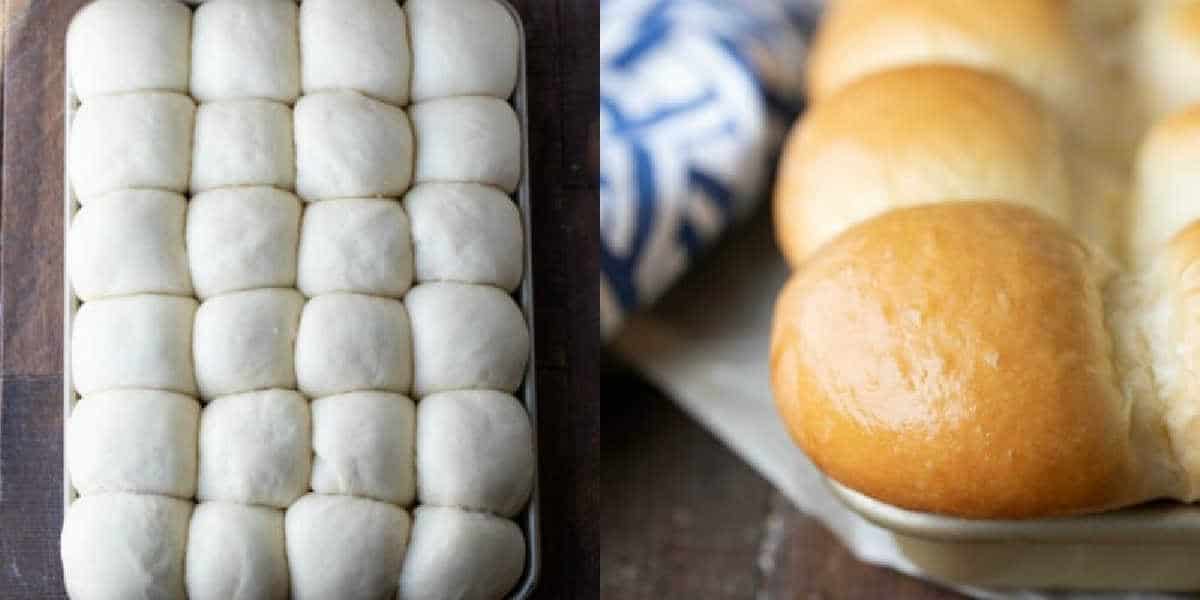
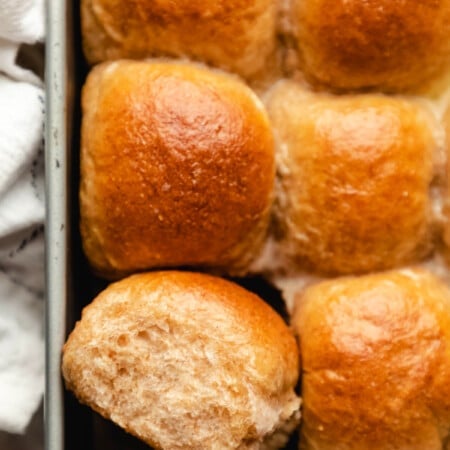
Step 7: Once the rolls have risen the second time, bake the rolls.
Tip >> If the rolls brown too quickly, tent the rolls with aluminum foil.
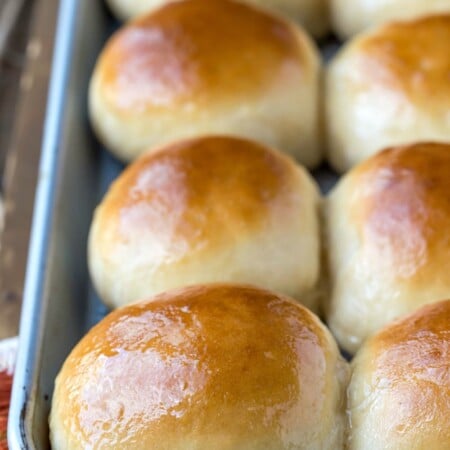
Step 8: The rolls should be golden brown. Once the rolls have finished baking, brush the hot rolls with melted butter before serving.
Recipe Tips!
- Temperature: Temperature is important when working with yeast. The milk should be warm, but it shouldn’t be hot. If it’s too hot, it can kill the yeast.
- Using a kitchen thermometer is the best way to check the temperature of the milk. There’re about $10, and you can use a kitchen thermometer for a variety of cooking and baking tasks.
- Butter and eggs: the butter and egg should be at room temperature. Otherwise, if they’re cold, they can bring down the temp of the dough and cause the rolls to rise slowly.
- Yeast: Using fresh yeast is key! Old yeast can lead to a dough that doesn’t rise.
- Flour: A range in flour measurements is given. You only need to use enough flour to form a smooth, slightly sticky dough.
Recipe FAQs
You can make the dough by hand. I recommend adding an additional minute or two to the kneading time if mixing by hand.
You can! If using active dry yeast, combine the yeast, sugar, and warm milk in a small bowl. Let it stand for 5 minutes, or until foamy. If the yeast doesn’t foam, start over, or the rolls won’t rise.
You can! Make the rolls through step 9. Place them in a freezer-safe container, and wrap tightly with plastic wrap. Let the rolls thaw and rise through the second rise before baking. I recommend increasing the amount of yeast by 20% to help with the yeast die-off in the freezer.
Storage
The dinner rolls should be stored in an airtight container at room temperature. These rolls should keep for up to 3 days.
More dinner roll recipes!

If you’ve tried this dinner roll recipe, don’t forget to rate the recipe and leave me a comment below. I love to hear from people who’ve made my recipes!
You can subscribe to receive my latest recipe newsletters or follow me on Facebook, Instagram and Pinterest for even more delicious food.

Dinner Rolls
Ingredients
- 4 -5 cups all purpose flour divided
- 2 tablespoons instant yeast
- 1/3 cup granulated sugar
- 1 teaspoon salt
- 1 ½ cups warm milk¹ about 105-110 F
- 6 tablespoons butter at room temperature
- 1 large egg at room temperature
- 2 tablespoons butter melted
Instructions
- Grease a rimmed 9×13-inch baking dish. Set aside.
- Combine 3 cups of flour, yeast, sugar, salt, warm milk, 6 tablespoons butter, and egg in the bowl of a stand mixer.
- Mix on low using the dough hook until the ingredients are combined.
- Continue adding flour, 1/4 cup at a time, until the dough clears the sides of the bowl and clings to the dough hook. The dough should feel smooth and slightly sticky but shouldn’t come off on your fingers if you pinch it.
- Continue to knead on low for 2 minutes.
- Cover the bowl.
- Let the dough rise for 30 minutes in a warm, draft-free spot.
- Uncover, and deflate the dough by punching down.
- Divide dough to form 24 rolls.²
- Place rolls onto prepared baking pan.
- Cover, and let rolls rise for an additional 30 minutes in a warm draft-free place.
- Toward the end of the rising time, preheat oven to 375 F.
- Bake the rolls for 12-15 minutes, or until light golden brown.³
- Remove rolls and brush with the 2 tablespoons melted butter.
Video
Notes
- Anything from skim to whole milk will work. Whole milk will give you a richer roll.
- I divide the dough in half. Then, I divide each half in half to form 4 pieces. I then divide each of the 4 pieces in half again to form 8 equal pieces. Each of those pieces I divide into 3 rolls to form 24 rolls.
- If the rolls are browning too quickly, tent the rolls with foil.
- Nutrition values are estimates.
Nutrition
Did You Make This Recipe?
Share it with me on Instagram @i_heart_eating and follow on Youtube @katedean and Pinterest @katedean for more!
Originally published 4/18/19. This recipe is regularly updated.
Reader Interactions
Love this recipe?
Share your thoughts below and let’s chat! Make sure to connect with me on your favorite social platform below and show me what you made!


Comments & Reviews
Jenifer says
Great rolls!
I put everything in the mixing bowl except the egg and flour as the other person posted. Mixed for a bit, added egg. Mixed a bit. Added flour. It ended up using almost all 5 cups of flour.
They turned out great! Thank you!
Kate says
Thank you! I’m glad that you like the rolls!
Meghan G says
Can you make, freeze, then rewarm? I’m considering making for thanksgiving but wanna premake them!
Kate says
You can! The rolls freeze/reheat well.
Erin says
Just about to get these puppies into the oven to bake, but I think I used the wrong kind of dish! When I read “baking dish,” I think my glass ones. I THINK I should have used a baking SHEET…these guys are really squished and nowhere near the right shape! LOL! I hope they bake okay!
Kate says
Hi! You can absolutely use a rimmed metal baking sheet if you prefer.
Diana says
These rolls received great compliments from family and friends.
Kate says
Yay!! So glad to hear that!
Brianna says
I’ve attempted buns multiple times and even this time my dough will not rise! What am I doing wrong?
Kate says
Hi! The first thing that I would check is your yeast. You can mix the yeast with the warm milk and 1 tablespoon of sugar. If it doesn’t proof (foam up) after 5-10 minutes, toss it out because your bread won’t rise.
jenny says
Have you ever used this recipe for cinnamon rolls? I made the rolls for dinner last night and their perfect texture and sweetness made me want to try it as cinnamon rolls!
Kate says
Glad you liked the rolls! I haven’t, but I think that should work just fine.
Laura says
Can u use margarine instead of butter?
Kate says
I haven’t tried it to say for certain, but I would guess that it would be ok.
Miranda MacNeill says
First batch was awful, but I used Becel. Second batch I used margarine and wow these rolls are absolutely to die for❤ I have saved this recipe to use in the future. Thank you
Kate says
I’m glad they turned out well for you! Thanks for noting that Becel doesn’t work well in this recipe.
Li v Cruz says
These are perfect ☺thanks
Kate says
Thank you!
Brenda says
Would I use the same amount of dry active yeast as I would instant yeast listed in the ingredients? Thanks!
Kate says
Yes, you will use the same amount of active dry yeast. You’ll just proof the yeast by mixing it with the warm milk and 2 tablespoons of the sugar and letting it sit for 5-10 minutes or until foamy. Then, you’ll mix the foamy (proofed) yeast along with the remaining sugar and the rest of the ingredients in step 2. Hope that helps! Please let me know if you have any other questions!
Misty says
Very good roll. Easy to make and great taste and consistency.
A few notes (some probably won’t affect outcome, but as info):
– I mixed the salt, yeast, butter, and sugar with the dough hook for just a few seconds before adding the egg. After letting the egg mix in for a few more seconds to break it up a little I started incorporating the flour. I started with the 3 cups first (make sure to spoon the flour into the measuring cup and level off- don’t dip the cup into the flour bag and pack it in the cup). I ended up using a full 5 cups of flour in this instance.
– I greased my 9 x 13 glass baking dish with butter (because you can never use too much butter).
– I baked them on the very center rack of my oven. I set the timer at 15 min. and the tops were starting to get fairly brown so I tented foil over them at around the 12 minute mark. The bottoms were still very light and I put them back in the oven for 3 more minutes. Oven times of course vary.
Kate says
Hi! I’m glad you liked the rolls. =) And thanks for taking the time to share your notes!
Katie says
These were the best rolls!! I’ve tried lots of recipes and this takes the cake!
Kate says
Yay!! Thank you so much!! =)
Lara says
The rolls and dough turned out great! However after 15 minutes the middle was quite undercooked. Had to bake for 15 minutes longer. But that could be cause I used a glass 9×13 container for baking.
Kate says
Hi! I’m glad they came turned out well for you! The reasons that I say “or until golden brown” is because oven temperatures can vary tremendously and baking dish materials can make a huge difference in the baking time. =)
Erin says
Good to know! I just commented that I think a “baking sheet” might have been better than “baking dish!” Mine are about to go in the oven in a glass baking dish!
Michael says
fabulous, the best I’ve ever baked!!!
Kate says
Thank you so much!
Izzy says
These rolls are so good! They will be on our Thanksgiving table.
Kate says
Thank you! I’m glad that you’re enjoying the recipe and that it will be a part of your Thanksgiving celebration. =)
Bonnie says
I have tried bread recipes so many times in the past with failures. Your blog and recipes like this has helped get beyond my flops and maKe a try at it once again. The kneading accessory on the mixer helps, too! After a huge success with your pizza dough, I just tried this yesterday. Although my rolls did not look as pretty and smooth as your pics, they are beyond wonderful rolls. I need to work on how to roll these in my hand before I place them in the pan – any pointers? I am thinking of inviting the whole family for Thanksgiving and making these! I’ll be a gramma who can actually make buns; I am thrilled
Kate says
Yay!! I’m so happy to hear that! Yes! I just made a video that shows how to shape rolls. I hope to have it up asap. =)
Caroline says
Hi Kate! Quick question, if I only wanted to bake half the dough, can I freeze the other half for another day? At what stage would I freeze it? The look fabulous! Thanks so much for sharing.
Kate says
Hi! Thanks! Once you’ve finished kneading the rolls in step 5, you’ll want to shape them and freeze them (without letting them rise). Also, if you’re planning to freeze them for more than a couple days, increase the yeast by 20%. Hope that helps!
Mary Victor says
Hi Kate, is it possible to roll the flour by hand instead of the machine. And if I do use my hand do I have to take note of any thing eg not to knead it too much etc
Kate says
Yes, you can mix the dough by hand. It takes more work, but it can be done! You’ll need to add an extra minute or two to the kneading time when making this by hand. Hope that helps!
Mary Victor says
Thanks Kate n will work on it and give you a feedback when I try the rolls
Gabi says
I read a similar recipe yesterday and it had potatoes filled in these rolls. How about you incorporate more ingredients like veggies etc in the filling of the roll?
Kate says
Hi! Are you looking to incorporate potato into the dough, or are you looking to fill the rolls with a veggie filling?
Linda says
I love your recipes! Can’t wait to try these rolls!
Kate says
Thanks! I hope you love the rolls. =)
Deb says
Easy and delicious!!! I will make these again and again and again.
Kate says
I’m so glad! Thank you so much for commenting! =)