
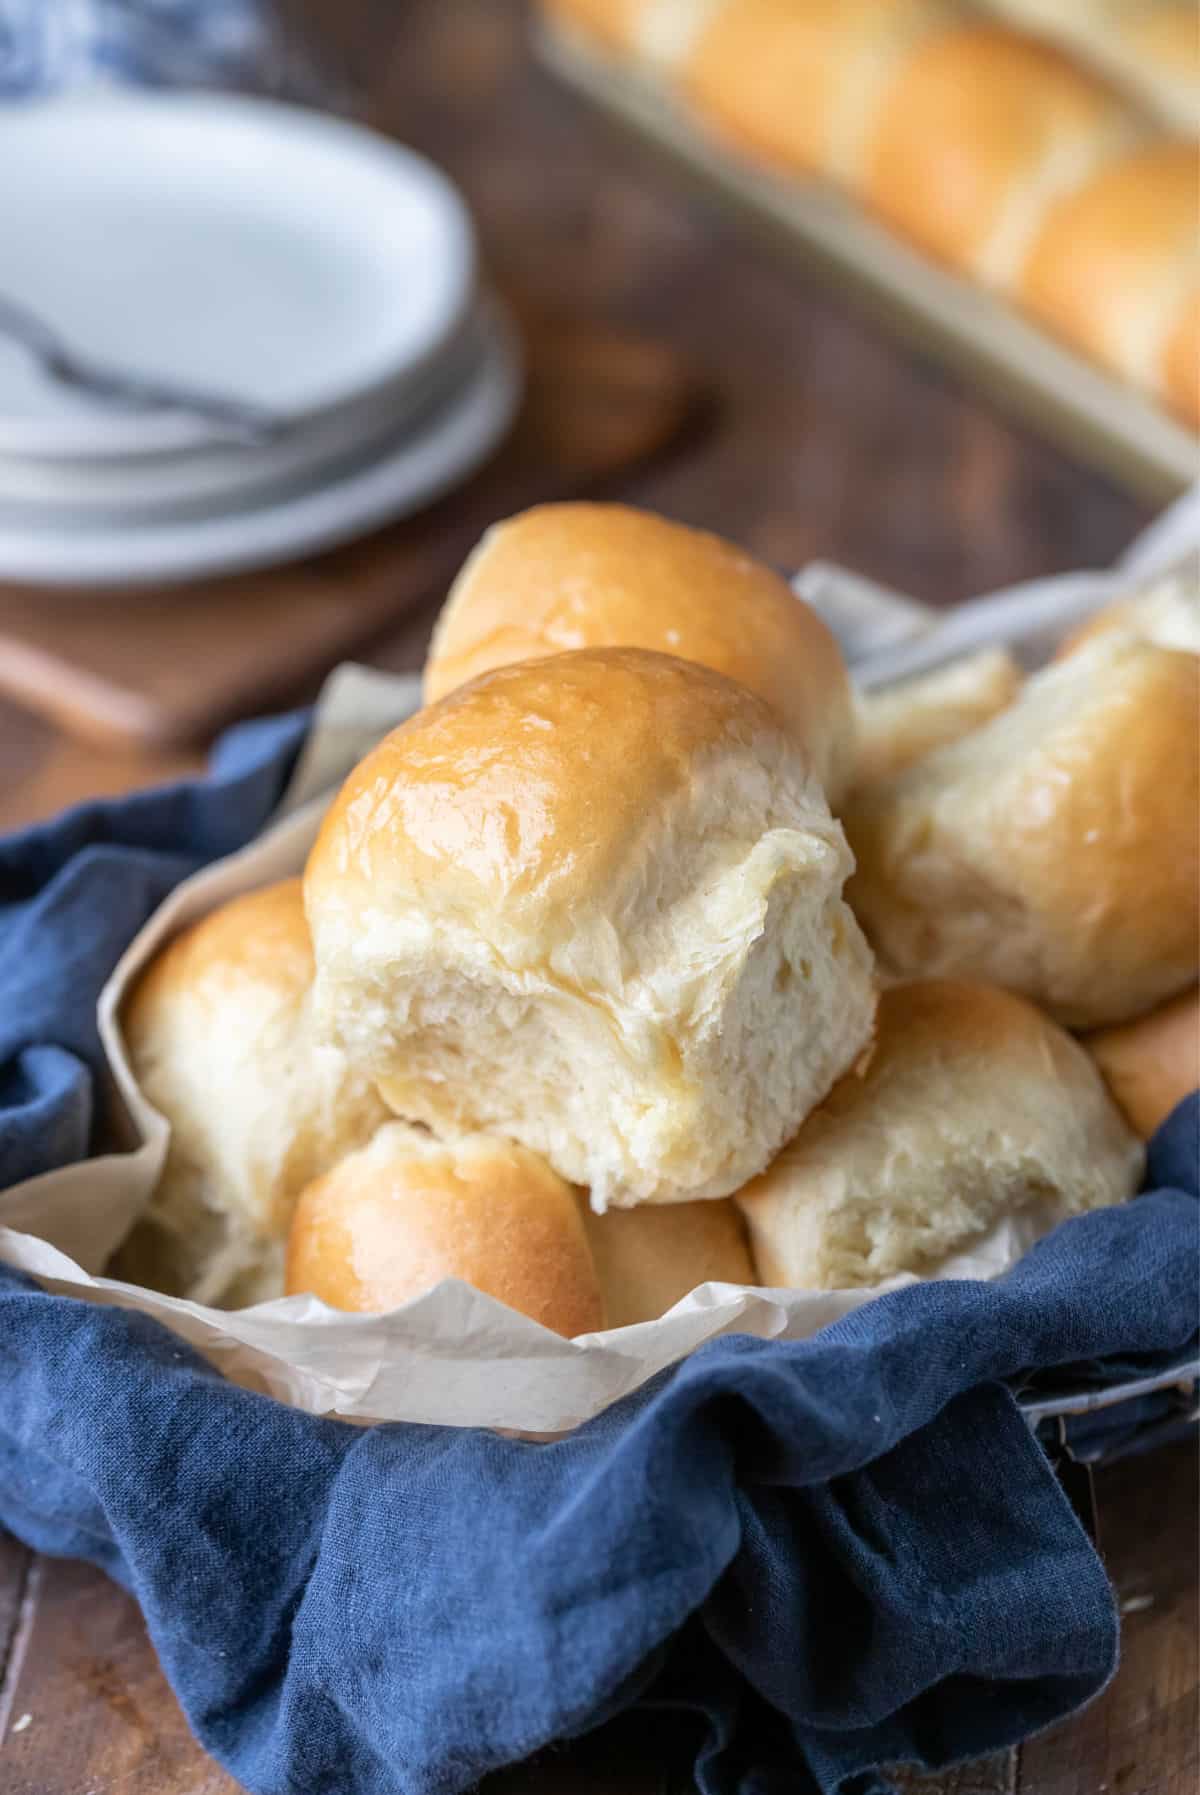
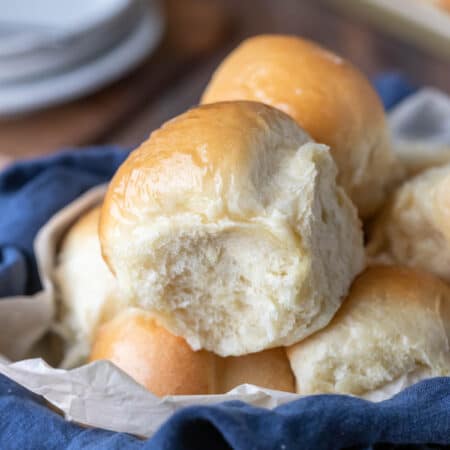
Homemade dinner rolls! Make the best soft and fluffy dinner rolls with this easy recipe! These old fashioned rolls are so simple to make.

My family can’t get enough homemade bread! Homemade bread is just one of those things that can’t be beat.
The smell of baking bread is enough to bring even my pickiest kid to the table. But a lot of people find working with yeast and making homemade dinner rolls to be intimidating.
So, let’s fix that! I’ve included step-by-step photos, tips, and plenty of notes to help you make amazing dinner rolls.
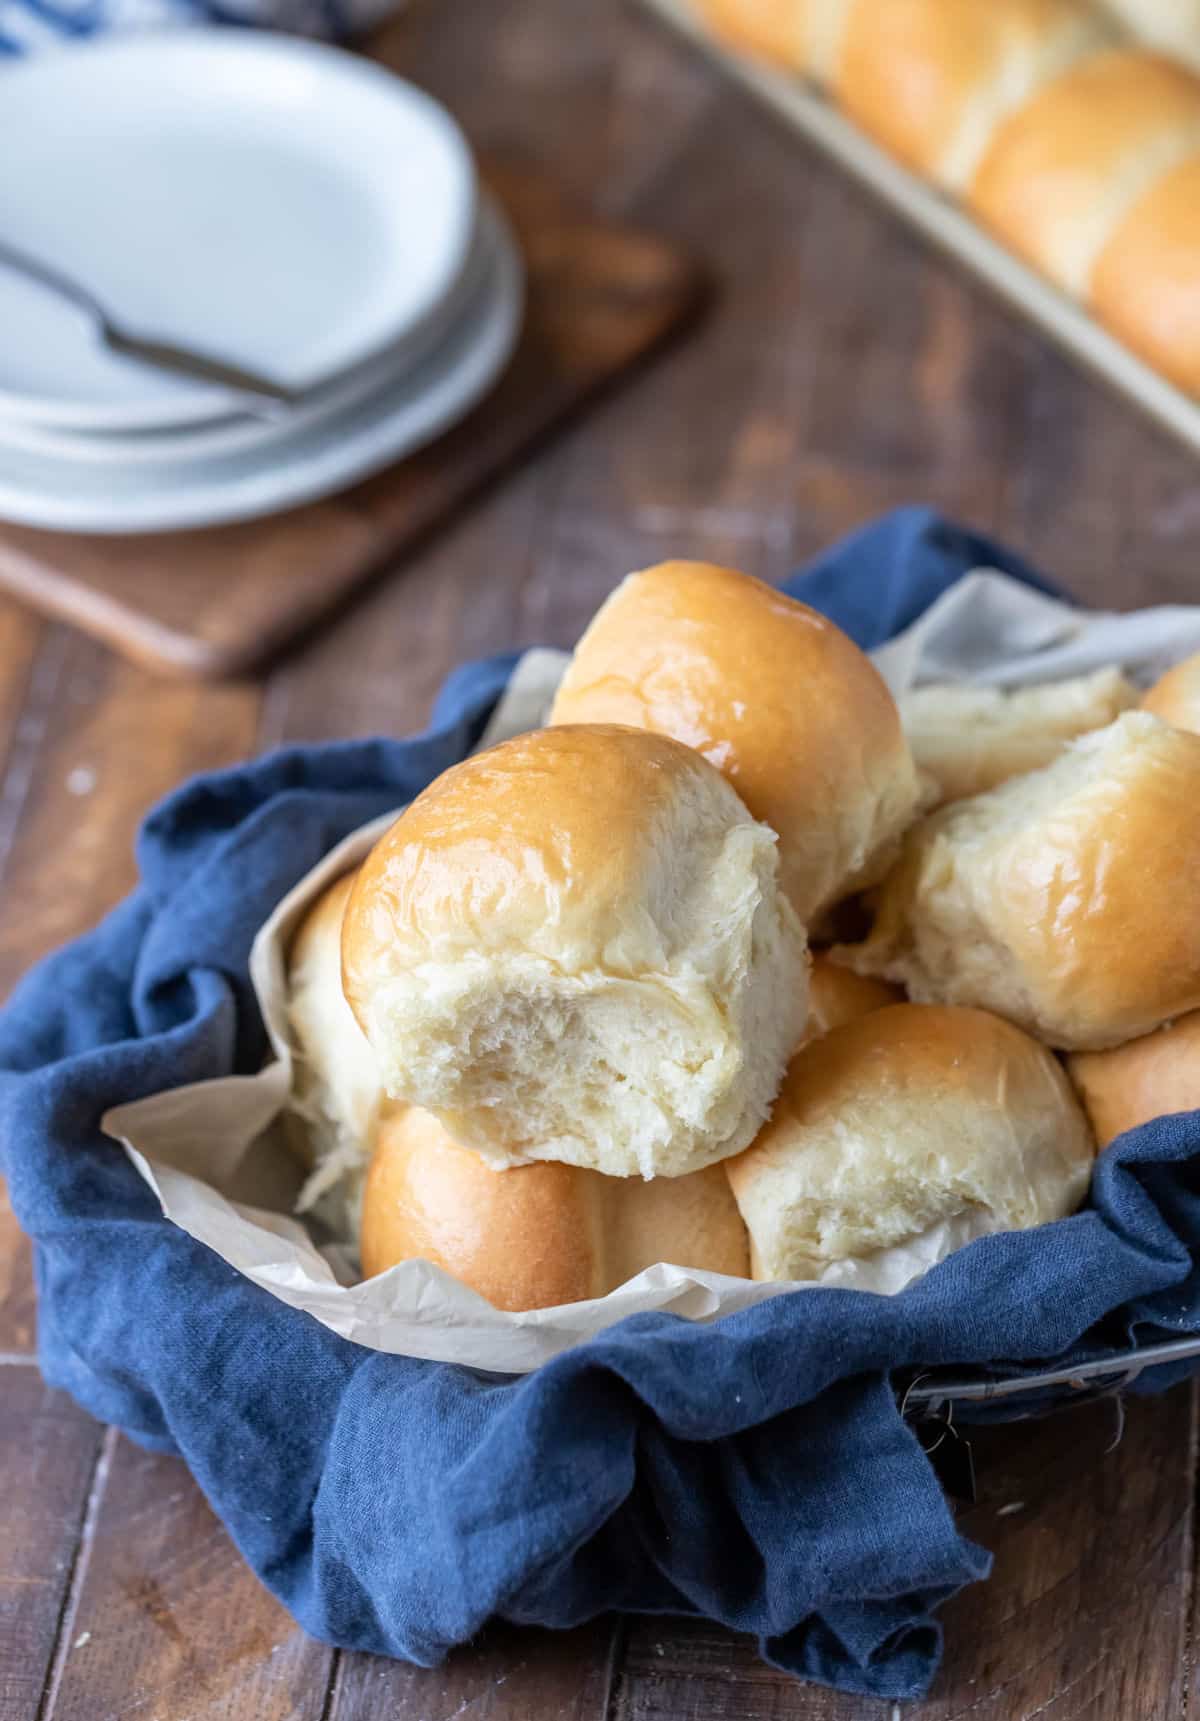
And the rolls definitely are amazing! They are soft and fluffy, old-fashioned homemade dinner rolls. Give this dinner roll recipe a try, and you’ll find these rolls make a lovely side for weeknight and holiday dinners alike!
“I have made these several times and we love them! I didn’t know it could be so easy and quick to have fresh rolls on the dinner table☺️ my little girls love helping make the rolls too. Delish👍” – Janna
How to make dinner rolls (from scratch)
Here you’ll find step-by-step photos showing how to make this recipe. The full recipe, including ingredients, is given below.
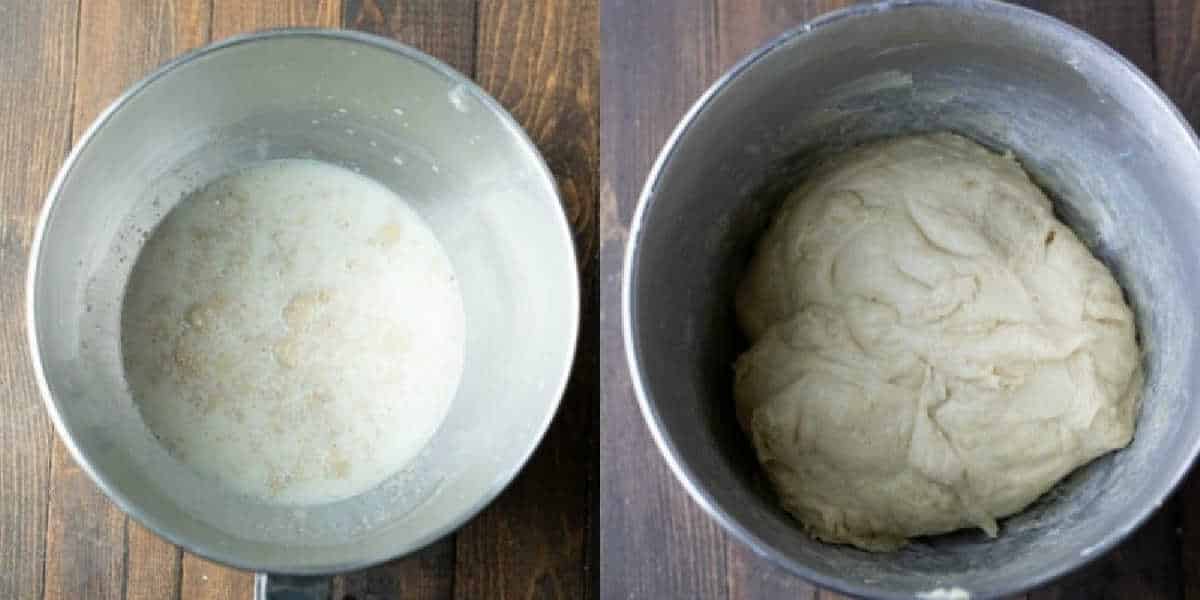
Step 1: Begin by mixing 3 cups of flour, yeast, sugar, salt, milk, butter, and egg in a mixing bowl until combined.
Step 2: Continue adding flour until a soft dough forms.
Step 3: The dough should cling to the dough hook and clear the sides of the bowl, and the dough should feel soft and slightly sticky but shouldn’t come off on your fingers when you pinch it.
Step 4: After kneading, cover the dough and let it rise.
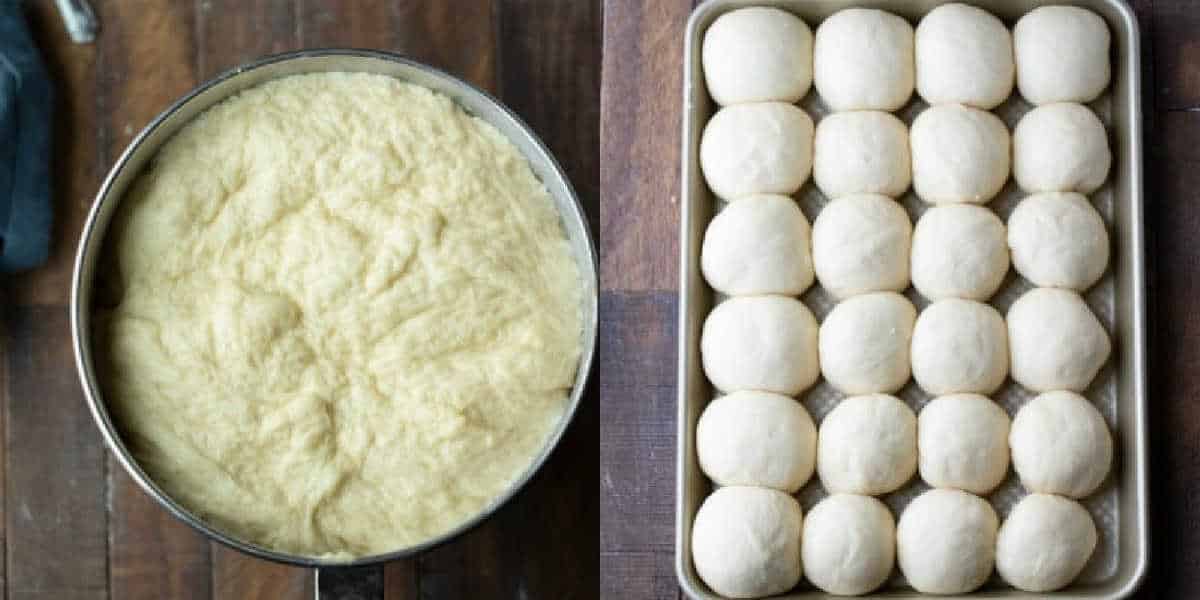
Step 5: After the dough rises, divide the dough into 24 pieces.
Tip >> I divide the dough in half. Then, I divide each half in half to form 4 pieces. I then divide each of the 4 pieces in half again to form 8 equal pieces. Each of those pieces I divide into 3 rolls to form 24 rolls.
Step 6: Place the dough onto the prepared baking sheet. Cover, and let the rolls rise.
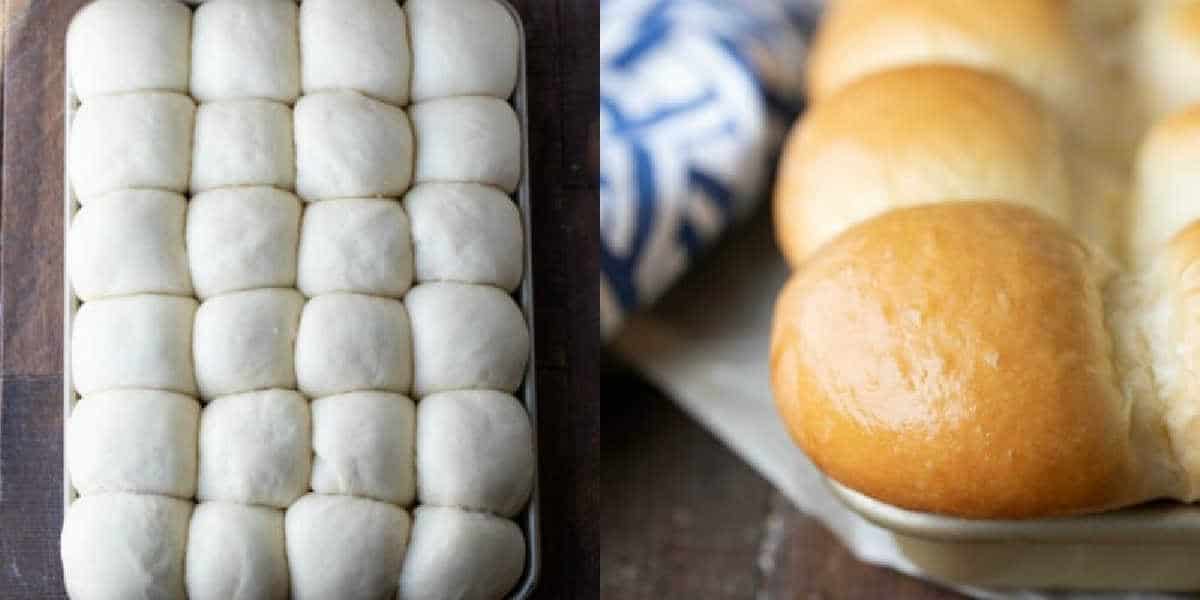
Step 7: Once the rolls have risen the second time, bake the rolls.
Tip >> If the rolls brown too quickly, tent the rolls with aluminum foil.
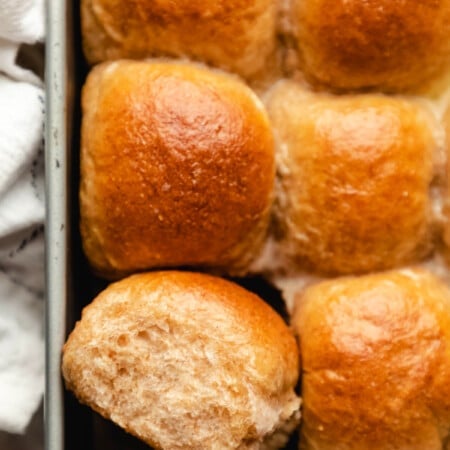
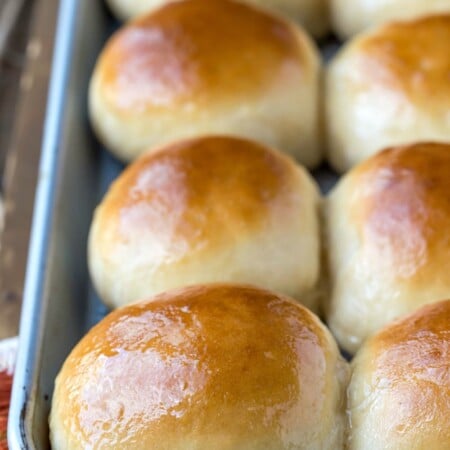
Step 8: The rolls should be golden brown. Once the rolls have finished baking, brush the hot rolls with melted butter before serving.
Recipe Tips!
- Temperature: Temperature is important when working with yeast. The milk should be warm, but it shouldn’t be hot. If it’s too hot, it can kill the yeast.
- Using a kitchen thermometer is the best way to check the temperature of the milk. There’re about $10, and you can use a kitchen thermometer for a variety of cooking and baking tasks.
- Butter and eggs: the butter and egg should be at room temperature. Otherwise, if they’re cold, they can bring down the temp of the dough and cause the rolls to rise slowly.
- Yeast: Using fresh yeast is key! Old yeast can lead to a dough that doesn’t rise.
- Flour: A range in flour measurements is given. You only need to use enough flour to form a smooth, slightly sticky dough.
Recipe FAQs
You can make the dough by hand. I recommend adding an additional minute or two to the kneading time if mixing by hand.
You can! If using active dry yeast, combine the yeast, sugar, and warm milk in a small bowl. Let it stand for 5 minutes, or until foamy. If the yeast doesn’t foam, start over, or the rolls won’t rise.
You can! Make the rolls through step 9. Place them in a freezer-safe container, and wrap tightly with plastic wrap. Let the rolls thaw and rise through the second rise before baking. I recommend increasing the amount of yeast by 20% to help with the yeast die-off in the freezer.
Storage
The dinner rolls should be stored in an airtight container at room temperature. These rolls should keep for up to 3 days.
More dinner roll recipes!

If you’ve tried this dinner roll recipe, don’t forget to rate the recipe and leave me a comment below. I love to hear from people who’ve made my recipes!
You can subscribe to receive my latest recipe newsletters or follow me on Facebook, Instagram and Pinterest for even more delicious food.

Dinner Rolls
Ingredients
- 4 -5 cups all purpose flour divided
- 2 tablespoons instant yeast
- ⅓ cup granulated sugar
- 1 teaspoon salt
- 1 ½ cups warm milk¹ about 105-110 F
- 6 tablespoons butter at room temperature
- 1 large egg at room temperature
- 2 tablespoons butter melted
Instructions
- Grease a rimmed 9×13-inch baking dish. Set aside.
- Combine 3 cups of flour, yeast, sugar, salt, warm milk, 6 tablespoons butter, and egg in the bowl of a stand mixer.4 -5 cups all purpose flour, 2 tablespoons instant yeast, ⅓ cup granulated sugar, 1 teaspoon salt, 1 ½ cups warm milk¹, 6 tablespoons butter, 1 large egg
- Mix on low using the dough hook until the ingredients are combined.
- Continue adding flour, 1/4 cup at a time, until the dough clears the sides of the bowl and clings to the dough hook. The dough should feel smooth and slightly sticky but shouldn’t come off on your fingers if you pinch it.
- Continue to knead on low for 2 minutes.
- Cover the bowl.
- Let the dough rise for 30 minutes in a warm, draft-free spot.
- Uncover, and deflate the dough by punching down.
- Divide dough to form 24 rolls.²
- Place rolls onto prepared baking pan.
- Cover, and let rolls rise for an additional 30 minutes in a warm draft-free place.
- Toward the end of the rising time, preheat oven to 375 F.
- Bake the rolls for 12-15 minutes, or until light golden brown.³
- Remove rolls and brush with the 2 tablespoons melted butter.2 tablespoons butter
Video
Notes
- Anything from skim to whole milk will work. Whole milk will give you a richer roll.
- I divide the dough in half. Then, I divide each half in half to form 4 pieces. I then divide each of the 4 pieces in half again to form 8 equal pieces. Each of those pieces I divide into 3 rolls to form 24 rolls.
- If the rolls are browning too quickly, tent the rolls with foil.
- Nutrition values are estimates.
Nutrition
Did You Make This Recipe?
Share it with me on Instagram @i_heart_eating and follow on Youtube @katedean and Pinterest @katedean for more!
Originally published 4/18/19. This recipe is regularly updated.
Reader Interactions
Love this recipe?
Share your thoughts below and let’s chat! Make sure to connect with me on your favorite social platform below and show me what you made!


Comments & Reviews
Jackie says
I usually make brioche rolls, but dropped the ball and forgot to make them the day before. Found your recipe and now doubt I’ll go back to brioche. These dinner rolls are so easy and taste fantastic! They’re a new family favorite
Kate says
Thank you! I’m glad that you liked the rolls!
Rose Kostelecky says
These are my favorite dinner rolls to make . Always make everyone happy.
Kate says
Thank you!
Violette says
Thank you! Thank you! for sharing your scrumptious dinner roll recipe. I did a trial run before presenting my rolls to the entire family for the Holidays (it was my first time ever attempting to make rolls period.) I used my immediate family: Mother, sisters, daughters and future son in-law who is a cook as my testers, and they absolutely loved them, they ate the whole batch :) Needless to say I was so proud of myself, it was the ease in preparation for me. They came out so beautiful, Anyway, I’m off to make some for the holidays.
Happy Holidays!
Kate says
Yay!! I’m proud of you, too! Learning to bake homemade bread is an accomplishment, and I’m so glad that they turned out well for you! Happy holidays!
Bertie says
How perfect in seeing you recipe for rolls I was really looking forward to try making fresh rolls and you just gave the idea. Thank you thank you. I will be making these for Thanksgiving Dinner.
Also Happy Thanksgiving to you and your family. Bertie Mansfield
Kate says
Thank you, Bertie! I hope that you and your family have a wonderful Thanksgiving!
JoAnn says
These are simple but delicious.
Kate says
Thank you!
M says
Incredible recipe. easy to follow, instant classic! So fluffy and delicious, my favorite dinner crowd pleaser! Thank you
Kate says
Thank you! The rolls are a family favorite at my house.
Janna says
I have made these several times and we love them! I didn’t know it could be so easy and quick to have fresh rolls on the dinner table☺️ my little girls love helping make the rolls too. Delish👍
Kate says
Thank you!
Chris says
This is the only recipe I use my whole family loves them and my parents call me and frequently ask me to make them and bring them some with my homemade blueberry jam. Thanks they’re amazing!
Kate says
Thank you so much!
Kari says
These are easy to make and taste great!
Kate says
Thank you!
Krista Lloyd says
Easy and delicious, thank you
Kate says
Thanks!
Jessica Wilson says
Awesome recipe! They were perfect the first time!
Kate says
Thank you!
Becky says
I make these all the time!! My family and friends love them so much!! Thank you for sharing!!
Kate says
Thank you!
C.J. says
Easy to mix up ! Delicious!!
Kate says
Thank you!
Danielle says
Can these be frozen after baking and reheated in the oven to serve? I’d like to get up a stock of bread and rolls for quick fixing meals and don’t want to have to wait for them to thaw and rise. Chasing toddlers all day sometimes leaves me with little time to throw supper together. Thanks!
Kate says
I get that! Yes, these dinner rolls freeze well.
Emily says
Do you usually use salted or unsalted butter?
Kate says
I use salted butter.
Cathy says
I’ve made these rolls a few times now, the recipe is easy to follow and they taste yummy. However after baking them for usually around 17 min, the tops are brown but the bottom part ends up quite doughy. Not sure how to avoid that.
Kate says
Hi! This sounds like an oven temperature issue. Ovens can vary in their actual temperature, and, from what you’re describing, it sounds like your oven bakes hot. I would try turning the oven down to 350F next time to give the dough time to cook through before the tops brown. The other thing that you can try is tenting aluminum foil over the pan. This will allow the rolls to continue to cook through without continuing to brown on top. I hope that helps!
Shelley says
Can I make these and cook them tomorrow
Kate says
Hi! I hope you see my response. =)
Shelley says
Can I make them and leave in frig to bake tomorrow ?
Kate says
I haven’t tried letting these rolls rise overnight in the fridge to say for certain. I would guess that they would work out well, but I haven’t tried it.
Pat says
These are delicious!! Would this recipe work for a loaf?
Kate says
Thank you! I haven’t tried making the roll dough as a loaf. If you try it, I’d love to hear how it turns out!
Rachel Thompson says
I want to freeze these. Do I do that between risings?
Kate says
To freeze the rolls, make the rolls through step 9. Place them in a freezer-safe container, and wrap tightly with plastic wrap. Let the rolls thaw and rise through the second rise before baking. I recommend increasing the amount of yeast by 20% to help with the yeast die-off in the freezer.