
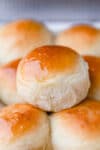


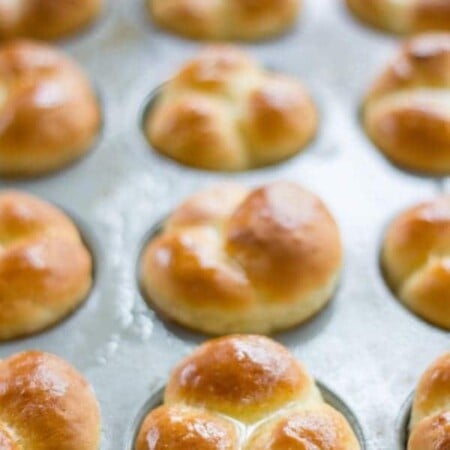
Make your own copycat version of Hawaiian Rolls at home with this easy, made-from-scratch recipe that makes soft and fluffy Hawaiian sweet rolls!

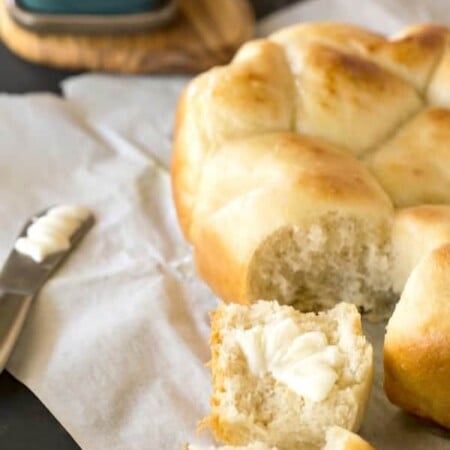
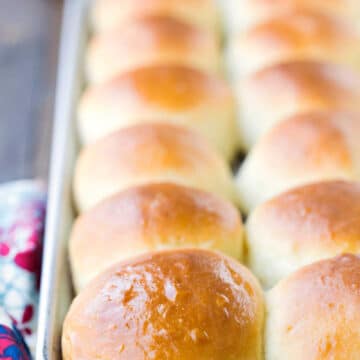
Hawaiian rolls are quite possibly the most delicious rolls ever. They are soft and buttery and sweet.
They can be made into smaller dinner rolls or buns for slider, or they can be made into larger, bun-sized rolls. They pair well with everything from burgers to ham, which makes them perfect for baked ham and Swiss poppy seed sandwiches.
“This is my new go-to dinner roll recipe! Very easy to make and everyone loves them. It’s also very easy to cut the recipe in half when I don’t need so many. I love this recipe!” – Julie
Why you’ll love these rolls
- They’re soft! The rolls are soft and fluffy.
- They’re tasty! The rolls are sweet and buttery with a bit of sweet pineapple flavor thrown in.
- They’re easy to make! The rolls are simple and don’t require much hands-on time.
Ingredient notes and substitutions
- Pineapple Juice: I use the mini cans of pineapple juice that come in a 6 pack. However, any 100% pineapple juice should work.
- Yeast: An equal amount of instant yeast will also work. Just skip proofing the yeast and continue with the recipe as written.
- Butter: I use salted butter in this recipe.
- Flour: I’ve also made these rolls with all-purpose flour when I didn’t have any bread flour. I had to add about 1/2-1 cup additional flour for a total of 6-6 1/2 cups of flour.
How to make homemade Hawaiian rolls
Here you’ll find step-by-step photos showing how to make this recipe. The full recipe is given below.
Step 1: Grease 2 9×13-inch pans. Set aside.
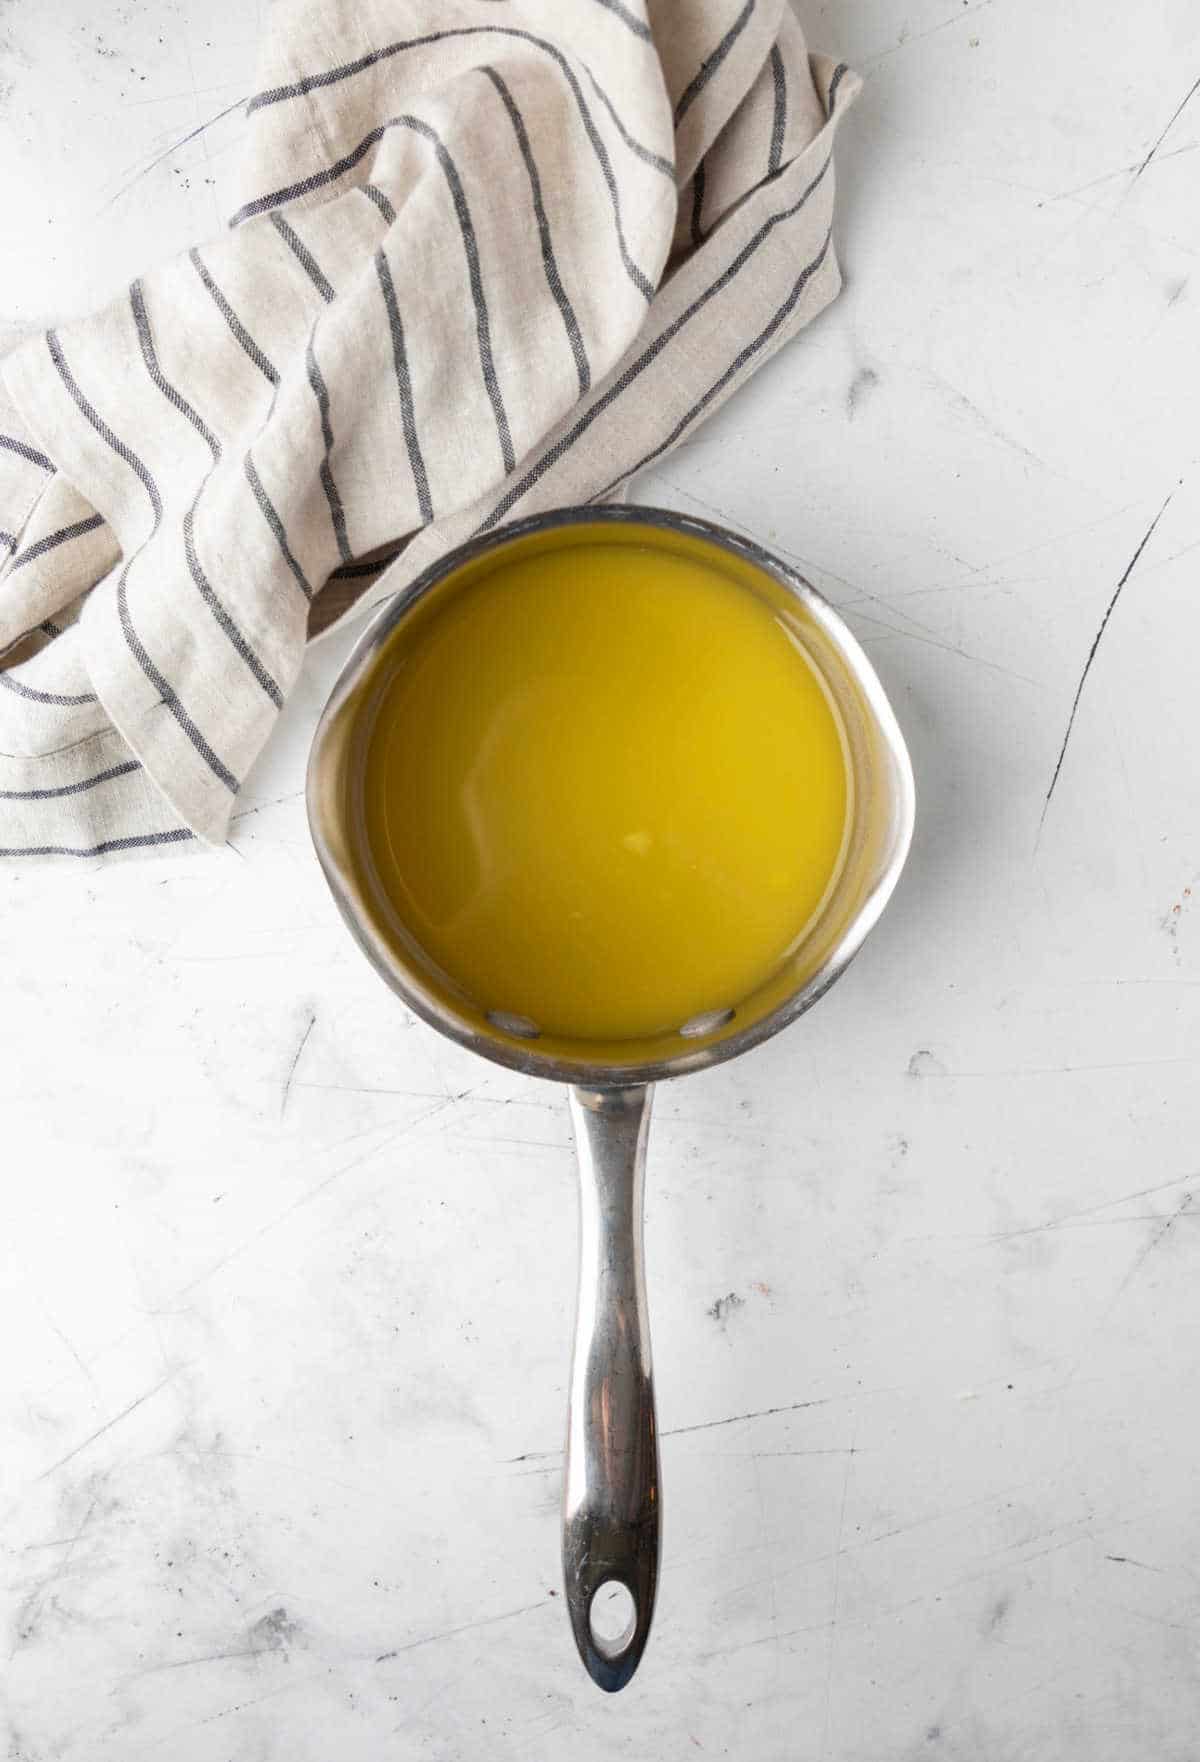
Step 2: In a small saucepan, heat pineapple juice over medium-low temperature until juice reaches about 105 F.

Step 3: In the bowl of a stand mixer fitted with a paddle attachment, stir together yeast and 2 tablespoons of sugar.
Step 4: Once the pineapple juice is at temperature, add to the bowl. Stir, and let the yeast mixture stand for 5-10 minutes, or until foamy.
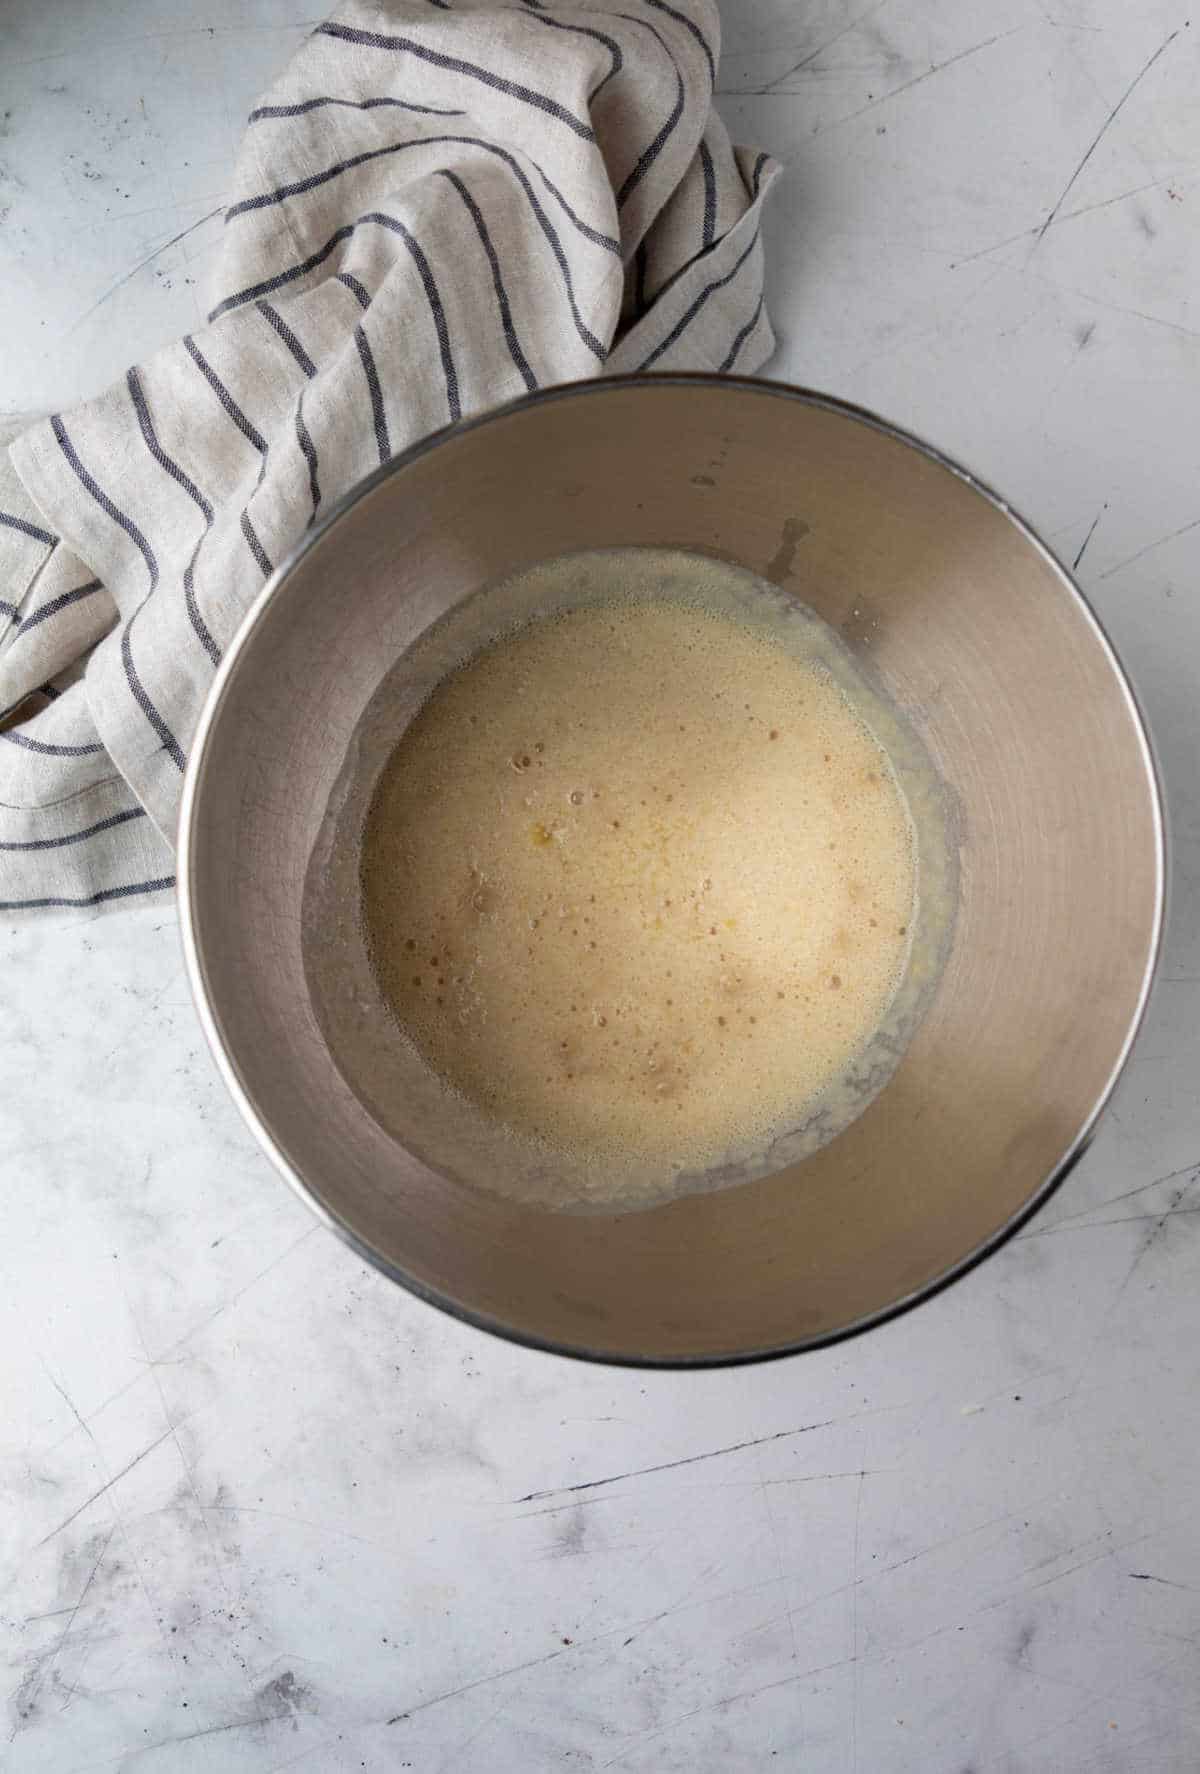
Step 5: Once the yeast is foamy, add the remaining sugar, butter, vanilla extract, and eggs; stir to combine.
Step 6: Switch from the paddle attachment to the dough hook, and add 3 cups of flour and salt. Stir on low.
Step 7: Continue adding flour ½ cup at a time until dough clears the sides of the bowl. The dough will feel slightly sticky. It takes 5 ½ cups of flour for my rolls.

Step 8: Once the dough comes together and clears the sides, continue to knead for about 1 minute.
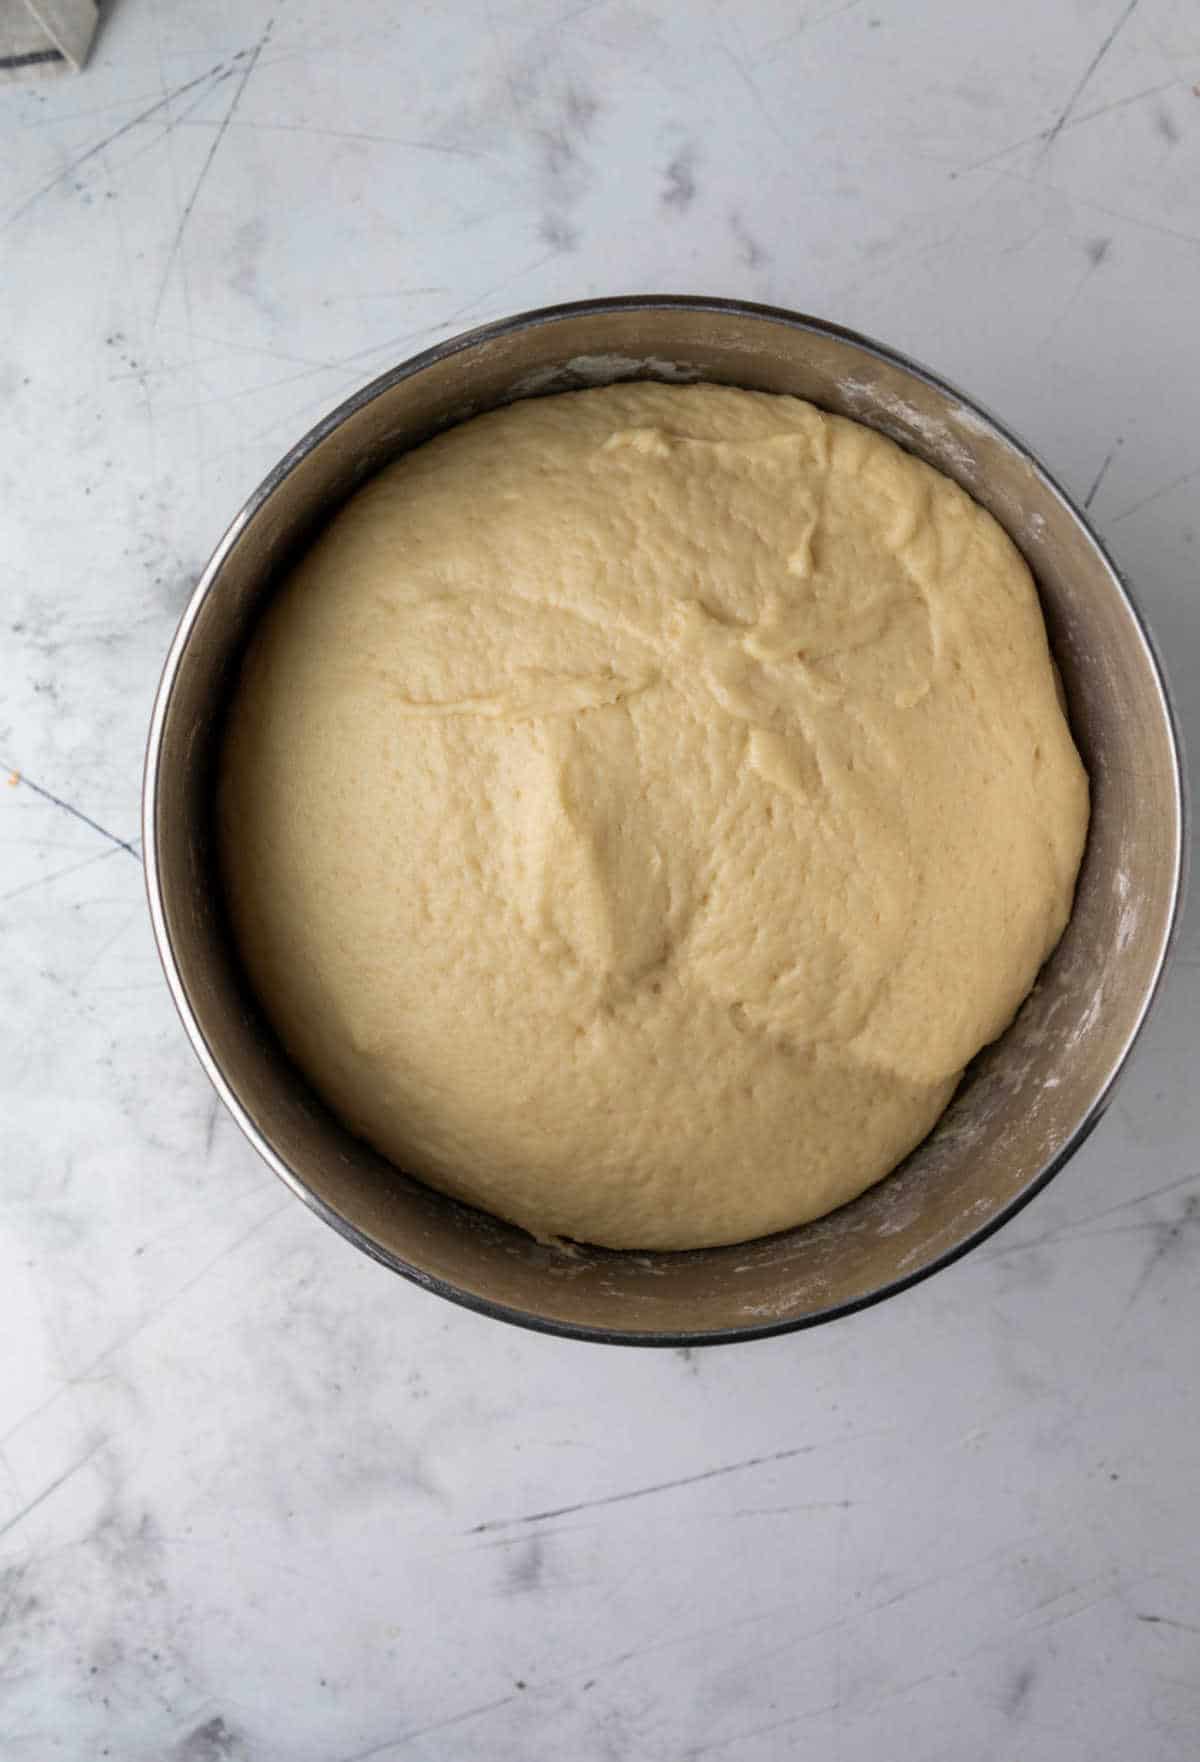
Step 9: Cover bowl with plastic wrap or a clean towel, and let it rise until dough has doubled in size, about 1 ½ hours.
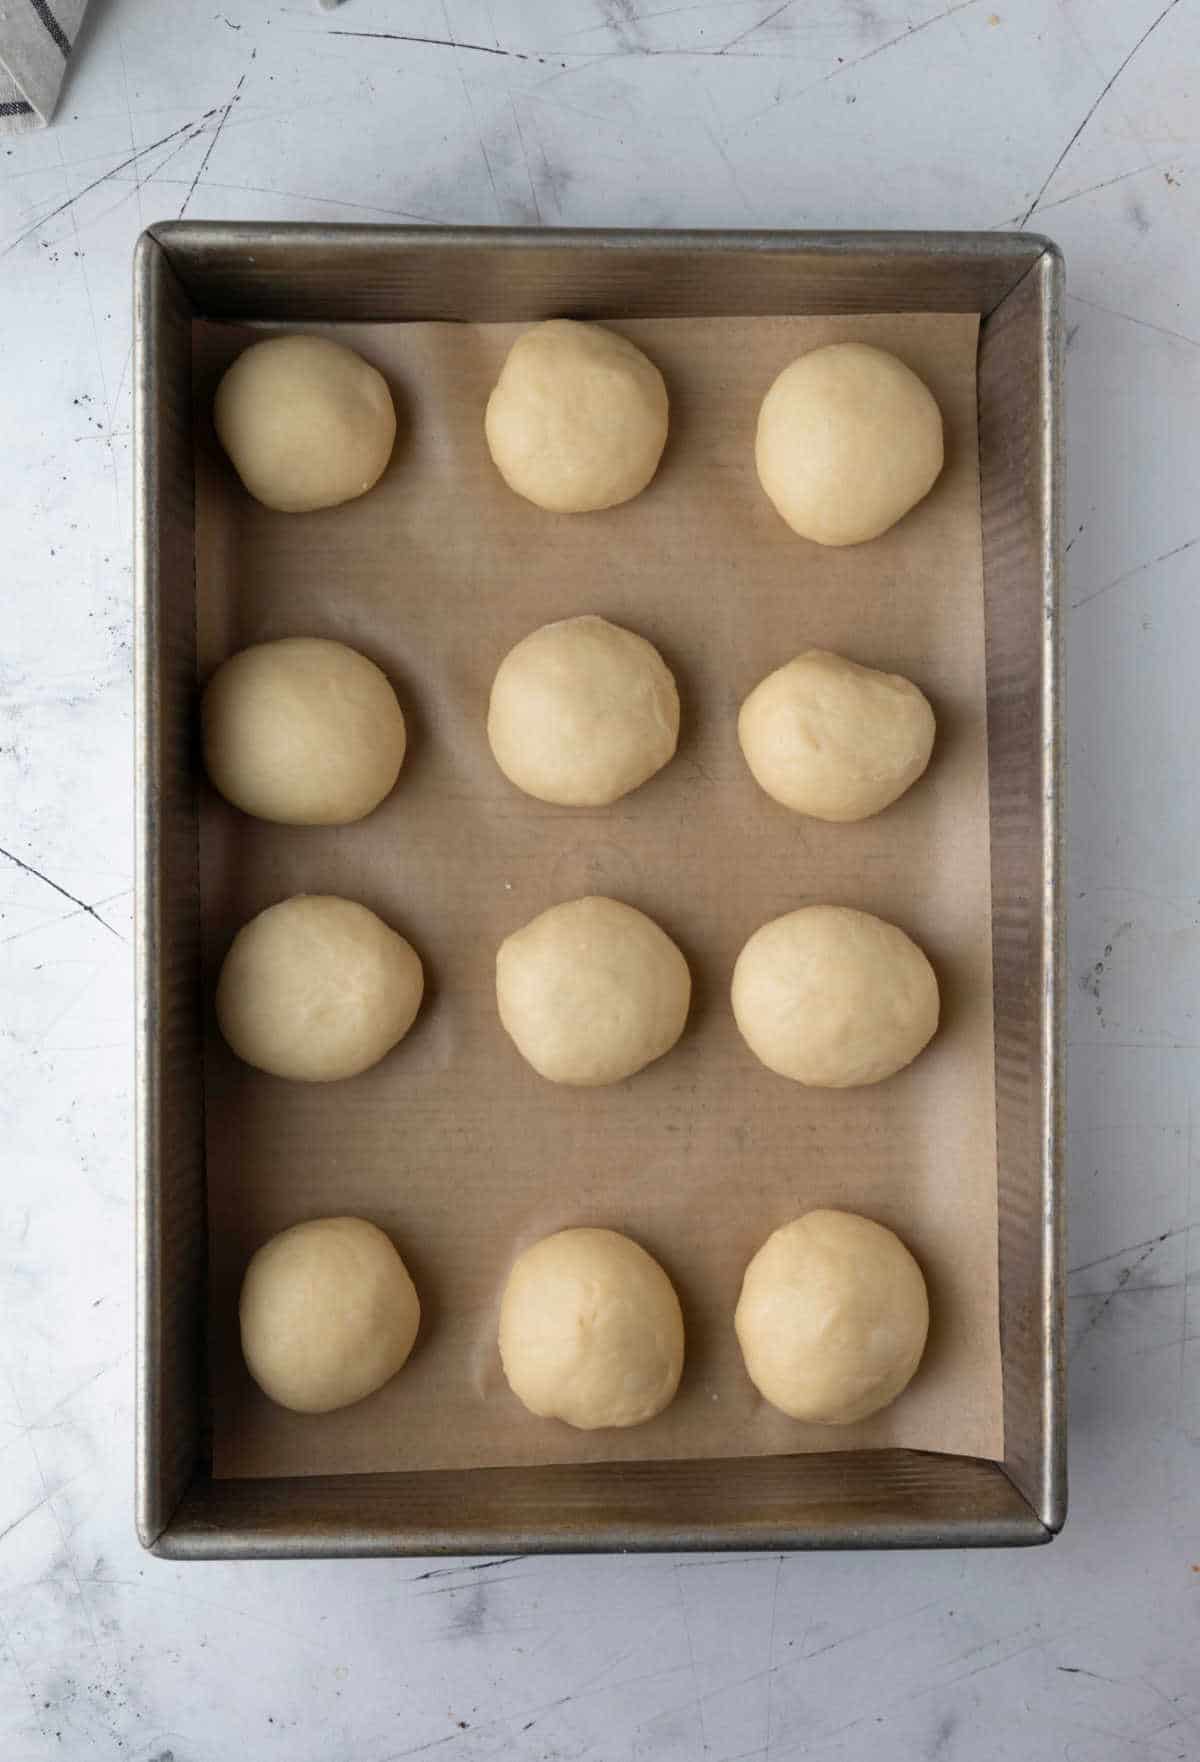
Step 10: Shape dough into rolls. If you would like smaller, dinner-sized rolls, shape into 24 rolls. If you would like larger, bun-sized rolls, shape into 12-18 rolls depending on desired size. Place half of the rolls in each pan.
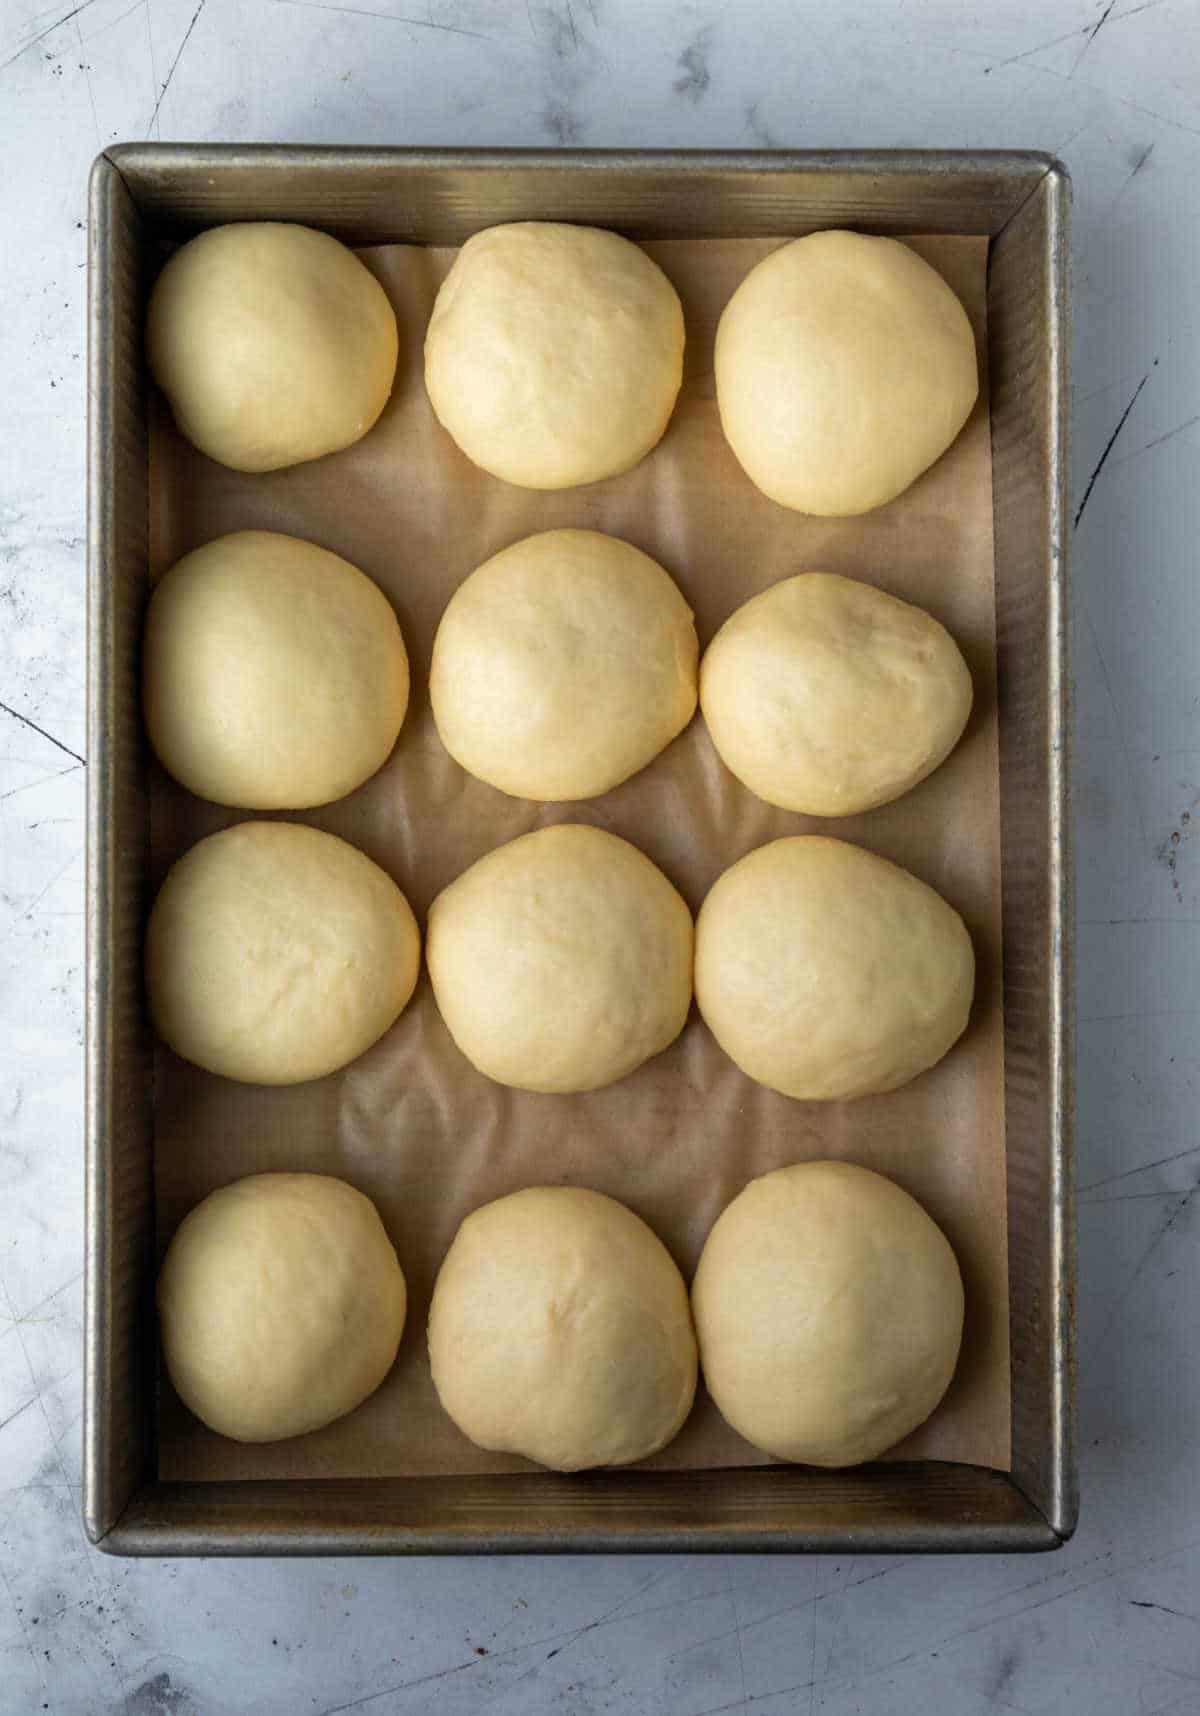
Step 11: Cover rolls with plastic wrap, and let rolls rise until doubled, about 1 ½ hours.
Toward the end of the second rise, preheat oven to 350 F.
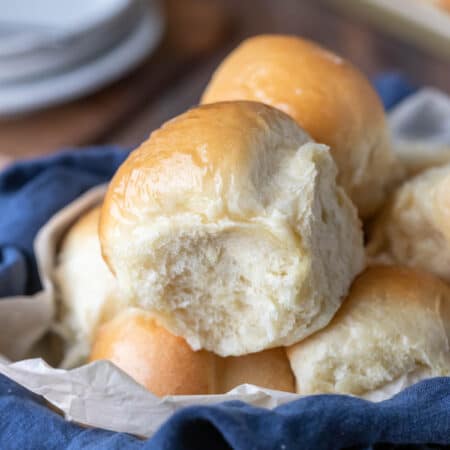
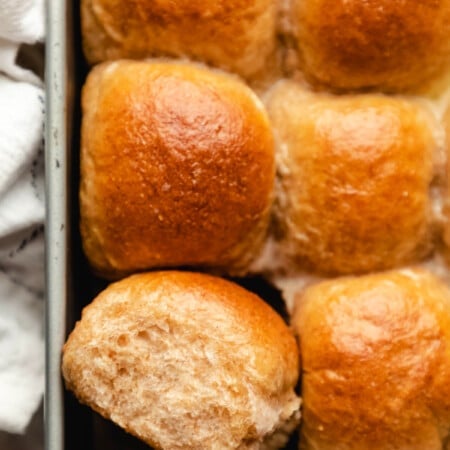
Step 12: Bake rolls for about 20 minutes (for dinner-sized rolls), or until rolls are golden brown. Immediately brush rolls with butter.
Serve warm or at room temperature.

Recipe Tips!
- Freezing the rolls: To freeze the baked rolls, let them cool to room temperature. Wrap the rolls tightly in plastic wrap and then place in a freezer-safe container. Freeze the baked rolls for up to 1 month.
- Gluten Free: While I haven’t tried it, I have heard from people who have successfully used measure-for-measure gluten free flour in this recipe.

Storage
The rolls should be stored in an airtight container at room temperature. They’ll keep for up to 3 days when properly stored.
More delicious roll recipes!
If you’ve tried this Hawaiian roll recipe, don’t forget to rate the recipe and leave me a comment below. I love to hear from people who’ve made my recipes!
You can subscribe to receive my latest recipe newsletters or follow me on Facebook, Instagram and Pinterest for even more delicious food.

Hawaiian Rolls
Ingredients
- 1 ½ cups pineapple juice
- 4 ½ teaspoons active dry yeast
- ⅔ cup granulated sugar divided
- ½ cup butter at room temperature, plus extra for brushing rolls
- 1 teaspoon vanilla extract
- 2 large eggs
- 5-6 cups bread flour
- 1 teaspoon salt
Instructions
- Grease 2 9×13-inch pans. Set aside.
- In a small saucepan, heat pineapple juice over medium-low temperature until juice reaches about 105 F.1 ½ cups pineapple juice
- In the bowl of a stand mixer fitted with a paddle attachment, stir together yeast and 2 tablespoons of sugar.4 ½ teaspoons active dry yeast, ⅔ cup granulated sugar
- Once the pineapple juice is at temperature, add to the bowl. Stir, and let the yeast mixture stand for 5-10 minutes, or until foamy.
- Once the yeast is foamy, add the remaining sugar, butter, vanilla extract, and eggs; stir to combine.½ cup butter, 1 teaspoon vanilla extract, 2 large eggs
- Switch from the paddle attachment to the dough hook, and add 3 cups of flour and salt. Stir on low.1 teaspoon salt, 5-6 cups bread flour
- Continue adding flour 1/2 cup at a time until dough clears the sides of the bowl. The dough will feel slightly sticky. It takes 5 1/2 cups of flour for my rolls.
- Once the dough comes together and clears the sides, continue to knead for about 1 minute.
- Cover bowl with plastic wrap, and let it rise until dough has doubled in size, about 1 ½ hours.
- Shape dough into rolls. If you would like smaller, dinner-sized rolls, shape into 24 rolls. If you would like larger, bun-sized rolls, shape into 12-18 rolls depending on desired size.
- Place half of the rolls in each pan.
- Cover rolls with plastic wrap, and let rolls rise until doubled, about 1 ½ hours.
- Toward the end of the second rise, preheat oven to 350 F.
- Bake rolls for about 20 minutes (for dinner-sized rolls), or until rolls are golden brown.
- Immediately brush rolls with butter.
- Serve warm or at room temperature.
Video
Notes
- Flour: I’ve also made these rolls with all-purpose flour when I didn’t have any bread flour. I had to add about 1/2-1 cup additional flour for a total of 6-6 1/2 cups flour.
- Nutrition facts are estimates.
Nutrition
Did You Make This Recipe?
Share it with me on Instagram @i_heart_eating and follow on Youtube @katedean and Pinterest @katedean for more!
Reader Interactions
Love this recipe?
Share your thoughts below and let’s chat! Make sure to connect with me on your favorite social platform below and show me what you made!


Comments & Reviews
Julia Kendrick says
Oh boy! These could get me in big trouble!! LOL I can’t wait to try them!
kateheartseating says
They are delicious, and I’ve eaten more than my share of them! Hope you enjoy! =)
Rita says
These look amazing. My daughter loves these, so I may have to try them.
kateheartseating says
Thanks! I hope you all enjoy them! =)
Chandra@The Plaid and Paisley Kitchen says
we love those rolls here at our house! Thank you so much for sharing on Show Me Your Plaid Monday’s!
kateheartseating says
We do, too! Thanks so much for stopping by!! =)
Karly says
I just had someone emailing me to see if I had a recipe for homemade Hawaiian rolls! I’ll have to see if I can dig up her email. These look amazing!
Thanks for linking up to What’s Cookin’ Wednesday!
kateheartseating says
Thanks! Well, that was good timing then! =)
Shannon {Cozy Country Living} says
These look great! I love Hawaiian sweet rolls, but have never made them myself. I can’t wait to try these:) Pinning now:)
kateheartseating says
We do, too! I hope you enjoy them!! =)
Chrissy says
These look delicious! I am going to give them a try tomorrow! Thanks for sharing!
kateheartseating says
Thanks! I hope you enjoy them as much as we do!! =)
Diane says
Thank you for sharing! Looks GREAT!!! We sure enjoy good bread around here! :) Visiting from marketing yourself monday :).
Blessings!
kateheartseating says
Thanks! And thanks for stopping by!! We love our bread around here, too!! =)
Amber says
Thanks for sharing at the Give Me The Goods Link Party! These look yummy! Will be trying!
kateheartseating says
Thanks! I hope you enjoy the rolls!! =)
Lorie says
I can’t wait to try this. We love the store bought version!!
kateheartseating says
We do, too! We were eating so many of the store bought ones that I decided to try to start making them. I hope you enjoy them as much as we do! =)
Krista Low says
These look amazing! I love homemade bread and rolls!
kateheartseating says
Thanks!! Me too! Fresh bread and cookies are my undoing. =). Thanks so much! I will definitely stop by and link up.
Jen Nikolaus says
These sound fantastic!! I can’t wait ti try them!!! Pinning!!!
kateheartseating says
Thanks!! My family absolutely loves these rolls! In fact, I made some this morning. I hope you enjoy them, too!! =)
Deanna Ritz says
These sound fantastic. I love Hawaiin rolls. :) Thank you
kateheartseating says
Thanks!! We do, too! Hope you enjoy! =)
Heather @ French Press says
I love making bread and rolls..these look SO gorgeous! cannot wait to try them!
kateheartseating says
Thanks!! Me too! There are few smells better than the smell of baking bread! Hope you enjoy the rolls! =)
Gloria says
These look really yummy! Found you at the Finding the Pretty and Delicious site.
Hope you have a super weekend!
kateheartseating says
Thanks so much! =)
Carolyn says
Mmmmm…pinned and can’t wait to try!
kateheartseating says
Thanks! I hope you enjoy the rolls! =)
Kate says
Do you think these would work in a bread machine on the dough cycle?
kateheartseating says
Maybe? I haven’t used my bread machine for a while, but, if I remember right, they have a sweet bread setting (does that sound right?). I’m not sure how well they would work on a regular dough setting because they might get overmixed and end up being dense. If the sweet bread setting doesn’t mix much, that one might work better, but I’m just guessing on this. If you try it, please let me know how it works! I’m sure other people wonder about this, too. =)
Susan says
I have one more question – kneading the dough for one minute doesn’t seem like much time. Are you trying to avoid developing the gluten? Anyway, I made these rolls – they are rising at this moment. My dough was really sticky so I did a fair amount of kneading as I added more flour.
kateheartseating says
Yes, I only knead it for about a minute because I want to keep them soft and tender. Also, that minute is with a stand mixer, so I believe that’s a few minutes by hand. I usually end up right around 5 1/2 cups of flour, but it depends on the humidity here as to whether I need to add a little more or less when I make the rolls. The dough is pretty sticky at first, but after it rises, it is a workable dough.
Susan says
When do you add the remaining sugar? I assume with the flour?
kateheartseating says
Thank you for catching that! You add the remaining sugar with the butter, eggs, and vanilla. I edited the recipe so that it includes that part. Again, thanks for bringing that to my attention so I could fix it! =)
Julie @ This Gal Cooks says
These rolls look good! I love homemade breads and rolls. Pinned to my food board.
kateheartseating says
Thanks! Me too! I love homemade bread!! =)
Liz says
I am definitely going to try these this weekend! They sound perfect! :)
kateheartseating says
Thanks!! I made them three times last week alone. We love them. I hope you enjoy them, too!! =)